| Wiki Markup |
|---|
{scrollbar} |
In the following section we will illustrate the steps on assembling a customer server in Geronimo. We are using Apache Geronimo V2.2 for this tutorial. In this tutorial we are taking an application centric approach. Using this approach our application will define on the contents of server. Custom server will be built around our application and will include only the components required by our application. For the application we have used an existing tutorial from tutorial section. Refer Stateless Session Bean tutorial for application development and deployment. Later we will assemble a custom server which will only include functional components required by our application.
| Info | ||
|---|---|---|
| ||
Application client referred in this tutorial is actually a Web Application Client. |
| Table of Contents |
|---|
Identifying the functional components required by our server.
This step is required to identify the various dependencies required by our application. Since we are following an application centric approach we need to find out the various dependencies required by our application.
This is the major work required for our custom server which has been simplified by geronimo administrative console.
- To assemble a server from existing instance of geronimo we need to include Geronimo Plugin Group :: Framework plugin group which is the framework of a functional server. Refer plugins in Geronimo section for more information on Geronimo Plugin Group :: Framework.
- To identify the application plugins to be included, in this tutorial they are:
- Web archive plugin default/ApplicationClient/1.0/car
- StatelessSessionEJB plugin default/StatelessSessionEJB/1.0/car
More information about how to get these plugins, please look into Converting applications into plugins using the Administrative Console.
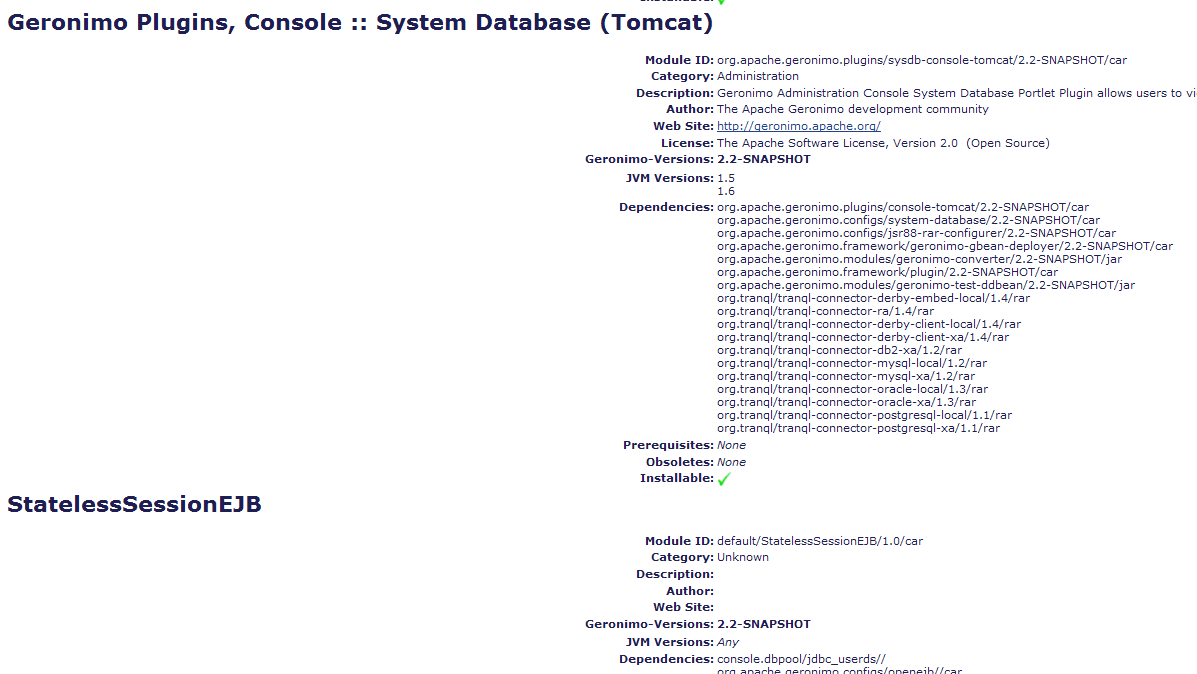
- To create a new database, we need to include Geronimo Plugins, Console :: System Database.
- To use the admin console for database creation, we need to include Geronimo Plugins, ActiveMQ v5 :: Console
This completes the identification of all the functional component(dependencies) required by our application centric custom server.
Assembling a custom server.
- Launch the administrative console and select Plugins under Applications.

- Select Assemble a server.

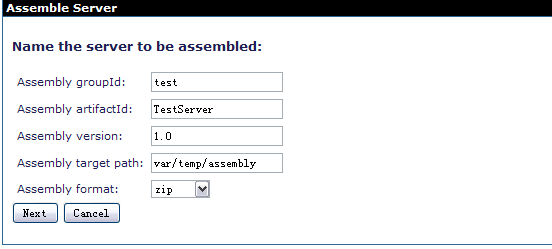
- Name the artifacts as suggested in the figure.
- Next step is to select the functional components we identified. Select Geronimo Plugin Group :: Framework, WAR and EJB plugins. You also have to select Geronimo Plugins, Console :: System Database since our application uses derby database.
- To get a web based administrative console you need to select Geronimo Plugins, ActiveMQ v5 :: Console.
You can also choose the Expert mode to select indivial plugins instead of plugin groups. - Final list of plugins/plugin groups we have selected are as follows
- org.apache.geronimo.plugingroups/framework/2.2-SNAPSHOT/car
- org.apache.geronimo.plugins/activemq-console-jetty/2.2-SNAPSHOT/car
- org.apache.geronimo.configs/system-database/2.2-SNAPSHOT/car
- default/StatelessSessionEJB/1.0/car
- default/ApplicationClient/1.0/car
- Once done select Assemble.

- On the next screen each artifact and its associated properties will be displayed. Select Install.
- Once done you will receive a confirmation message suggesting the success or failure of server assembly. It will also enlist the location of the custom server assembly which by default is <GERONIMO_HOME>/var/temp/assembly.
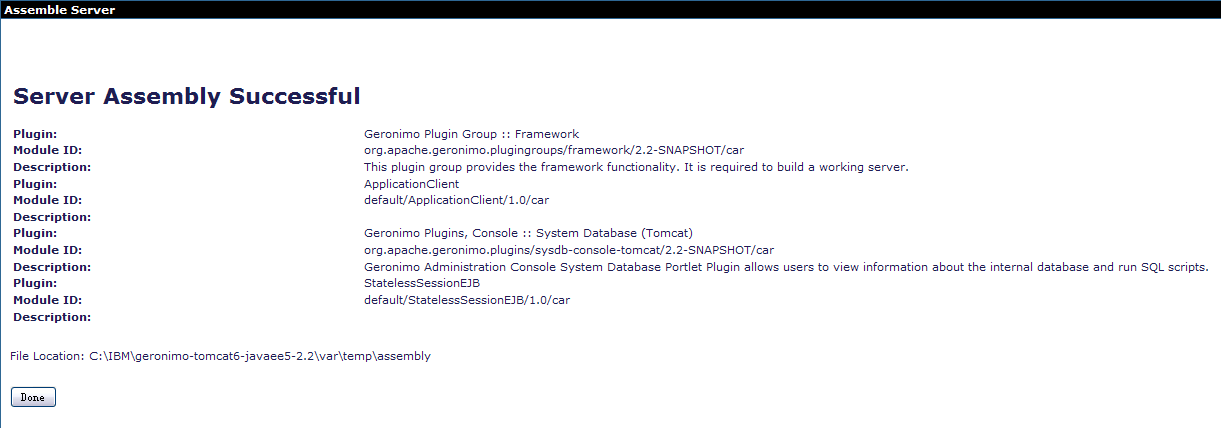
- The server will be named as TestServer-1.0-bin.zip. Unzip it and start the server.
- Since our Stateless Session Bean uses userdbs you need to create database and table as suggested in the tutorial.
This completes our illustration for custom server assembly