Start here if you are setting up a brand new development environment, or want to reconfigure your environment from scratch.
Requirements:
The instructions below assume you already have available:
A recent version of IntelliJ. These steps have been validated on IntelliJ 2020.2.2
JDK 1.8 installed and configured in IntelliJ
A local git clone of the apache/beam repository in your home directory ("~/beam")
- ChromeDriver installed and running (chromedriver --port=4444)
- Flutter installed
- Dart installed (version >=3.0.2 <4.0.0)
- The script local-env-setup.sh (Located at the root of the project) ran before importing the project
To set up your IntelliJ project:
- Launch the New Project wizard by closing your project File | Close Project.
- Then click Open from the splash page to open a new project (Depending on what version of IntelliJ you may need to find an option to "Import project" instead)
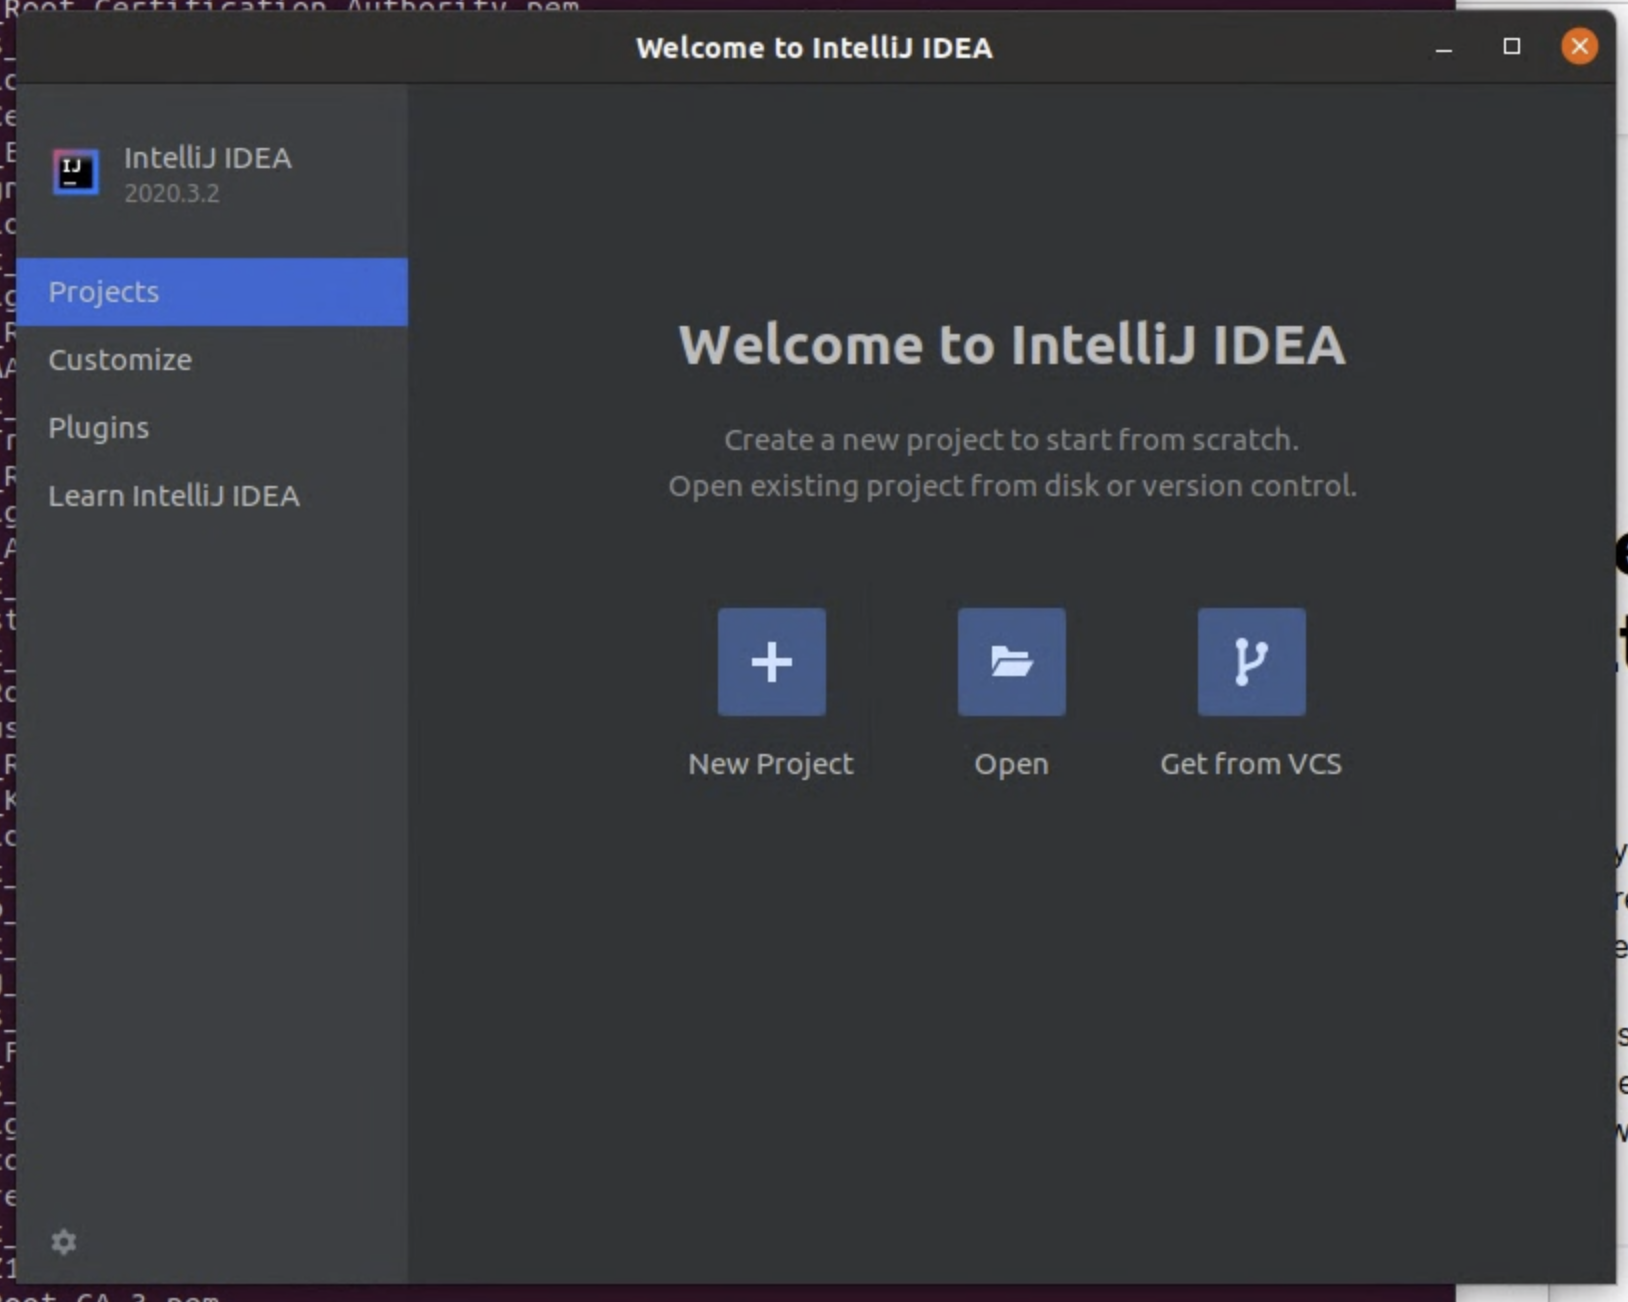
- Select the settings.gradle.kts in the root of your beam git repo

You shouldn't need to modify the project settings. But you should double check on the Java SDK version. File → Project Structure Project → Settings
In the Project pane, set the Project SDK to "1.8", and select Apply.
Note: If the 1.8 SDK is not displayed, Download Java 8 and extract it (to any location) from the tar.gz option on the Oracle website.
Then add it under Platform Settings → SDKs-> + icon. (Removing other SDKs if you don't need them will help eliminate potential issues, but isn't required).

(Also set it up so that java -version uses this SDK on the command line. By setting up your PATH and JAVA_HOME properly to refer to the same location (And remove other java installation files, if necessary))
Double check these settings (but they shouldn't need to change) while the project syncs:
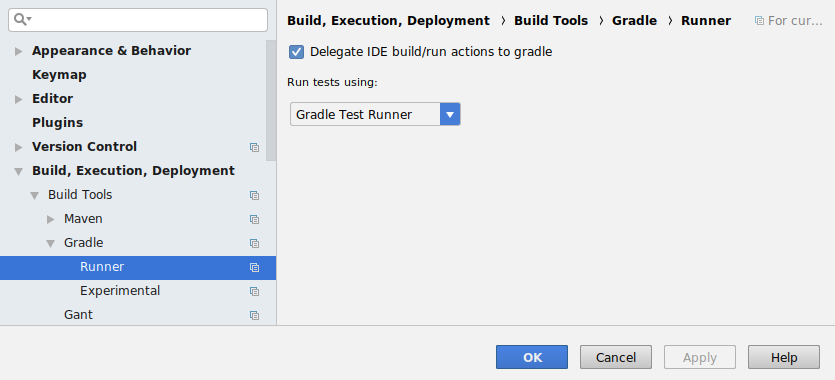
Open File | Settings... In left pane, navigate to Build, Execution, Deployment | Build Tools | Gradle | Runner. Select Delegate IDE build/run actions to gradle, and Run tests using: Gradle Test Runner. Then select Apply and OK.
Open View | Tool Windows | Gradle to open the Gradle pane.
Wait for the Gradle project to sync-- it may take 30 minutes or more. It should complete with no errors, and populate the list of Gradle projects in the Gradle pane.

Verify that your project is correctly configured by building and testing a single module.
You may also want to setup a specialized environment for the Beam modules you're working on:
Make sure to set the formatting options. Otherwise IntelliJ will make unnecessary changes.
File → Settings → Editor → Code Style → Java → Tabs and Indents
Make sure the settings match below:

Also disable "*" style imports
File → Settings → Editor → Code Style → Java → Imports
Set Class count to use import with '*'; to 999
Set Names count to use static import with '*'; to 999

Issues when building:
When building the project with IntelliJ, you may encounter some issues, here is the fix for each issue:
Flutter finished with non-zero exit value 1:
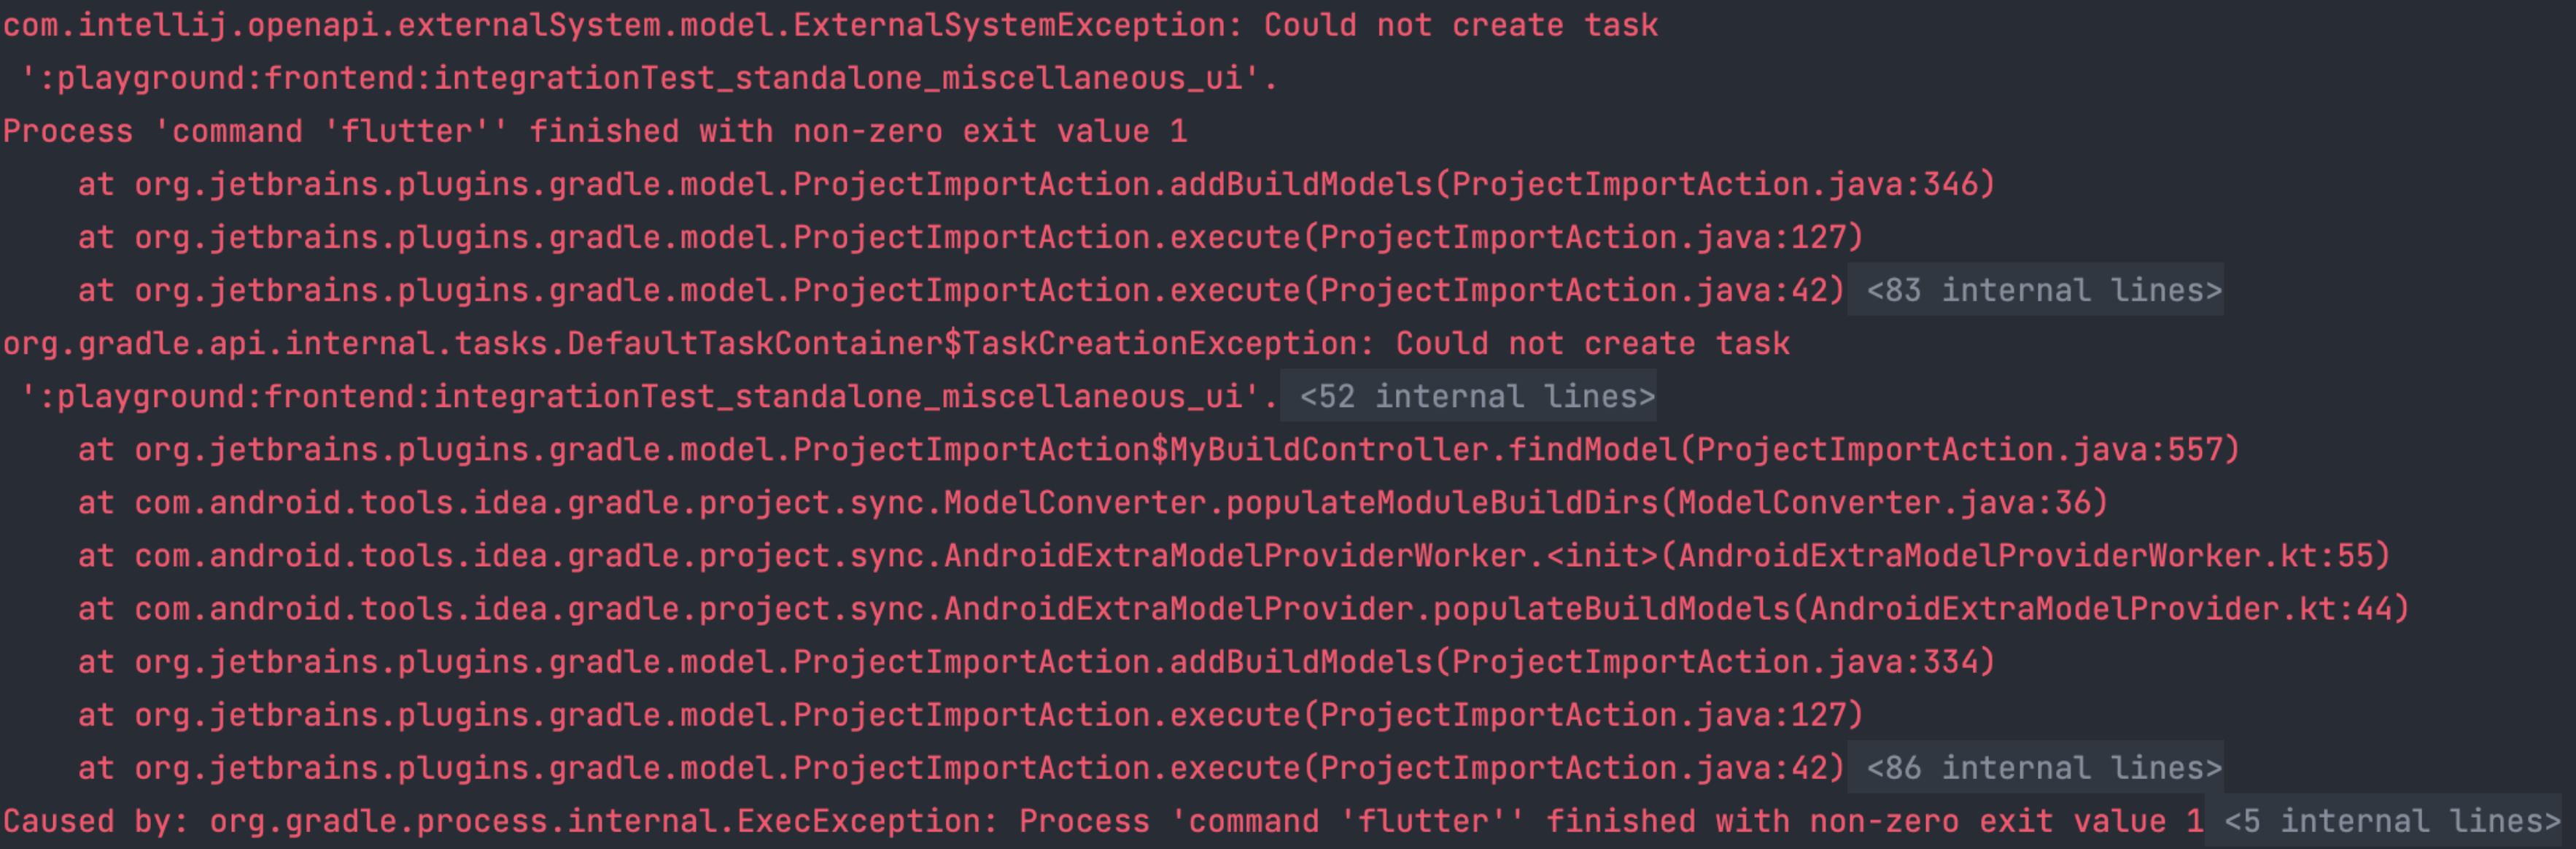
When you get this issue, you should make sure that ChromeDriver is installed and running with the command chromedriver --port=4444 and duplicate or rename the file config.example.dart to config.g.dart in the folder playground/frontend/lib.
If you want to see exactly what cause the issue, you can ran just the task that failed. For this example, you could ran the task as the following: ./gradlew integrationTest_standalone_change_example_sdk_run and see the error message.
If you got as an error message the following, then you should only rename the file config.example.dart to config.g.dart

If you got this error message, then you should run ChromeDriver with the following command chromedriver --port=4444
ChromeDriver
Note: You should keep ChromeDriver running until the build is finished.

Cannot find symbol class Module:
if you got this error, you can try following solutions:
- Make sure to set the language as the following screen shot (The class Module is only available starting from Java 9+)

- Clean & rebuild the project
Try invalidating the IntelliJ cache and restarting the IDE, using
File > Invalidate caches/ restartDelete the .idea & .gradle project and rebuild or reimport the project
Can't resolve generated AutoValue classes AutoValue_*:
To fix this issue, you should enable annotation processing in IntelliJ. For that, you will need to go
File → Settings → Build, Execution, Deployment → Compiler → Annotation Processors
And check "Enable annotation processing" as in the following image.

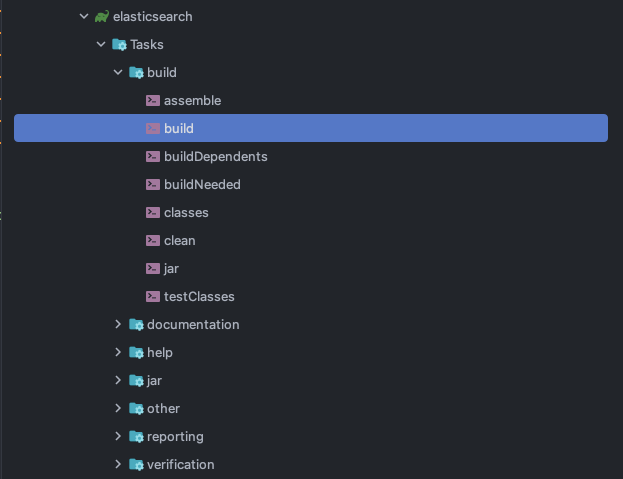
After that, you will need to run the build of that specific module. If for example, you want to work on "ElasticsearchIO", you will need to open gradle sidebar,

beam → Tasks → sdks → io → elasticsearch