| Wiki Markup |
|---|
{scrollbar} |
This application will deal with populating an image on a database and later retrieving the same from the database. This tutorial will help you understand how to deal with data of type Blob. We will be using Derby database in this application. Please use images of smaller sizes to upload on to database. This is because there are some limitations associated with the derby database.
To run this tutorial, as a minimum you will be required to have installed the following prerequisite software:
- Sun JDK 6.0+ (J2SE 1.6)
- Eclipse IDE for Java EE Developers, which is platform specific
- Apache Geronimo Eclipse Plugin 2.1.x
- Apache Geronimo Server 2.1.x
Note Geronimo version 2.1.x, Java 1.5 runtime, and Eclipse Ganymede are used is used in this tutorial but other versions can be used instead (e.g., Geronimo version 2.2, Java 1.6, Eclipse Europa)
Details on installing eclipse are provided in the Development environment section. This tutorial is organized in the following sections:
| Table of Contents | ||
|---|---|---|
|
Creating a dynamic Web project
- Launch Eclipse. Select File -> New -> Project.

- Select Web -> Dynamic Web Project. Select Next.
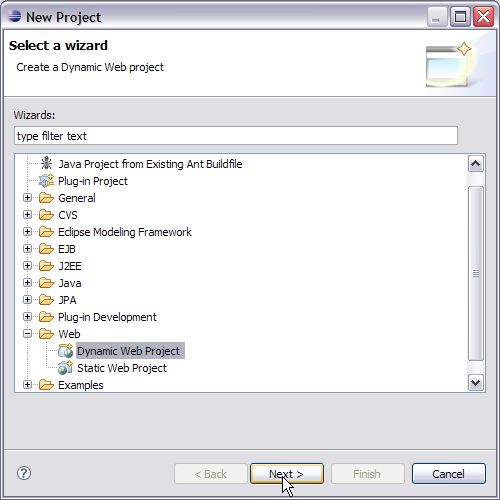
- On the next screen give the name of the project as WebJDBC.

- Select default values for all other fields. Finally select Finish.

Creating a database using the administrative console
- Start the server and Launch the Administrative Console using the URL http://localhost:8080/console.
- Enter default username and password.
- In the welcome page, Under Embedded DB, select DB Manager.

- On the next page create a database userdbs and select Create.

- Once done you can see the userdbs database listed in DB Viewer portlet under Databases. This confirms that the database has been successfully created.

- As shown in the figure below, select userdbs from the dropdown box.

- Run the query as shown in the figure. This query will create table PICTURES with the columns name and pic.

Code Block borderStyle solid title CreateTable.sql create table pictures(name varchar(32) not null primary key, pic blob(16M));
Creating a datasource using the administrative console
- Start the server and Launch the Administrative Console using the URL http://localhost:8080/console.
- Enter default username and password.
- Once in the welcome page. In console navigation, Under Services, select Database Pools.

- On the next screen, Create a new database pool Using the Geronimo database pool wizard.

- On the next screen give the name as suggested in the figure jdbc/userds. This will initiate the process to create a Derby Embedded XA datasource.

- Select the Driver Jar and give the database name as userdbs (remember this is the database we created in the previous step). All other fields can be set to default.

- Select Deploy to deploy the connector plan.

- Once done you can see the Database Pool jdbc/userds listed in the available database pools.

Adding code for image upload to derby database
- Right click on WebContent and select New -> JSP.

- Name the JSP as index.jsp and select Next.

- Select Finish. This will create a template for
index.jsp.

- Add the following code to
index.jsp.
The <form action="/WebJDBC/ImageUpload"> suggests that once the form is submitted the request will be passed to ImageUpload. The next step is to add the servlet ImageUpload to process the request sent by the JSP client.Code Block borderStyle solid title index.jsp <%@ page language="java" contentType="text/html; charset=ISO-8859-1" pageEncoding="ISO-8859-1"%> <!DOCTYPE html PUBLIC "-//W3C//DTD HTML 4.01 Transitional//EN" "http://www.w3.org/TR/html4/loose.dtd"> <html> <head> <meta http-equiv="Content-Type" content="text/html; charset=ISO-8859-1"> <title>Image Upload</title> </head> <body> <h2>Select a Image and Upload it</h2> <form action="/WebJDBC/ImageUpload"> <table> <tr> <td> Location of the Image(full path) </td> <td> <Input type="text" name="ImageLoc"> </td> </tr> <tr> <td> Name of the Image(Unique Name) </td> <td> <Input type="text" name="ImageName"> </td> </tr> <tr> <td> <Input type="submit" value="submit"> </td> <tr> </table> </form> </body> </html> - Right click on Java Resources and select New -> other.

- Select Web -> Servlet. Select Next.

- Name the java package as jdbc and class as ImageUpload. Select Next -> Next.
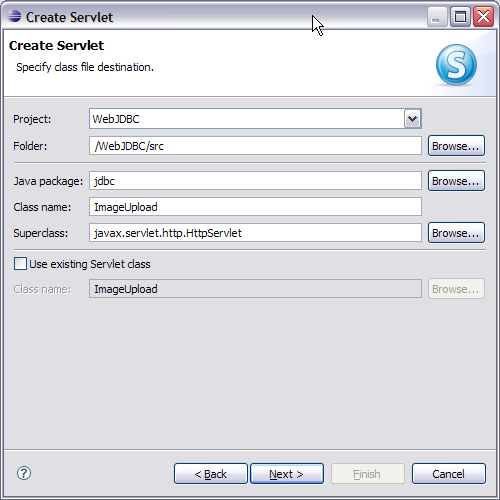
- Select Finish.

- Add the following code to
ImageUpload.java.Code Block borderStyle solid title ImageUpload.java package jdbc; import java.io.File; import java.io.FileInputStream; import java.io.IOException; import java.io.PrintWriter; import java.sql.Connection; import java.sql.PreparedStatement; import java.sql.SQLException; import javax.annotation.Resource; import javax.servlet.ServletException; import javax.servlet.http.HttpServletRequest; import javax.servlet.http.HttpServletResponse; import javax.sql.DataSource; public class ImageUpload extends javax.servlet.http.HttpServlet implements javax.servlet.Servlet { @Resource(name="jdbc/userds") private DataSource ds; static final long serialVersionUID = 1L; public ImageUpload() { super(); } protected void doGet(HttpServletRequest request, HttpServletResponse response) throws ServletException, IOException { doProcess(request, response); } protected void doProcess(HttpServletRequest request, HttpServletResponse response) throws ServletException, IOException { Connection dbconnect = null; PreparedStatement stmnt = null; String pic=request.getParameter("ImageLoc"); String name=request.getParameter("ImageName"); try{ File f= new File(pic); FileInputStream fis=new FileInputStream(f); dbconnect= ds.getConnection(); stmnt = dbconnect.prepareStatement("INSERT INTO PICTURES (" + "NAME," + "PIC )" + " VALUES(?,?)"); stmnt.setString(1, name); stmnt.setBinaryStream(2, fis, (int)f.length()); stmnt.execute(); PrintWriter out= response.getWriter(); out.println("Congratulations your image has been successfully uploaded"); } catch(Exception e) { e.printStackTrace(); } finally { try{ dbconnect.close(); stmnt.close(); }catch(SQLException e){ e.printStackTrace(); } } } protected void doPost(HttpServletRequest request, HttpServletResponse response) throws ServletException, IOException { doProcess(request, response); } }
Once a request is submitted from index.jsp for an image upload with the name and exact location of image the request is send to the ImageUpload servlet.
- String pic=request.getParameter("ImageLoc");- Retrieves the location of the image
- String name=request.getParameter("ImageName");- Retrieves the name of the image
Once we have the image available a new File object is created from the image. Thereafter the image file is read as a binary stream. PreparedStatement is used to insert the image onto database. This completes the code for ImageUpload.
Code to retrieve the image from derby database
- Create a JSP page with the name
ImageDownload.jsp. - Add the following code to
ImageDownload.jsp:
As can be seen from <form action="/WebJDBC/ImageDownload"> this JSP requests the ImageDownload servlet when the form is submitted.Code Block borderStyle solid title ImageDownload.jsp <%@ page language="java" contentType="text/html; charset=ISO-8859-1" pageEncoding="ISO-8859-1"%> <!DOCTYPE html PUBLIC "-//W3C//DTD HTML 4.01 Transitional//EN" "http://www.w3.org/TR/html4/loose.dtd"> <html> <head> <meta http-equiv="Content-Type" content="text/html; charset=ISO-8859-1"> <title>Download Image</title> </head> <body> <h2>Name a Image to download</h2> <form action="/WebJDBC/ImageDownload"> <table> <tr> <td> Name of the Image </td> <td> <Input type="text" name="ImageName"> </td> </tr> <tr> <td> <Input type="submit" value="submit"> </td> <tr> </table> </form> </body> </html> - Create a new servlet
ImageDownload.javaand add the following code:Code Block borderStyle solid title ImageDownload.java package jdbc; import java.io.IOException; import java.io.OutputStream; import java.sql.Blob; import java.sql.Connection; import java.sql.PreparedStatement; import java.sql.ResultSet; import java.sql.SQLException; import javax.annotation.Resource; import javax.servlet.ServletException; import javax.servlet.http.HttpServletRequest; import javax.servlet.http.HttpServletResponse; import javax.sql.DataSource; public class ImageDownload extends javax.servlet.http.HttpServlet implements javax.servlet.Servlet { @Resource(name = "jdbc/userds") private DataSource ds; static final long serialVersionUID = 1L; public ImageDownload() { super(); } protected void doGet(HttpServletRequest request, HttpServletResponse response) throws ServletException, IOException { doProcess(request, response); } protected void doProcess(HttpServletRequest request, HttpServletResponse response) throws ServletException, IOException { Connection dbconnect = null; ResultSet rs = null; PreparedStatement stmnt = null; try { dbconnect = ds.getConnection(); String s=request.getParameter("ImageName"); stmnt = dbconnect.prepareStatement("SELECT PIC FROM PICTURES WHERE NAME=?"); stmnt.setString(1, s); rs = stmnt.executeQuery(); if (rs.next()) { // Get as a BLOB Blob aBlob = rs.getBlob(1); byte[] b = new byte[4096]; java.io.InputStream ip = aBlob.getBinaryStream(); OutputStream out = null; int c = 0; out = response.getOutputStream(); response.setContentType("image/jpeg"); while (c != -1) { c = ip.read(b); if (c > 0) { out.write(b, 0, c); out.flush(); } ip.close(); } } catch (Exception e) { e.printStackTrace(); } finally { try{ dbconnect.close(); stmnt.close(); rs.close(); }catch(SQLException e){ e.printStackTrace(); } } } protected void doPost(HttpServletRequest request, HttpServletResponse response) throws ServletException, IOException { doProcess(request, response); } }
The ImageDownload servlet works in a similar way once the request is sent from ImageDownload.jsp to it. The servlet uses
- String s=request.getParameter("ImageName");- To retrieve the name of the image to be downloaded
- rs = stmnt.executeQuery();- To execute the PreparedStatement
- Blob aBlob = rs.getBlob(1);- Data is stored as a Blob datatype
- java.io.InputStream ip = aBlob.getBinaryStream();- Blob data is retrieved as a binary stream
- response.setContentType("image/jpeg");- sets the output content type as a Image datatype
- c = ip.read(b);, out.write(b);, out.flush();- Data is read as a byte buffer and written on the web page. After each write the buffet is flushed.
This completes the code for Image download.
Modifying deployment plan
The next step is to modify the geronimo-web.xml deployment plan. We need to add the dependency element for the JDBC resource. Also we need to add a resource reference element for the userds datasource.
| Code Block | ||||
|---|---|---|---|---|
| ||||
<?xml version="1.0" encoding="UTF-8"?>
<web-app xmlns="http://geronimo.apache.org/xml/ns/j2ee/web-2.0.1"
         xmlns:nam="http://geronimo.apache.org/xml/ns/naming-1.2"
         xmlns:sec="http://geronimo.apache.org/xml/ns/security-2.0"
         xmlns:sys="http://geronimo.apache.org/xml/ns/deployment-1.2">
  <sys:environment>
    <sys:moduleId>
      <sys:groupId>default</sys:groupId>
      <sys:artifactId>WebJDBC</sys:artifactId>
      <sys:version>1.0</sys:version>
      <sys:type>car</sys:type>
    </sys:moduleId>
   <sys:dependencies>
            <sys:dependency>
                <sys:groupId>console.dbpool</sys:groupId>
                <sys:artifactId>jdbc_userds</sys:artifactId>
            </sys:dependency>
    </sys:dependencies>
  </sys:environment>
  <context-root>/WebJDBC</context-root>
  <nam:resource-ref>
        <nam:ref-name>jdbc/userds</nam:ref-name>
        <nam:pattern>
          <nam:groupId>console.dbpool</nam:groupId>
          <nam:artifactId>jdbc_userds</nam:artifactId>
          <nam:name>jdbc/userds</nam:name>
        </nam:pattern>
    </nam:resource-ref>
</web-app>
|
- <sys:dependency>- The dependency element is to suggest the dependency of the application on the database pool. In our case we have userds as a dependency module.
- <nam:resource-ref>- This element is used to map the JDBC connenction pool with a user defined name. In our case we have mapped jdbc/userds with jdbc_userds.
Deploy and run
- Start the server within Eclipse.
- Right click on WebJDBC project and select Run as - > Run on server.
- Once done the application will be deployed on the server.
- Launch the application with the following link http://localhost:8080/WebJDBC/

- Fill up the form with the a image location and name. The same name will be used while populating the database with the image data. Select Submit once done.

- If your image is successfully inserted into the database you will get a Congratulation message.

- To retrieve an image from the database launch the following portlet http://localhost:8080/WebJDBC/ImageDownload.jsp. Select submit once done.

- This will display the image in the browser.