...
| Code Block | ||
|---|---|---|
| ||
For Linux/Mac: $ ./gradlew cleanAll loadDefault ofbiz()
For Windows: > gradlew cleanAll loadDefault ofbiz |
Above command will load demo data, (Sample Data to run apps) which comes with OFBiz, in Derby Database. Derby comes configured with OFBiz ready to use.
For more options see README.MD.
- Direct your browser to httphttps://localhost:80808443/webtools and login with username "admin" and password "ofbiz" and look around a bit.
That's it, Apache OFBiz is now running on your system!!
...
Simply open $OFBIZ_HOME/specialpurpose/ofbizDemo/widget/OfbizDemoScreens.xml file from ofbizDemo plugin (you just created)
Code Block language xml <?xmlversion="1.0"encoding="UTF-8"?> <screens xmlns:xsi="http://www.w3.org/2001/XMLSchema-instance" xsi:noNamespaceSchemaLocation="http://ofbiz.apache.org/dtds/widget-screen.xsd"> <screen name="main"> <section> <actions> <set field="headerItem" value="main"/><!-- this highlights the selected menu-item with name "main" --> </actions> <widgets> <decorator-screen name="OfbizDemoCommonDecorator" location="${parameters.mainDecoratorLocation}"> <decorator-section name="body"> <label text="Hello World!! :)"/> </decorator-section> </decorator-screen> </widgets> </section> </screen> </screens>We have only added the <label text="Hello World!! :)" />
- Now you will need to restart OFBiz by reloading data($ ./gradlew loadDefault ofbiz). It's required as you have created a new component with some security data for you component (Setup by default in your component data directory as OfbizDemoSecurityGroupDemoData.xml) and as you will restart it, ofbizdemo component will also be loaded.
- As OFBiz restarted direct your browser to your application here httphttps://localhost:80808443/ofbizdemoofbizDemo
- You will be asked to login. Login with user: admin password: ofbiz.
- As you login you will see ofbizdemo application up with the hello world message you have put in screen as shown in below given image.
That's it, congratulations your first component is setup and running.
...
| Code Block | ||
|---|---|---|
| ||
<?xml version="1.0" encoding="UTF-8"?>

<entitymodel xmlns:xsi="http://www.w3.org/2001/XMLSchema-instance"
    xsi:noNamespaceSchemaLocation="http://ofbiz.apache.org/dtds/entitymodel.xsd">

    <title>Entity of an Open For Business Project Component</title>
    <description>None</description>
    <version>1.0</version>

    <entity entity-name="OfbizDemoType" package-name="org.apache.ofbiz.ofbizdemo" title="OfbizDemo Type Entity">
        <field name="ofbizDemoTypeId" type="id-ne"><description>primary sequenced ID</description></field>
        <field name="description" type="description"></field>
        <prim-key field="ofbizDemoTypeId"/>
    </entity>

    <entity entity-name="OfbizDemo" package-name="org.apache.ofbiz.ofbizdemo" title="OfbizDemo Entity">
        <field name="ofbizDemoId" type="id-ne"><description>primary sequenced ID</description></field>
        <field name="ofbizDemoTypeId" type="id-ne"></field>
        <field name="firstName" type="name"></field>
        <field name="lastName" type="name"></field>
        <field name="comments" type="comment"></field>
        <prim-key field="ofbizDemoId"/>
        <relation type="one" fk-name="ODEM_OD_TYPE_ID" rel-entity-name="OfbizDemoType">
            <key-map field-name="ofbizDemoTypeId"/>
        </relation>
    </entity>

</entitymodel> |
Now have a look at $OFBIZ_HOME/specialpurpose/ofbizDemo/ofbiz-component.xml file. You already have resource entry made in it for loading these entities from their definitions to database when component loads. As shown below:
...
Loading data in entity
At this moment to load this sample data into entities/tables defined you can either run "./gradlew loadefaultloadDefault" on console or can directly go here in webtools to load entity xml https://localhost:8443/webtools/control/EntityImport.
Simply put your xml data in " Complete XML document (root tag: entity-engine-xml):" text area and hit "Import Text", as shown in below given image

As you will hit Import Text, it will load data and will show the result as shown below
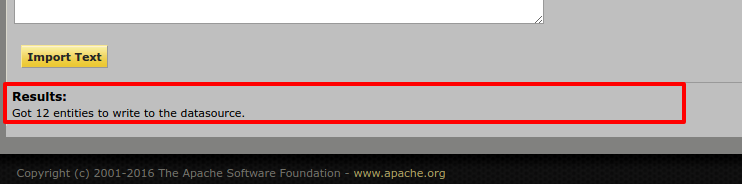
After completing the data load process again visit Entity Data Maintenance(https://localhost:8443/webtools/control/entitymaint) and check your entities, you will find this data here that you just loaded.
That's it, you have successfully imported the data in the database tables, super easy, right!
...
In our previous section, we have seen how to create the entities (tables), now it's time to create a form which will allow you to make entries in that entity.
Create a Service
Before preparing form, let's write a service to create records in database for OfbizDemo entity in service definition xml file ($OFBIZ_HOME/specialpurpose/ofbizDemo/servicedef/services.xml)
| Code Block | ||||
|---|---|---|---|---|
| ||||
<?xml version="1.0" encoding="UTF-8"?>
<services xmlns:xsi="http://www.w3.org/2001/XMLSchema-instance"
        xsi:noNamespaceSchemaLocation="http://ofbiz.apache.org/dtds/services.xsd">

    <description>OfbizDemo Services</description>
    <vendor></vendor>
    <version>1.0</version>

    <service name="createOfbizDemo" default-entity-name="OfbizDemo" engine="entity-auto" invoke="create" auth="true">
        <description>Create an Ofbiz Demo record</description>
        <auto-attributes include="pk" mode="OUT" optional="false"/>
        <auto-attributes include="nonpk" mode="IN" optional="false"/>
        <override name="comments" optional="true"/>
    </service>

</services> |
Now again have a look at $OFBIZ_HOME/specialpurpose/ofbizDemo/ofbiz-component.xml file. You already have resource entry made in it for loading services defined in this file as:
| Code Block | ||
|---|---|---|
| ||
<!-- service resources: model(s), eca(s) and group definitions --> <service-resource type="model" loader="main" location="servicedef/services.xml"/> |
For this service definition to load you will need to restart OFBiz. To test this service you directly go to webtools --> Run Service option here: https://localhost:8443/webtools/control/runService

| Info |
|---|
Running service via Web Tools: This a smart utility provided by framework to run your service. On submission of the form above, you will presented a form to enter IN parameters of the service. |
Create the add Form
Use of UI Labels (Introduction)
Internationalization of Apache OFBiz is really easy, we define the UI Labels in various languages and on the basis of user's locale, respective label is shown.
Here is the example of UI Labels (while creating component <component-name>UiLabels.xml is created by default, in our case it is OfbizDemoUiLabels.xml)
| Code Block | ||||
|---|---|---|---|---|
| ||||
<?xml version="1.0" encoding="UTF-8"?>
<resource xmlns:xsi="http://www.w3.org/2001/XMLSchema-instance" xsi:noNamespaceSchemaLocation="http://ofbiz.apache.org/dtds/ofbiz-properties.xsd">
    <property key="OfbizDemoApplication">
        <value xml:lang="en">OfbizDemo Application</value>
        <value xml:lang="zh">OfbizDemo应用程�?</value>
        <value xml:lang="zh-TW">OfbizDemo應用程�?</value>
    </property>
    <property key="OfbizDemoCompanyName">
        <value xml:lang="en">OFBiz: OfbizDemo</value>
        <value xml:lang="zh-TW">OFBiz: OfbizDemo</value>
    </property>
    <property key="OfbizDemoCompanySubtitle">
        <value xml:lang="en">Part of the Apache OFBiz Family of Open Source Software</value>
        <value xml:lang="it">Un modulo della famiglia di software open source Apache OFBiz</value>
        <value xml:lang="zh">开�?软件OFBiz的组�?部分</value>
        <value xml:lang="zh-TW">開�?軟體OFBiz的組�?部分</value>
    </property>
    <property key="OfbizDemoViewPermissionError">
        <value xml:lang="en">You are not allowed to view this page.</value>
        <value xml:lang="zh">�?�?许你�?览这个页�?�。</value>
        <value xml:lang="zh-TW">�?�?許您檢視這個�?�?�.</value>
    </property>
</resource>
|
Create the add Form
Let's create our first form for this service and for that let's edit the existing file at location $OFBIZ_HOME/specialpurpose/ofbizDemo/widget/OfbizDemoForms.xml and add Create Form for OfbizDemo as shown below:Let's create our first form for this service and for that let's edit the existing file at location $OFBIZ_HOME/specialpurpose/ofbizDemo/widget/OfbizDemoForms.xml and add Create Form for OfbizDemo as shown below:
| Code Block | ||||
|---|---|---|---|---|
| ||||
<?xml version="1.0" encoding="UTF-8"?>
<forms xmlns:xsi="http://www.w3.org/2001/XMLSchema-instance"
        xsi:noNamespaceSchemaLocation="http://ofbiz.apache.org/dtds/widget-form.xsd">

    <form name="AddOfbizDemo" type="single" target="createOfbizDemo">
        <!-- We have this utility in OFBiz to render form based on service definition.
             Service attributes will automatically lookedup and will be shown on form
        -->
        <auto-fields-service service-name="createOfbizDemo"/>
        <field name="ofbizDemoTypeId" title="${uiLabelMap.CommonType}">
            <drop-down allow-empty="false" current-description="">
                <!---We have made this drop down options dynamic(Values from db) using this -->
                <entity-options description="${description}" key-field-name="ofbizDemoTypeId" entity-name="OfbizDemoType">
                    <entity-order-by field-name="description"/>
                </entity-options>
            </drop-down>
        </field>
        <field name="submitButton" title="${uiLabelMap.CommonAdd}"><submit button-type="button"/></field>
    </form>
</forms>
|
Here you can notice we have used auto-fields-service to auto generate the form based on service definition IN/OUT attributes.
Go to Screens xml file(OfbizDemoScreens.xml) add this form location in decorator body to your screen that you used to show the Hello World... text. As shown below
| Code Block | ||||
|---|---|---|---|---|
| ||||
 <?xml version="1.0" encoding="UTF-8"?>
<screens xmlns:xsi="http://www.w3.org/2001/XMLSchema-instance"
        xsi:noNamespaceSchemaLocation="http://ofbiz.apache.org/dtds/widget-screen.xsd">

    <screen name="main">
        <section>
            <actions>
                <set field="headerItem" value="main"/> <!-- this highlights the selected menu-item with name "main" -->
            </actions>
            <widgets>
                <decorator-screen name="main-decorator" location="${parameters.mainDecoratorLocation}">
                    <decorator-section name="body">
                        <screenlet title="Add Ofbiz Demo">
                            <include-form name="AddOfbizDemo" location="component://ofbizDemo/widget/OfbizDemoForms.xml"/>
                        </screenlet>
                    </decorator-section>
                </decorator-screen>
            </widgets>
        </section>
    </screen>
</screens> |
Controller Entry for Form
Before you go to the form and start creating OfbizDemo records from add form, you will need to make an entry in $OFBIZ_HOME/specialpurpose/ofbizDemo/webapp/ofbizdemoofbizDemo/WEB-INF/controller.xml file for the target service which will called when form is submitted. You can do it as shown below under Request Mappings in your ofbizdemo apps controller file:
| Code Block | ||
|---|---|---|
| ||
<request-map uri="createOfbizDemo">
    <security https="true" auth="true"/>
    <event type="service" invoke="createOfbizDemo"/>
    <response name="success" type="view" value="main"/>
</request-map> |
Everything set, let's have a look into to our recently create form httphttps://localhost:80808443/ofbizdemoofbizDemo
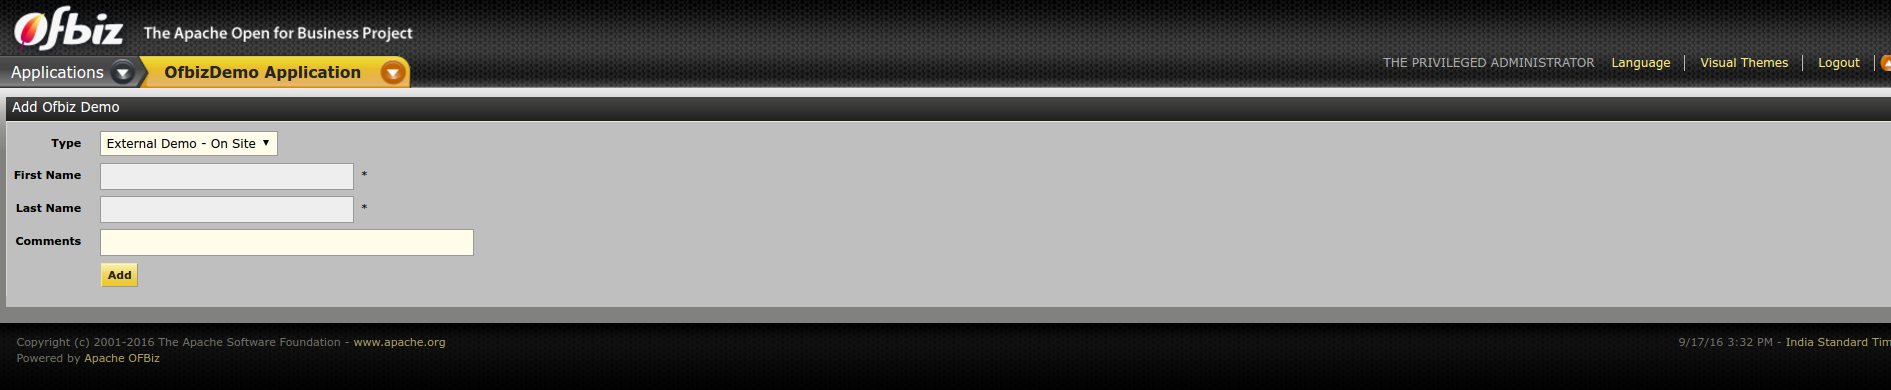
Primary key(ofbizDemoId) is not needed to be send in with the form, it will be auto sequenced by OFBiz in db records.
Create a Find Form
Let's create a find form for the entity OfbizDemo, so that you search OfbizDemos being created.
1.) Add the forms (FindOfbizDemo and ListOfbizDemo) in OfbizDemoForms.xml
| Code Block | ||||
|---|---|---|---|---|
| ||||
 <form name="FindOfbizDemo" type="single" target="FindOfbizDemo" default-entity-name="OfbizDemo">
    <field name="noConditionFind"><hidden value="Y"/> <!-- if this isn't there then with all fields empty no query will be done --></field>
    <field name="ofbizDemoId" title="${uiLabelMap.OfbizDemoId}"><text-find/></field>
    <field name="firstName" title="${uiLabelMap.OfbizDemoFirstName}"><text-find/></field>
    <field name="lastName" title="${uiLabelMap.OfbizDemoLastName}"><text-find/></field>
    <field name="ofbizDemoTypeId" title="${uiLabelMap.OfbizDemoType}">
        <drop-down allow-empty="true" current-description="">
            <entity-options description="${description}" key-field-name="ofbizDemoTypeId" entity-name="OfbizDemoType">
                <entity-order-by field-name="description"/>
            </entity-options>
        </drop-down>
    </field>
    <field name="searchButton" title="${uiLabelMap.CommonFind}" widget-style="smallSubmit"><submit button-type="button" image-location="/images/icons/magnifier.png"/></field>
</form>

<form name="ListOfbizDemo" type="list" list-name="listIt" paginate-target="FindOfbizDemo" default-entity-name="OfbizDemo" separate-columns="true"
    odd-row-style="alternate-row" header-row-style="header-row-2" default-table-style="basic-table hover-bar">
    <actions>
       <!-- Preparing search results for user query by using OFBiz stock service to perform find operations on a single entity or view entity -->
       <service service-name="performFind" result-map="result" result-map-list="listIt">
           <field-map field-name="inputFields" from-field="ofbizDemoCtx"/>
           <field-map field-name="entityName" value="OfbizDemo"/>
           <field-map field-name="orderBy" from-field="parameters.sortField"/>
           <field-map field-name="viewIndex" from-field="viewIndex"/>
           <field-map field-name="viewSize" from-field="viewSize"/>
        </service>
    </actions>
    <field name="ofbizDemoId" title="${uiLabelMap.OfbizDemoId}"><display/></field>
    <field name="ofbizDemoTypeId" title="${uiLabelMap.OfbizDemoType}"><display-entity entity-name="OfbizDemoType"/></field>
    <field name="firstName" title="${uiLabelMap.OfbizDemoFirstName}" sort-field="true"><display/></field>
    <field name="lastName" title="${uiLabelMap.OfbizDemoLastName}" sort-field="true"><display/></field>
    <field name="comments" title="${uiLabelMap.OfbizDemoComment}"><display/></field>
</form> |
Form or Screen's action tag is used for data preparation logics for your view.
| Info |
|---|
We have used OOTB OFBiz generic service performFind to do the search operations which is easy and efficient to use when you have to perform search on one entity or one view entity. |
2.) In next step, we will include these form in the screen, let's add these form in OfbizDemoScreens.xml file. For this include the FindOfbizDemo screen defined below in the OfbizDemoScreens.xml
| Code Block | ||
|---|---|---|
| ||
 <!-- Find and list all ofbizdemos in a tabular format -->
<screen name="FindOfbizDemo">
    <section>
        <actions>
            <set field="headerItem" value="findOfbizDemo"/>
            <set field="titleProperty" value="PageTitleFindOfbizDemo"/>
            <set field="ofbizDemoCtx" from-field="parameters"/>
        </actions>
        <widgets>
            <decorator-screen name="main-decorator" location="${parameters.mainDecoratorLocation}">
                <decorator-section name="body">
                    <section>
                        <condition>
                            <if-has-permission permission="OFBIZDEMO" action="_VIEW"/>
                        </condition>
                        <widgets>
                            <decorator-screen name="FindScreenDecorator" location="component://common/widget/CommonScreens.xml">
                                <decorator-section name="search-options">
                                    <include-form name="FindOfbizDemo" location="component://ofbizDemo/widget/OfbizDemoForms.xml"/>
                                </decorator-section>
                                <decorator-section name="search-results">
                                    <include-form name="ListOfbizDemo" location="component://ofbizDemo/widget/OfbizDemoForms.xml"/>
                                </decorator-section>
                            </decorator-screen>
                        </widgets>
                        <fail-widgets>
                            <label style="h3">${uiLabelMap.OfbizDemoViewPermissionError}</label>
                       </fail-widgets>
                    </section>
                </decorator-section>
            </decorator-screen>
        </widgets>
    </section>
</screen> |
3.) Add request mapping for accessing this new Find Ofbiz Demo page in controller.xml
| Code Block | ||
|---|---|---|
| ||
<!-- Request Mapping --> <request-map uri="FindOfbizDemo"><security https="true" auth="true"/><response name="success" type="view" value="FindOfbizDemo"/></request-map> <!-- View Mapping --> <view-map name="FindOfbizDemo" type="screen" page="component://ofbizDemo/widget/OfbizDemoScreens.xml#FindOfbizDemo"/> |
4.) Now, let's add a new menu for showing find option.
Creating a menu is really simple in OFBiz, all the menus are defined is *menus.xml.
When we create a component from a Gra, we get a file named OfbizDemoMenus.xml
Make the following entry in the OfbizDemoMenus.xml file.
| Code Block | ||||
|---|---|---|---|---|
| ||||
<?xml version="1.0" encoding="UTF-8"?>
<menus xmlns:xsi="http://www.w3.org/2001/XMLSchema-instance" xsi:noNamespaceSchemaLocation="http://ofbiz.apache.org/dtds/widget-menu.xsd">
    <menu name="MainAppBar" title="${uiLabelMap.OfbizDemoApplication}" extends="CommonAppBarMenu" extends-resource="component://common/widget/CommonMenus.xml">
        <menu-item name="main" title="${uiLabelMap.CommonMain}"><link target="main"/></menu-item>
        <menu-item name="findOfbizDemo" title="${uiLabelMap.OfbizDemoFind}"><link target="FindOfbizDemo"/></menu-item>
    </menu>
</menus> |
Use of UI Labels (Completion)
As we have seen above Internationalization of Apache OFBiz is really easy, we define the UI Labels in various languages and on the basis of user's locale, respective label is shown.
Here is we complete the example of UI Labels (while creating component <component-name>UiLabels.xml is created by default, in our case it is OfbizDemoUiLabels.xml)
| Code Block | ||||
|---|---|---|---|---|
| ||||
 <property key="OfbizDemoFind">
    <value xml:lang="en">Find</value>
</property>
<property key="OfbizDemoFirstName">
    <value xml:lang="en">First Name</value>
</property>
<property key="OfbizDemoId">
    <value xml:lang="en">OFBiz Demo Id</value>
</property>
<property key="OfbizDemoLastName">
   <value xml:lang="en">Last Name</value>
</property> |
Now simply restart the server, under ofbizdemo application (https://localhost:8443/ofbizdemoofbizDemo/control/main) you will see the Find menu option.

Services using other engines
Whenever you have to build a business logic you should prefer to write services to leverage features from its built in Service Engine.
The service "createOfbizDemo" that you created earlier was using engine="entity-auto" and hence you didn't need to provide its implementation and OFBiz took care of create operation. When you need to work on complex operations in service involving multiple entities from database and custom logics to be built, you need to provide custom implementation to your service. In this section we will focus on this.
Service in Java
You can implement a service in Java as directed here in below given steps:
1.) Define your service, here again we will be operating on the same entity(OfbizDemo) of our custom Ofbiz Demo application. Open your service definition file $OFBIZ_HOME/specialpurpose/ofbizDemo/servicedef/services.xml and add a new definition as:
| Code Block | ||||
|---|---|---|---|---|
| ||||
 <service name="createOfbizDemoByJavaService" default-entity-name="OfbizDemo" engine="java"
        location="com.companyname.ofbizdemo.services.OfbizDemoServices" invoke="createOfbizDemo" auth="true">
    <description>Create an Ofbiz Demo record using a service in Java</description>
    <auto-attributes include="pk" mode="OUT" optional="false"/>
    <auto-attributes include="nonpk" mode="IN" optional="false"/>
    <override name="comments" optional="true"/>
</service>
|
| Info |
|---|
Notice we have this time used engine="java". |
2.) Create package "com.companyname.ofbizdemo.services" in your ofbizDemo components src/main/java directory (create those if they don't exist in your src directory).
Example: src/main/java/com/companyname/ofbizdemo/services. Services for your application which have ofbizdemo components src directory e.g. src --> com --> companyname --> ofbizdemo --> services. Services which has to be implemented in Java can be placed in this java directory for your application.
3.) Define new Java Class in file OfbizDemoServices.java here in services directory and implement method, which is going to be invoked by your service definition, as shown below:
OfbizDemoServices.java
package com.companyname.ofbizdemo.services;import java.util.Map;import org.apache.ofbiz.base.util.Debug;import org.apache.ofbiz.entity.Delegator;import org.apache.ofbiz.entity.GenericEntityException;import org.apache.ofbiz.entity.GenericValue;import org.apache.ofbiz.service.DispatchContext;import org.apache.ofbiz.service.ServiceUtil;public class OfbizDemoServices { public static final String module = OfbizDemoServices.class.getName(); public static Map<String, Object> createOfbizDemo(DispatchContext dctx, Map<String, ? extends Object> context) { Map<String, Object> result = ServiceUtil.returnSuccess(); Delegator delegator = dctx.getDelegator(); try { GenericValue ofbizDemo = delegator.makeValue("OfbizDemo"); // Auto generating next sequence of ofbizDemoId primary key ofbizDemo.setNextSeqId(); // Setting up all non primary key field values from context map ofbizDemo.setNonPKFields(context); // Creating record in database for OfbizDemo entity for prepared value ofbizDemo = delegator.create(ofbizDemo); result.put("ofbizDemoId", ofbizDemo.getString("ofbizDemoId")); Debug.log("==========This is my first Java Service implementation in Apache OFBiz. OfbizDemo record created successfully with ofbizDemoId: "+ofbizDemo.getString("ofbizDemoId")); } catch (GenericEntityException e) { Debug.logError(e, module); return ServiceUtil.returnError("Error in creating record in OfbizDemo entity ........" +module); } return result; }} |
4.) Stop server and re-start using "./ant clean build startgradlew ofbiz", it will compile your class and will make it available when ofbiz restarts which updated jar file.
5.) Test service implemented using webtools --> Run Service option(https://localhost:8443/webtools/control/runService) or simply update the service name being called by your controller request to use this service instead and use add form in your app that you prepared earlier. By doing this your Add OfbizDemo form will call this java service.
<request-map uri="createOfbizDemo"> <security https="true" auth="true"/> <event type="service" invoke="createOfbizDemoByJavaService"/> <response name="success" type="view" value="main"/></request-map> |
To make sure this new service implementation is being executed, you can check this line in console log that you have put in your code using Debug.log(....). For logging in OFBiz you must always use Debug class methods in Java classes.
Console Log
[java] 2014-06-24 12:11:37,282 (http-bio-0.0.0.0-8443-exec-2) [ OfbizDemoServices.java:28 :INFO ] ==========This is my first Java Service implementation in Apache OFBiz. OfbizDemo record created successfully with ofbizDemoId: ...... |
Service in Groovy
To utilize feature of on the fly compilation and less line of code you can implement services for building business logics in OFBiz using Groovy DSL.
To implement a service using Groovy you can follow below given steps:
1.) Add new service definition to services/services.xml file as:
services.xml
<service name="createOfbizDemoByGroovyService" default-entity-name="OfbizDemo" engine="groovy" location="component://ofbizDemo/script/com/companyname/ofbizdemo/OfbizDemoServices.groovy" invoke="createOfbizDemo" auth="true"> <description>Create an Ofbiz Demo record using a service in Java</description> <auto-attributes include="pk" mode="OUT" optional="false"/> <auto-attributes include="nonpk" mode="IN" optional="false"/> <override name="comments" optional="true"/></service> |
2.) Add new groovy services file here component://ofbizDemo/script/com/companyname/ofbizdemo/OfbizDemoServices.groovy
3.) Add service implementation to the file OfbizDemoServices.groovy
OfbizDemoServices.groovy
import org.apache.ofbiz.entity.GenericEntityException; createOfbizDemo() { result = [:]; try { ofbizDemo = delegator.makeValue("OfbizDemo"); // Auto generating next sequence of ofbizDemoId primary key ofbizDemo.setNextSeqId(); // Setting up all non primary key field values from context map ofbizDemo.setNonPKFields(context); // Creating record in database for OfbizDemo entity for prepared value ofbizDemo = delegator.create(ofbizDemo); result.ofbizDemoId = ofbizDemo.ofbizDemoId; logInfo("==========This is my first Groovy Service implementation in Apache OFBiz. OfbizDemo record " +"created successfully with ofbizDemoId: "+ofbizDemo.getString("ofbizDemoId")); } catch (GenericEntityException e) { logError(e.getMessage()); return error("Error in creating record in OfbizDemo entity ........"); } return result;} |
4.) Stop server and re-start using"./ant startgradlew ofbiz", this time we just need to load the new service definition, no explicit compilation is required as its a service implementation in Groovy.
5.) Test service implemented using webtools --> Run Service option(https://localhost:8443/webtools/control/runService) or simply update the service name being called by your controller request to use this service instead and use add form in your app that you prepared earlier for testing. By doing this your Add OfbizDemo form will call this groovy service.
controller.xml
<request-map uri="createOfbizDemo"> <security https="true" auth="true"/> <event type="service" invoke="createOfbizDemoByGroovyService"/> <response name="success" type="view" value="main"/></request-map> |
To make sure this new service implementation is being executed, you can check this line in console log that you have put in your code using Debug.log(....). For logging in OFBiz you must always use Debug class methods in Java classes.
[java] 2014-06-24 12:11:37,282 (http-bio-0.0.0.0-8443-exec-2) [ OfbizDemoServices.java:28 :INFO ] ==========This is my first Groovy Service implementation in Apache OFBiz. OfbizDemo record created successfully with ofbizDemoId: ..... |
To get more details around using Groovy DSL for service and events implementation in Apache OFBiz you can refer document created by Jacopo Cappellato in OFBiz Wiki here.
...
package com.companyname.ofbizdemo.events;import javax.servlet.http.HttpServletRequest;import javax.servlet.http.HttpServletResponse;import org.apache.ofbiz.base.util.Debug;import org.apache.ofbiz.base.util.UtilMisc;import org.apache.ofbiz.base.util.UtilValidate;import org.apache.ofbiz.entity.Delegator;import org.apache.ofbiz.entity.GenericValue;import org.apache.ofbiz.service.GenericServiceException;import org.apache.ofbiz.service.LocalDispatcher;public class OfbizDemoEvents { public static final String module = OfbizDemoEvents.class.getName(); public static String createOfbizDemoEvent(HttpServletRequest request, HttpServletResponse response) { Delegator delegator = (Delegator) request.getAttribute("delegator"); LocalDispatcher dispatcher = (LocalDispatcher) request.getAttribute("dispatcher"); GenericValue userLogin = (GenericValue) request.getSession().getAttribute("userLogin"); String ofbizDemoTypeId = request.getParameter("ofbizDemoTypeId"); String firstName = request.getParameter("firstName"); String lastName = request.getParameter("lastName"); if (UtilValidate.isEmpty(firstName) || UtilValidate.isEmpty(lastName)) { String errMsg = "First Name and Last Name are required fields on the form and can't be empty."; request.setAttribute("_ERROR_MESSAGE_", errMsg); return "error"; } String comments = request.getParameter("comments"); try { Debug.logInfo("=======Creating OfbizDemo record in event using service createOfbizDemoByGroovyService=========", module); dispatcher.runSync("createOfbizDemoByGroovyService", UtilMisc.toMap("ofbizDemoTypeId", ofbizDemoTypeId, "firstName", firstName, "lastName", lastName, "comments", comments, "userLogin", userLogin)); } catch (GenericServiceException e) { String errMsg = "Unable to create new records in OfbizDemo entity: " + e.toString(); request.setAttribute("_ERROR_MESSAGE_", errMsg); return "error"; } request.setAttribute("_EVENT_MESSAGE_", "OFBiz Demo created succesfully."); return "success"; }} |
...
Okay so we are here in the last part of OFBiz tutorial. In this part we will focus on customizing UI layer of Apache OFBiz for business management apps i.e. backend apps . The and esp. Most of the time you will find the OFBiz Widgets are enough. But sometimes the important thing here is to develop applications as user users exactly want it.
So to customize UI part of your application first of all to make it easy we will be using Freemarker Templates instead of inbuilt form widgetsForm Widgets. First of all we will see how to use Freemarker and Groovy scripts with Apache OFBiz and then we'll see how to put on custom styling on it by defining your own decorators. Initially we will be using OFBiz default decorators.
...
1.) Add two Freemarker files at location $ OFBIZ_HOME/specialpurpose/ofbizDemo/webapp/ofbizdemoofbizDemo/crud/AddOfbizDemo.ftl and ListOfbizDemo.ftl, as shown below:
...
2.) Add new Groovy file for data fetching logic at location $ OFBIZ_HOME/specialpurpose/ofbizDemo/webapp/ofbizdemoofbizDemo/WEB-INF/actions/crud/ListOfbizDemo.groovy and add code as shown to list out OfbizDemo records:
...
<screen name="AddOfbizDemoFtl"> <section> <actions> <set field="titleProperty" value="PageTitleAddOfbizDemos"/> <set field="headerItem" value="addOfbizDemoFtl"/> <script location="component://ofbizDemo/webapp/ofbizdemoofbizDemo/WEB-INF/actions/crud/ListOfbizDemo.groovy"/> </actions> <widgets> <decorator-screen name="main-decorator" location="${parameters.mainDecoratorLocation}"> <decorator-section name="body"> <screenlet title="${uiLabelMap.OfbizDemoListOfbizDemos}"> <platform-specific> <html><html-template location="component://ofbizDemo/webapp/ofbizdemoofbizDemo/crud/ListOfbizDemo.ftl"/></html> </platform-specific> </screenlet> <screenlet title="${uiLabelMap.OfbizDemoAddOfbizDemoServiceByFtl}"> <platform-specific> <html><html-template location="component://ofbizDemo/webapp/ofbizdemoofbizDemo/crud/AddOfbizDemo.ftl"/></html> </platform-specific> </screenlet> </decorator-section> </decorator-screen> </widgets> </section></screen> |
...
6.) Run your ofbiz demo application and go to the new tab you just added. You should have view as:

Creating Custom Decorator
...
We will be doing it by defining custom decorator for your application view. A decorator in OFBiz is nothing but a screen that you define and reuse it afterwards by including it in your other screens of application. You are already doing it with default decorator (main-decorator –> ApplicationDecorator) which came comes with OFBiz. Just observe your screens you have prepared so far, you will find that, you were using this main decorator, please refer below line in OfbizDemoScreens.xml.
...
2.) Create two new directories namely "css" and "js" at location $ OFBIZ_HOME/specialpurpose/ofbizDemo/webapp/ofbizdemoofbizDemo/
3.) Copy bootstrap-3.3.7/dist/css/bootstrap.min.css to $ OFBIZ_HOME/specialpurpose/ofbizDemo/webapp/ofbizdemoofbizDemo/css
4.) Copy bootstrap-3.3.7/dist/js/bootstrap.min.js to $ OFBIZ_HOME/specialpurpose/ofbizDemo/webapp/ofbizdemoofbizDemo/js.
5.) Open $ OFBIZ_HOME/specialpurpose/ofbizDemo/webapp/ofbizdemoofbizDemo/WEB-INF/web.xml and make entries for css and js directories in allowedPaths at the end as shown below:
...
6.) Add new directory named "includes" at location $ OFBIZ_HOME/specialpurpose/ofbizDemo/webapp/ofbizdemoofbizDemo/ and create two new files in this new directory you just added named PreBody.ftl and PostBody.ftl. We will be using(including) these two files in our decorator screen to build complete HTML page.
...
<html> <head> <title>${layoutSettings.companyName}</title> <meta name="viewport" content="width=device-width, user-scalable=no"/> <#if webSiteFaviconContent?has_content> <link rel="shortcut icon" href=""> </#if> <#list layoutSettings.styleSheets as styleSheet> <link rel="stylesheet" href="${StringUtil.wrapString(styleSheet)}" type="text/css"/> </#list> <#list layoutSettings.javaScripts as javaScript> <script type="text/javascript" src="${StringUtil.wrapString(javaScript)}"/></script> </#list> </head> <body data-offset="125"> <h4 align="center"> ==================Page PreBody Starts From Decorator Screen========================= </h4> <div class="container menus" id="container"> <div class="row"> <div class="col-sm-12"> <ul id="page-title" class="breadcrumb"> <li> <a href="<@ofbizUrl>main</@ofbizUrl>">Main</a> </li> <li class="active"><span class="flipper-title">${StringUtil.wrapString(uiLabelMap[titleProperty])}</span></li> <li class="pull-right"> <a href="<@ofbizUrl>logout</@ofbizUrl>" title="${uiLabelMap.CommonLogout}">logout</i></a> </li> </ul> </div> </div> <div class="row"> <div class="col-lg-12 header-col"> <div id="main-content"> <h4 align="center"> ==================Page PreBody Ends From Decorator Screen=========================</h4> <h4 align="center"> ==================Page Body starts From Screen=========================</h4> |
...
<screen name="OfbizDemoCommonDecorator"> <section> <actions> <property-map resource="OfbizDemoUiLabels" map-name="uiLabelMap" global="true"/> <property-map resource="CommonUiLabels" map-name="uiLabelMap" global="true"/> <!-- Including custom CSS Styles that you want to use in your application view. [] in field can be used to set the order of loading CSS files to load if there are multiple --> <set field="layoutSettings.styleSheets[]" value="/ofbizdemoofbizDemo/css/bootstrap.min.css"/> <!-- Including custom JS that you want to use in your application view. [] in field can be used to set the order of loading of JS files to load if there are multiple --> <set field="layoutSettings.javaScripts[+0]" value="/ofbizdemoofbizDemo/js/bootstrap.min.js" global="true"/> <set field="layoutSettings.companyName" from-field="uiLabelMap.OfbizDemoCompanyName" global="true"/> </actions> <widgets> <section> <condition> <if-has-permission permission="OFBIZDEMO" action="_VIEW"/> </condition> <widgets> <platform-specific><html><html-template location="component://ofbizDemo/webapp/ofbizdemoofbizDemo/includes/PreBody.ftl"/></html></platform-specific> <decorator-section-include name="pre-body"/> <decorator-section-include name="body"/> <platform-specific><html><html-template location="component://ofbizDemo/webapp/ofbizdemoofbizDemo/includes/PostBody.ftl"/></html></platform-specific> </widgets> <fail-widgets> <label style="h3">${uiLabelMap.OfbizDemoViewPermissionError}</label> </fail-widgets> </section> </widgets> </section></screen> |
In the code above you may have noticed the layoutSettings.styleSheets[] and layoutSettings.javaScripts[+0] notations. You can use the layoutSettings. notation for any files.
If you want to order styleSheets or javaScripts with empty square brackets you simply add the file at the end of the layoutSettings.styleSheets or layoutSettings.javaScripts list, with [+0] you add it at front of it.
9.) Use this decorator in your Freemarker screen that you created in last part as:
...
<screen name="AddOfbizDemoFtl"> <section> <actions> <set field="titleProperty" value="OfbizDemoAddOfbizDemoFtl"/> <set field="headerItem" value="addOfbizDemoFtl"/> <script location="component://ofbizDemo/webapp/ofbizdemoofbizDemo/WEB-INF/actions/crud/ListOfbizDemo.groovy"/> </actions> <widgets> <decorator-screen name="OfbizDemoCommonDecorator" location="${parameters.mainDecoratorLocation}"> <decorator-section name="body"> <label style="h4" text="${uiLabelMap.OfbizDemoListOfbizDemos}"/> <platform-specific> <html><html-template location="component://ofbizDemo/webapp/ofbizdemoofbizDemo/crud/ListOfbizDemo.ftl"/></html> </platform-specific> <label style="h4" text="${uiLabelMap.OfbizDemoAddOfbizDemoFtl}"/> <platform-specific> <html><html-template location="component://ofbizDemo/webapp/ofbizdemoofbizDemo/crud/AddOfbizDemo.ftl"/></html> </platform-specific> </decorator-section> </decorator-screen> </widgets> </section></screen> |
...
10. Now restart OFBiz as you have made entries to allowedPaths in web.xml. As it reloads hit https://localhost:8443/ofbizdemoofbizDemo/control/AddOfbizDemoFtl you should see page with custom styles that you have used instead of using default OFBiz theme. It should look like:
...
If you have followed all the steps and developed practice application from this tutorial then this will help you in understanding other implementation in OFBiz. These things are basic foundation of working in OFBiz. Now you know, how you can start development in OFBiz. Don't leave behind the extra links provided in this tutorial as they will help you a lot in understanding the things which are given there in detail.
Here is another good reading can be of help is available at FAQ Tips Tricks Cookbook HowTo.
Now the next thing comes in the way is the business processes which are really needed to be understood well for understanding OOTB process flow in OFBiz and OOTB data model, so for this, books are available at : OFBiz Related Books. Understanding well the OFBiz OOTB available data model and business processes will help in building better business solutions top of it.
...