| Wiki Markup |
|---|
{scrollbar} |
This application is a simple JMS application where in a user sends information to the administrator for updation . As we go through the tutorial we will try to understand the basic of Servlets and JMS.
To run this tutorial, as a minimum you will be required to have installed the following prerequisite software.
- Sun JDK 5.0+ (J2SE 1.5)
- Eclipse 3.3.1.1 (Eclipse Classic package of Europa distribution), which is platform specific
- Web Tools Platform (WTP) 2.0.1
- Data Tools Platform (DTP) 1.5.1
- Eclipse Modeling Framework (EMF) 2.3.1
- Graphical Editing Framework (GEF) 3.3.1
Details on installing eclipse are provided in the Development environment section. This tutorial is organized in the following sections:
The application development will take you through the following
| Table of Contents |
|---|
Creating a Dynamic Web Project
- Launch Eclipse. Select File->New->Project.

- Select Web->Dynamic Web Project. Select Next.

- On the next screen give the name of the project as WebJMS.

- Select default values for all other fields. Finally select Finish.

Creating Connection Factory and Destination
In simple terms a Connection Factory is an object which is used by a client to connect to the Service provider. In our case we will be using Active MQ as the provider.
Destination is an object which is used by client to provide the target to messages produced and source of the messages to be consumed. In our case the target is going to be a queue.
Let us see how we can use the administrative console to create a Connection Factory and Message Destination.
- Start the server and Launch the administrative console.
- Under Services. Select JMS Resources.

- Under Create a new JMS Resource Group:. Select For ActiveMQ.

- On the next screen suggest a Resource Group Name. In our case we are using WebJMS. All other values can be taken as default.

- Select Next once done.

- Select Add Connection Factory on the next page.

- In the drop down box select javax.jms.QueueConnectionFactory. Select Next.

- Next give the Connection Factory Name as jms/TestConnectionFactory. Keep default for all other fields. Select Next.

- Select Add Destination on the next screen.

- Select JMS Destination Type as javax.jms.Queue. Select Next.

- Name the Message Destination Name as jms/TestQueue. Select Next.

- On the next screen Select Deploy Now. This will deploy the created Plan.

- Under JMS resources you can see the newly created connection factory and queue.

Adding producer, consumer and UI code to the application
- Right click on WebJMS project and create a new servlet.
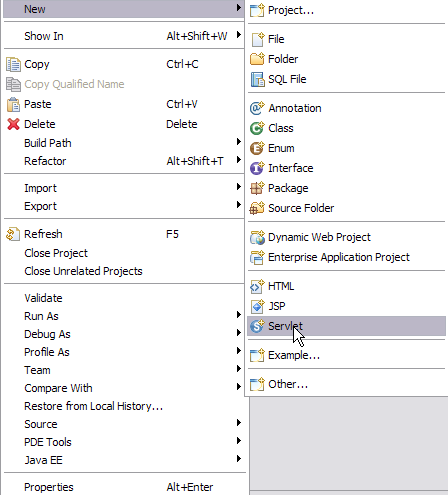
- Name the servlet as UserServlet and package as webjms. This is the producer in the application.

- Select Next and later Finish.

- Add the following code to UserServlet.java
Code Block title UserServlet.java borderStyle solid package webjms; import java.io.IOException; import java.io.PrintWriter; import java.util.Enumeration; import javax.annotation.Resource; import javax.jms.Connection; import javax.jms.ConnectionFactory; import javax.jms.JMSException; import javax.jms.MessageProducer; import javax.jms.Queue; import javax.jms.Session; import javax.jms.TextMessage; import javax.servlet.ServletException; import javax.servlet.http.HttpServletRequest; import javax.servlet.http.HttpServletResponse; /** * Servlet implementation class for Servlet: UserServlet * */ public class UserServlet extends javax.servlet.http.HttpServlet implements javax.servlet.Servlet { @Resource(name="jms/TestConnectionFactory") private ConnectionFactory connectionFactory; @Resource(name="jms/TestQueue") private Queue queue; static final long serialVersionUID = 1L; /* (non-Java-doc) * @see javax.servlet.http.HttpServlet#HttpServlet() */ public UserServlet() { super(); } /* (non-Java-doc) * @see javax.servlet.http.HttpServlet#doGet(HttpServletRequest request, HttpServletResponse response) */ protected void doGet(HttpServletRequest request, HttpServletResponse response) throws ServletException, IOException { PrintWriter out = response.getWriter(); if(connectionFactory == null) { out.println("Connection Factory lookup has failed"); return; } if(queue == null) { out.println("Queue lookup has failed"); return; } Connection connection = null; try { connection = connectionFactory.createConnection(); connection.start(); Session session = connection.createSession(false, Session.AUTO_ACKNOWLEDGE); MessageProducer producer = session.createProducer(queue); TextMessage message = session.createTextMessage(); Enumeration arr=request.getParameterNames(); while(arr.hasMoreElements()) { String fields= (String)arr.nextElement(); String paramname[]=request.getParameterValues(fields); for (int i=0; i<paramname.length;i++) { String s=null; s=fields+":" + paramname[i]; message.setText(s); producer.send(message); } } out.println("Your request has been sent to administrator."); //Send a non-text control message indicating end of messages. producer.send(session.createMessage()); } catch (JMSException e) { e.printStackTrace(); } finally { if(connection != null) { try { connection.close(); } catch (JMSException e1) { } } } } /* (non-Java-doc) * @see javax.servlet.http.HttpServlet#doPost(HttpServletRequest request, HttpServletResponse response) */ protected void doPost(HttpServletRequest request, HttpServletResponse response) throws ServletException, IOException { doGet(request, response); } }
Lets try to understand the code- @Resource(name="jms/TestConnectionFactory")- This is a resource injection wherein connection factory has been injected.
- @Resource(name="jms/TestQueue")- a queue previously created has been injected. Resource injection is useful in the sense that we need not include the entries in a deployment descriptor.
- Servlets follow a request response model wherein a request is send to servlet and a response is generated. The function protected void doGet(....,....) follows a request response model.
- PrintWriter out = response.getWriter()- This statement returns a PrintWriter object which is used to send HTML content to client page.
- connection = connectionFactory.createConnection()- Creates a connection to jms/TestConnectionFactory
- Session session = connection.createSession(..,..)- A session is a context for producing and consuming messages. Use this statement we create a new session.
- MessageProducer producer = session.createProducer(queue)- A client uses message producer to send messages to a destination. Queue name is passed to createProducer method provided by session object.
- TextMessage message = session.createTextMessage()- A TextMessage is used to send a message of java.lang.String type.
- Similarly create a second servlet AdminServlet. This is the consumer in the application.


Add the following code to AdminServlet.javaCode Block title AdminServlet.java borderStyle solid package webjms; import java.io.IOException; import java.io.PrintWriter; import javax.annotation.Resource; import javax.jms.Connection; import javax.jms.ConnectionFactory; import javax.jms.JMSException; import javax.jms.Message; import javax.jms.MessageConsumer; import javax.jms.Queue; import javax.jms.Session; import javax.jms.TextMessage; import javax.servlet.ServletException; import javax.servlet.http.HttpServletRequest; import javax.servlet.http.HttpServletResponse; /** * Servlet implementation class for Servlet: AdminServlet * */ public class AdminServlet extends javax.servlet.http.HttpServlet implements javax.servlet.Servlet { @Resource(name="jms/TestConnectionFactory") private ConnectionFactory connectionFactory; @Resource(name="jms/TestQueue") private Queue queue; /* (non-Java-doc) * @see javax.servlet.http.HttpServlet#HttpServlet() */ public AdminServlet() { super(); } /* (non-Java-doc) * @see javax.servlet.http.HttpServlet#doGet(HttpServletRequest request, HttpServletResponse response) */ protected void doGet(HttpServletRequest request, HttpServletResponse response) throws ServletException, IOException { PrintWriter out = response.getWriter(); if(connectionFactory == null) { out.println("Connection Factory lookup has failed"); return; } if(queue == null) { out.println("Queue lookup has failed"); return; } Connection connection = null; try { connection = connectionFactory.createConnection(); Session session = connection.createSession(false, Session.AUTO_ACKNOWLEDGE); MessageConsumer consumer = session.createConsumer(queue); connection.start(); out.println("The following information has been received for updation\n"); while(true) { Message m = consumer.receive(); if (m instanceof TextMessage) { TextMessage message = (TextMessage) m; out.println(message.getText()); } else { break; } } } catch (JMSException e) { e.printStackTrace(); } finally { if(connection != null) { try { connection.close(); } catch (JMSException e1) { } } } } /* (non-Java-doc) * @see javax.servlet.http.HttpServlet#doPost(HttpServletRequest request, HttpServletResponse response) */ protected void doPost(HttpServletRequest request, HttpServletResponse response) throws ServletException, IOException { doGet(request, response); } } - Right Click on WebContent and create a jsp.

- Name the jsp as index.jsp. Select Next.

- Select Finish.

Add the following code to index.jsp
This will create the producer, consumer and user interface required by the application.Code Block title index.jsp borderStyle solid <%@ page language="java" contentType="text/html; charset=ISO-8859-1" pageEncoding="ISO-8859-1"%> <!DOCTYPE html PUBLIC "-//W3C//DTD HTML 4.01 Transitional//EN" "http://www.w3.org/TR/html4/loose.dtd"> <html> <head> <meta http-equiv="Content-Type" content="text/html; charset=ISO-8859-1"> <title>Sample Web Application accessing JMS Resources</title> </head> <body> <form action="/WebJMS/UserServlet"> <h1>Please enter the updated information</h1> <table> <tr> <td>UserName:</td> <td><input type="text" name="username" size="30"></td> </tr> <tr> <td>UserID:</td> <td><input type="text" name="userid" size="30"></td> </tr> <tr> <td>Old Address:</td> <td><input type="text" name="oldaddress" size="30"></td> </tr> <tr> <td>New Address:</td> <td><input type="text" name="newaddress" size="30"></td> <tr> </table> <input type="submit" value="Submit"> </form> </body> </html>
Modifying the deployment plan
Modify the deployment plan as shown below
| Code Block | ||||
|---|---|---|---|---|
| ||||
<?xml version="1.0" encoding="UTF-8"?>
<web-app xmlns="http://geronimo.apache.org/xml/ns/j2ee/web-1.2"
         xmlns:nam="http://geronimo.apache.org/xml/ns/naming-1.2"
         xmlns:sec="http://geronimo.apache.org/xml/ns/security-1.1"
         xmlns:sys="http://geronimo.apache.org/xml/ns/deployment-1.2">
  <sys:environment>
    <sys:moduleId>
      <sys:groupId>default</sys:groupId>
      <sys:artifactId>WebJMS</sys:artifactId>
      <sys:version>1.0</sys:version>
      <sys:type>car</sys:type>
    </sys:moduleId>
    <sys:dependencies>
            <sys:dependency>
                <sys:groupId>org.apache.geronimo.configs</sys:groupId>
                <sys:artifactId>activemq-ra</sys:artifactId>
                <sys:version>2.1</sys:version>
                <sys:type>car</sys:type>
            </sys:dependency>
        </sys:dependencies>
  </sys:environment>
  <context-root>/WebJMS</context-root>
  <nam:resource-ref>
        <nam:ref-name>jms/TestConnectionFactory</nam:ref-name>
        <nam:pattern>
            <nam:groupId>org.apache.geronimo.configs</nam:groupId>
            <nam:artifactId>activemq-ra</nam:artifactId>
            <nam:version>2.1</nam:version>
            <nam:name>DefaultActiveMQConnectionFactory</nam:name>
        </nam:pattern>
    </nam:resource-ref>
    <nam:resource-env-ref>
        <nam:ref-name>jms/TestQueue</nam:ref-name>
        <nam:pattern>
            <nam:groupId>org.apache.geronimo.configs</nam:groupId>
            <nam:artifactId>activemq-ra</nam:artifactId>
            <nam:version>2.1</nam:version>
            <nam:name>SendReceiveQueue</nam:name>
        </nam:pattern>
    </nam:resource-env-ref>
</web-app>
|
The deployment plan has been modified to include active-mq dependencies and resource references for queue(TestQueue) and Connection Factory(Test Connection Factory).
<sys:dependency>- Defines the dependency of the application on ActiveMQ
<nam:resource-ref>- This tag is basically used to define connections that can be JDBC Connection, Java Mail connection or JMS Connection Factory. In our case we are using it for JMS Connection Factory.
<nam:resource-env-ref>- This tag is basically used to define a resource. In our case we have defind the message destination that is the TestQueue.
Deploy and Run
| Warning | ||
|---|---|---|
| ||
Due to some limitation with GEP you need to export the project. This issue will be fixed soon. |
- Right Click on WebJMS project and select Export->war file.

- Browse to a convenient location to save the exported project.

- Once done select save. This will save the file as WebJMS.war.

- Select Finish.

- Start the server and Launch Administrative console.
- Under Applications. Select Deploy New.

- In the Install New Applications window. Select Browse.

- Browse to the directory where the application was exported. Select Open.

- Once done. Select Install.

- You will get the following message once the application is successfully deployed.

- Launch the application using http://localhost:8080/WebJMS. Fill in the required information and Select Submit.

- Once your request is successfully sent to administrator you will get the following message.

- Once the administrator login he/she will receive the request sent by user. Launch the AdminServlet using the following http://localhost:8080/WebJMS/AdminServlet.
