| Wiki Markup |
|---|
{scrollbar} |
We will be using Eclipse Ganymede and Sun JDK 6.0+ for the illustration. Geronimo Eclipse Plugin (GEP) can be installed using the following options
| Table of Contents |
|---|
This page describes how to install the current release of the GEP. For information about installing previous releases, see this page.
Prerequisites
| Anchor | ||||
|---|---|---|---|---|
|
- Java J2SE 1.5.0 or greater
- Eclipse IDE for Java EE Developers (Ganymede (Eclipse 3.4) or Europa (Eclipse 3.3 Winter))
- Apache Geronimo 2.0.x or 2.1.x server
Installing GEP within WTP
- Once you have all the #Prerequisites installed, launch Eclipse from <Eclipse_Home>/eclipse.
- By default Eclipse will be launched with Java EE perspective.
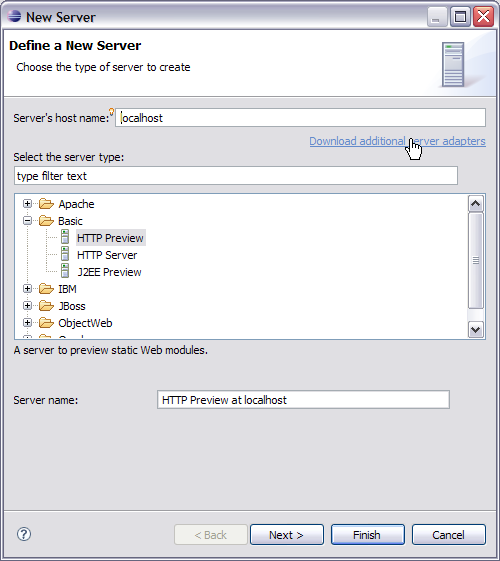
- Select the servers tab as shown in the figure and select New->Server.

- On the next screen select Download Additional Server Adapters as shown in the figure.
- Select Geronimo V2.1 Server Adapter v2.1.2 adapter and select Next.

- Accept the license agreement and select Finish.

- Next screen will ask for confirmation. Select Ok. Once done Geronimo V2.1 server adapter will be downloaded and installed.

- Once the adapter is installed you will be prompted to restart the server. Select Yes.

Installing GEP using Eclipse update manager
- Once you have all the prerequisites installed. Launch Eclipse from <Eclipse_Home>/eclipse.
- By default Eclipse will be launched with Java EE perspective.
- Select Help->Software Updates.. from the menu.

- On the next screen select Available Software tab. Select Add Site.

- Copy and paste the following site to Add Site window and Select Ok.
Code Block html html http://apache.org/dist/geronimo/eclipse/updates/

- Expand http://apache.org/dist/geronimo/eclipse/updates/ and Select Geronimo v2.1 Server Adapter v2.1.2.

- Once done you have to wait a few seconds while Eclipse resolves dependencies.

- Once done Install window will pop up. Select Next.

- Accept the license and Select Finish.

- Installation will start and will take time few minutes. A progress window will display the jars being installed.

- Once GEP is installed you will be prompted to restart. Select yes.

Manual Installation
Using deployable.zip
- Download the package geronimo-eclipse-plugin-2.1.2-deployable.zip from http://archive.eu.apache.org/dist/geronimo/eclipse/2.1.2/.
- Once done unzip the package to your eclipse installation directory. For Ganymede, unzip to the eclipse/dropins directory. You may get a prompt regarding file replacement. Select All. Restart eclipse with the -clean option.
- This will install GEP.
Verify GEP installation
- Select Help->About Eclipse Platform.

- You can see a G icon in the About Eclipse Platform. This confirms the successful installation of GEP. Click the icon.

- On the next screen you can view details- License, Plug-in-Details and set the Columns of the table being displayed.
