Make Luke a Lucene/Solr Module
Student Name : Ajay Bhat
Student e-mail : a.ajay.bhat@gmail.com
Apache Project Name : Apache Lucene
Project Title : Make Luke a Lucene/Solr Module
Mentor name : Mark Miller
Link to project idea JIRA : Make Luke a Lucene/Solr Module![]()
For the ASF-ICFOSS Pilot Mentoring Programme![]()
1. Abstract
Apache Lucene(TM) is a high-performance, full-featured text search engine library written entirely in Java. It is a technology suitable for nearly any application that requires full-text search, especially cross-platform.
Lucene offers powerful features through a simple API:
- Scalable, High-Performance Indexing
- Powerful, Accurate and Efficient Search Algorithms
- Cross-Platform Solution
Luke accesses already existing Lucene indexes and allows you to display and modify their content in several ways:
- Browse by document number, or by term and View documents / copy to clipboard or selectively delete documents from the index
- Retrieve a ranked list of most frequent terms
- Execute a search. browse and analyze search results
- Reconstruct the original document fields, edit them and re-insert to the index
- optimize indexes
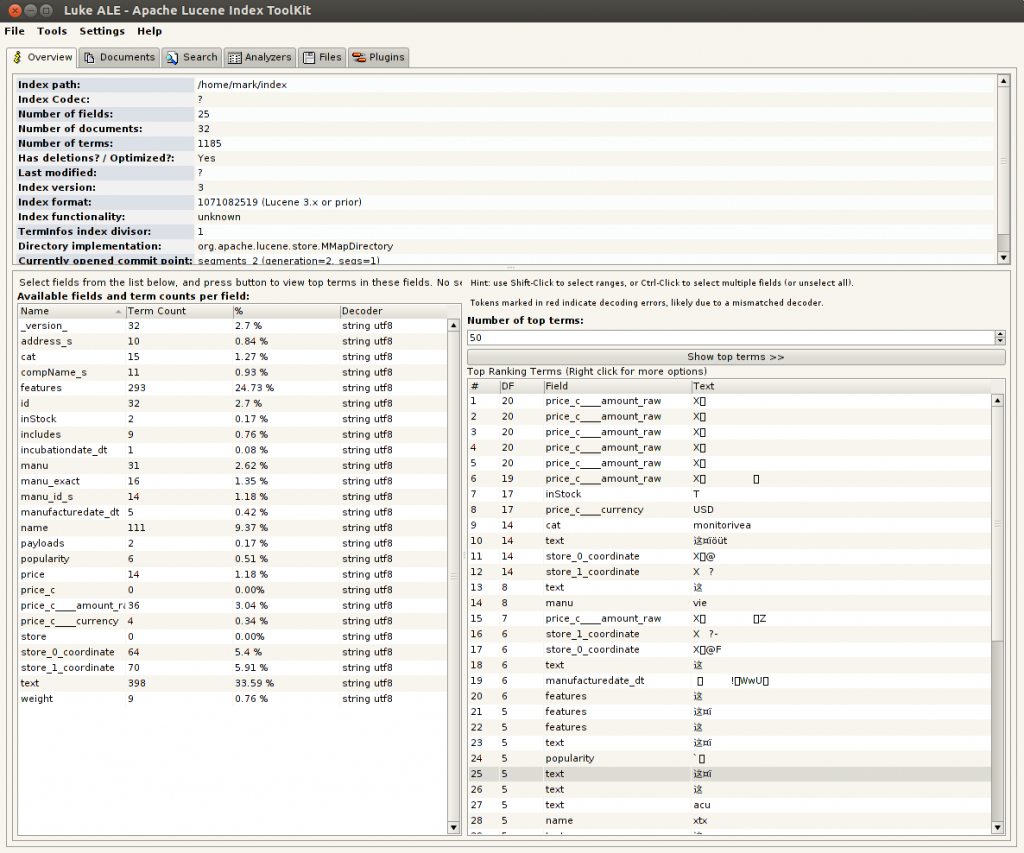
Currently the Luke application uses Thinlet (LGPL Licensed API) for many of the GUI features. The UI needs to be ported to an Apache Licensed API for adding it to the trunk. The porting has been done to support Lucene 4.0.0. However lot of work still needs to be done. In this project I am mainly focusing on porting some of the plugins present in the Luke version, so it is more beneficial to the community and users who want to make use of these plugins.
Here I am going to use Apache Pivot (http://pivot.apache.org/![]() ) for the porting. Pivot allows developers to easily construct visually-engaging, cross-platform, connected applications in Java or any other JVM language, such as JavaScript, Groovy, or Scala. It is completely open source, and is driven entirely by the software development community.
) for the porting. Pivot allows developers to easily construct visually-engaging, cross-platform, connected applications in Java or any other JVM language, such as JavaScript, Groovy, or Scala. It is completely open source, and is driven entirely by the software development community.
Current (sandbox) version of Luke can be accessed at : https://svn.apache.org/repos/asf/lucene/sandbox/luke![]()
The original repo created by Andrzej Bialecki can be accessed at : http://luke.googlecode.com/svn/trunk/![]()
2. Detailed Description
2.1 BXML used in Pivot for the GUI
BXML is an XML-based markup language for simplifying the construction of Java object hierarchies. While it is most often used to define the user interface of an Apache Pivot application, it is not limited to user interface construction, and can actually be used to create hierarchies of any object type.
In BXML, an XML namespace represents a Java package. Declaring a namespace associates the namespace prefix with the package, similar to how the import keyword is used in Java.
For example, the following simple BXML associates the package "com.foo" with the "foo" namespace prefix:
<foo:Bar xmlns:foo="com.foo"/>

The above window is created when BXML file is written thusly:
<Window title="Hello BXML!" maximized="true"
   xmlns:bxml="http://pivot.apache.org/bxml"
   xmlns="org.apache.pivot.wtk">
   <Label text="Hello BXML!"
       styles="{font:'Arial bold 24', color:'#ff0000',
           horizontalAlignment:'center', verticalAlignment:'center'}"/>
</Window>
and then we use the BXML file in our Java source code as:
import org.apache.pivot.beans.BXMLSerializer;
import org.apache.pivot.collections.Map;
import org.apache.pivot.wtk.Application;
import org.apache.pivot.wtk.Display;
import org.apache.pivot.wtk.Window;
public class HelloBXML implements Application {
   private Window window = null;
   @Override
   public void startup(Display display, Map<String, String> properties)
       throws Exception {
       BXMLSerializer bxmlSerializer = new BXMLSerializer();
       window = (Window)bxmlSerializer.readObject(HelloBXML.class, "hello.bxml");
       window.open(display);
   }
   @Override
   public boolean shutdown(boolean optional) {
       if (window != null) {
           window.close();
       }
       return false;
   }
   public static void main(String[] args) {
     DesktopApplicationContext.main(HelloBXML.class, args);
   }
2.2 Implement Plugins
Apache Pivot API is used to implement the GUI features of the Luke application as it is Apache Licensed and can be used in the Lucene trunk.
Tabs for Plugins
Tabbed pane is already done using Pivot API for the Luke application. There is a pane for plugins that is empty in the sandboxed version.A Tab Pane is added as a BXML file as :
<TabPane bxml:id="tabPane">
	<tabs>
		<Border styles="{backgroundColor:11,thickness:0}">
			<TabPane.tabData>
				<content:ButtonData icon="/img/info.gif" text="%lukeWindow_overviewTabText" />
			</TabPane.tabData>
			<content>
				<bxml:include bxml:id="abc" src="MyTab.bxml" />
			</content>
		</Border>
	</tabs>
</TabPane>
Hadoop Plugin
The Hadoop Plugin uses a index used by Hadoop
We can use the RowSequence class in Pivot (http://pivot.apache.org/2.0.2/docs/api/org/apache/pivot/wtk/TablePane.RowSequence.html![]() ) to manipulate rows.
) to manipulate rows.
The add() method will add a Row object (http://pivot.apache.org/2.0.2/docs/api/org/apache/pivot/wtk/TablePane.Row.html![]() ) to the table.
) to the table.
The process of reading number of bytes is done using methods and classes from apache hadoop and lucene: org.apache.hadoop.conf, org.apache.hadoop.fs,org.apache.lucene.index packages
Vocabulary Analysis Tool
The tool basically works using a SlowThread class which extends Thread and the class having run() defined as:
public final void run() {
   app.add(ui);
   try{
	execute();
   }
   catch (Throwable t){
	t.printStackTrace();
	app.showStatus(t.getMessage());
   }
   app.remove(ui);
   app.repaint();
 }
Where app is the pane showing results.
The analysis is done as:
SlowThread st = new SlowThread(app) {
     public void execute() {
       try {
         int numAgeGroups = 100;
         float numDocs = ir.maxDoc();
         if (numDocs < numAgeGroups) numAgeGroups = ir.maxDoc();
         float ageTotals[] = new float[numAgeGroups];
         TermsEnum te = MultiFields.getTerms(ir, field).iterator(null);
         while (te.next() != null)
	{
		DocsEnum td = te.docs(null, null, 0);
		td.nextDoc();
		float firstDocId = td.docID();
		int ageBracket = (int) ((firstDocId / numDocs) * numAgeGroups);
		ageTotals\[ageBracket\]++;
	}

         float total = 0.0f;
         float max = 0.0f;
         for (int i = 0; i < ageTotals.length; i++) {
           if (ageTotals[i] > max) max = ageTotals[i];
           total += ageTotals[i];
           if (i > 0 && cumul){
		ageTotals\[i\] \+= ageTotals\[i - 1\]; // make totals cumulative
	   }
       }
         Object maxpct = app.find(myUi, "maxpct");
         if (cumul){
		app.setString(maxpct, "text", "100 %");
	   }else{
		app.setString(maxpct, "text", (float)Math.round(max * 10000.0f / total) / 100.0f + " %");
	   }
         chart.setScores(ageTotals);
         chart.invalidate();
         app.repaint();
       }
	 catch (Exception e){
		app.showStatus("ERROR: " + e.getMessage());
	   }
      }
};
This only involves some basic string manipulation, arithmetic and some classes imported from Lucene index, specifically:
org.apache.lucene.index.MultiFields, org.apache.lucene.index.DocsEnum and org.apache.lucene.index.TermsEnum.
So there’s no need of specific GUI needed for analysis. However for displaying we need Pivot.
Analyzer Tool
The Analyzer tool is a lexical analyzer. It analyzes first for tokens, leaving out any special characters and spaces including @ symbol. An example is:
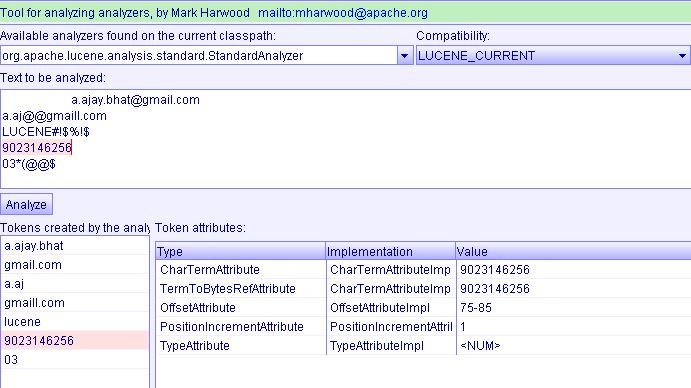
The Analyzer also provides functionality for highlighting selected text.
Right now the highlighting is done by requestFocus() method which works as:
Object inputText = app.find(myUi, "inputText");
   if (as.hasAttribute(OffsetAttribute.class)){
	OffsetAttribute off = (OffsetAttribute)as.getAttribute(OffsetAttribute.class);
	app.setInteger(inputText, "start", 0);
	app.setInteger(inputText, "end", off.endOffset());
	app.setInteger(inputText, "start", off.startOffset());
	app.requestFocus(inputText);
   }
where setInteger() is inherited from superclass which uses Thinlet::
public void setInteger(Object component, String key, int value) {
       Object[] definition = getDefinition(getClass(component), key, "integer");
       if (setInteger(component, (String) definition[1], value, ((Integer) definition[3]).intValue())){
		update(component, definition\[2\]);}
       }
and getDefinition() is :
private static Object[] getDefinition(Object classname, String key, String type) {
       Object currentname = classname;
       while (classname != null) {
           for (int i = 0; i < dtd.length; i += 3) {
               if (dtd[i] == classname) {
                   Object[][] attributes = (Object[][]) dtd[i + 2];
                   if (attributes != null) {
                       for (int j = 0; j < attributes.length; j++) {
                           if (attributes[j][1].equals(key)) {
                               if ((type != null) && (type != attributes[j][0]))
				{
					throw new IllegalArgumentException(attributes\[j\]\[0\].toString());
				}
                               return attributes[j];
                          }
                       }
                   }
                   classname = dtd[i + 1];
                   break;
               }
           }
       }
       throw new IllegalArgumentException("unknown " + key + " " + type + " for " + currentname);
   }
Highlighting can be implemented in Pivot as one of two methods:
- setSelection(int selectionStart, int selectionLength)
- setSelection(Span selection)
If we already know the offset and length of where we want to select, then we can use the first one:
void doSomething(){
int start = <starting offset of text to select>;
int length = <length of text>;
textArea.clearSelection();
textArea.setSelection(start, length);
Alternatively, we can use the method that involve a Span object:
        Span span = new Span(start, end);
       textArea.setSelection(span);
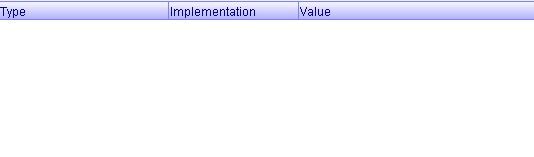
The token analysis displayed as a Table Pane. In Pivot we implement Table pane using BXML:
<layout:SimpleTablePanes bxml:id="window" title="Table Panes" maximized="true"
   xmlns:bxml="http://pivot.apache.org/bxml"
   xmlns:layout="org.apache.pivot.tutorials.layout"
   xmlns="org.apache.pivot.wtk">
   <Border>
       <TablePane bxml:id="tablePane" styles="{verticalSpacing:1, showHorizontalGridLines:true,
           horizontalSpacing:1, showVerticalGridLines:true}">
           <columns>
               <TablePane.Column width="100"/>
               <TablePane.Column width="2*"/>
               <TablePane.Column width="300"/>
           </columns>
           <TablePane.Row height="-1">
               <TablePane.Filler/>
               <Label text="Type" styles="{horizontalAlignment:'center'}"/>
               <Label text="Implementation" styles="{horizontalAlignment:'center'}"/>
               <Label text="Value" styles="{horizontalAlignment:'center'}"/>
           </TablePane.Row>
           <TablePane.Row height="-1">
               <Label styles="{verticalAlignment:'center'}"/>
           </TablePane.Row>
           <TablePane.Row height="1*">
               <Label styles="{verticalAlignment:'center'}"/>
           </TablePane.Row>
           <TablePane.Row height="1*">
               <Label styles="{verticalAlignment:'center'}"/>
           </TablePane.Row>
       </TablePane>
   </Border>
</layout:SimpleTablePanes>
and use the BXML file as:
public class SimpleTablePanes extends Window implements Bindable {
 private TablePane tablePane = null;
@Override
 public void initialize(Map<String, Object> namespace, URL location, Resources resources){
        tablePane = (TablePane)namespace.get("tablePane");
	}
}
giving a pane similar in look to :
2.3 Implement Other Features
Status Bar
A minor feature that is in the Luke application but not in the sandboxed version is a status bar.
It can be implemented using Box Pane.
<BoxPane styles="{padding:4, verticalAlignment:'center'}">
       <Label text="Index : Not added"/>
</BoxPane>
Themes
Another nice, if minor, touch to the application would be different color schemes.
Hex values of the current themes available are as follows.
| Unknown macro: {0xece9d0, 0x000000, 0xf5f4f0, 0x919b9a, 0xb0b0b0, 0xeeeeee, 0xb9b9b9, 0xff8080, 0xc5c5dd} |
Default |
| Unknown macro: {0xe6e6e6, 0x000000, 0xffffff, 0x909090, 0xb0b0b0, 0xededed, 0xb9b9b9, 0x89899a, 0xc5c5dd} |
Gray |
| Unknown macro: {0xeeeecc, 0x000000, 0xffffff, 0x999966, 0xb0b096, 0xededcb, 0xcccc99, 0xcc6600, 0xffcc66} |
Sandstone |
| Unknown macro: {0xf0f0ff, 0x0000a0, 0xffffff, 0x8080ff, 0xb0b0b0, 0xededed, 0xb0b0ff, 0xff0000, 0xfde0e0} |
Sky |
| Unknown macro: {0x6375d6, 0xffffff, 0x7f8fdd, 0xd6dff5, 0x9caae5, 0x666666, 0x003399, 0xff3333, 0x666666} |
Navy |
Comparison of gray and sandstone themes in current Luke app:

2.4 Deliverables
Analyzer Tool Plugin : Tool for analyzing analyzers.
Vocabulary Analysis Plugin : It shows the index’s vocabulary growth.
Hadoop Plugin : Hadoop Plugin to open indexes located on any filesystem supported by Hadoop.
Themes : Set of predefined themes
Status Bar : Status Bar to show the index directory etc.
Documentation : User and developer documentation on Luke web page.
2.5 Future/Additional Work
If I get time during the work period after completing the above deliverables I’d like to work on one of these:
- Query Parser for documents
- Scripting Plugin for Luke
3. Timeline
(Rough estimate)
Week |
Dates |
Work to be done |
|---|---|---|
Week 0 |
July 20th to August 2nd |
Familiarize with Pivot API |
Week 1-3 |
August 5th to August 25th |
Work on Analyzer Plugin. |
Week 4-6 |
August 26th to September 13th |
Work on Status Bar and Themes. |
Week 7-8 |
September 16th to September 30th |
Work on Vocabulary Analysis Plugin |
Week 9-10 |
September 30th to October 14th |
Work on Hadoop Plugin |
Week 11 |
October 14th to October 21st |
Extra Week for catching up in case of delays. Code review. |
Week 12 |
October 21st to October 28th |
Do documentation for code till date. |