This Quick Start guide is for readers who are new to the use of virtual machines, Apache Ambari, and/or the Apache Hadoop component stack, who would like to install and use a small local Hadoop cluster. The instructions are for a local host machine running OS X.
The following instructions cover four main steps for installing Ambari and HDP using VirtualBox and Vagrant:
- Install VirtualBox and Vagrant.
- Install and start one or more Linux virtual machines. Each machine represents a node in a cluster.
- On one of the virtual machines, download, install, and deploy the version of Ambari you wish to use.
- Using Ambari, deploy the version of HDP you wish to use.
When you complete the example in this Quick Start, you should have a three-node cluster of virtual machines running Ambari 2.4.1.0 and HDP 2.5.0 (unless you specify different repository versions).
Once VirtualBox and Vagrant are installed, steps 2 through 4 can be done multiple times to change versions, create a larger cluster, and so on. There is no need to repeat step 1 unless you want to upgrade VirtualBox and/or Vagrant later.
Note: these steps were most recently tested on MacOS 10.11.6, El Capitan.
Terminology
A virtual machine, or VM, is a software program that exhibits the behavior of a separate computer and is capable of running applications and programs within its own environment.
A virtual machine is often called a guest, because it runs within another computing environment--usually known as the host. For example, if you install three Linux VMs on a Mac, the Mac is the host machine; the three Linux VMs are guests.
Multiple virtual machines can exist within a single host at one time. In the following examples, one or more virtual machines run on a host machine running OS X. OS X is the primary operating system. The virtual machines (guests) are installed under OS X. The virtual machines run Linux in separate environments on OS X. Thus, your Mac is the "host" machine, and the virtual machines that run Ambari and Hadoop are called "guest" machines.
Prerequisites
You will need the following resources for this Quick Start:
- A solid internet connection, preferably with at least 5 MB available download bandwidth.
- If you are installing the VMs on a Mac, at least 16 GB of memory (assuming 3 GB per VM)
Install VirtualBox and Vagrant
VirtualBox is a software virtualization package that installs on an operating system as an application. It allows you to run multiple virtual machines at the same time. In this Quick Start you will use VirtualBox to run Linux nodes within VirtualBox on OS X:

Vagrant is a tool that makes it easier to work with virtual machines. It helps automate the work of setting up, running, and removing virtual machine environments. Using Vagrant, you can install and run a preconfigured cluster environment with Ambari and the HDP stack.
- Download and install VirtualBox from https://www.virtualbox.org/wiki/Downloads. This Quick Start has been tested on version 5.1.6.
- Download and install Vagrant from https://www.vagrantup.com/downloads.html.
Clone the
ambari-vagrantGitHub repository into a convenient folder on your Mac. Navigate to the folder, and enter the following command from the terminal:git clone https://github.com/u39kun/ambari-vagrant.git
The repository contains scripts for setting up Ambari virtual machines on several Linux distributions.
Add virtual machine hostnames and addresses to the
/etc/hostsfile on your computer. The following command copies a set of host names and addresses fromambari-vagrant/append-to-etc-hosts.txtto the end of the/etc/hostsfiles:sudo -s 'cat ambari-vagrant/append-to-etc-hosts.txt >> /etc/hosts'
Use the
vagrantcommand to create a private key to use with Ambari:vagrant
The
vagrantcommand displays Vagrant command information, and then it creates a private key in the file~/.vagrant.d/insecure_private_key.
Start Linux Virtual Machines
The ambari-vagrant directory (cloned from GitHub) contains several subdirectories, each for a specific Linux distribution. Each subdirectory has scripts and configuration files for running Ambari and HDP on that version of Linux.
To start one or more virtual machines:
Change your current directory to
ambari-vagrant:cd ambari-vagrant
If you run an
lscommand on theambari-vagrantdirectory, you will see subdirectories for several different operating systems and operating system versions.cdinto the OS subdirectory for the OS you wish to use. CentOS is recommended, because it is quicker to launch than other operating systems.
The remainder of this example uses CentOS 7.0 . (To install and use a different version or distribution of Linux, specify the other directory name in place ofcentos7.0.)cd centos7.0
Important: All VM
vagrantcommands operate within your current directory. Be sure to run them from the local (Mac) subdirectory associated with the VM operating system that you have chosen to use. If you attempt to run avagrantcommand from another directory, it will not find the VM.Copy the private key into the directory associated with the chosen operating system.
For this example, which usescentos7.0, issue the following command:cp ~/.vagrant.d/insecure_private_key .
(Optional) If you have at least 16 GB of memory on your Mac, consider increasing the amount of memory allocated to the VMs.
Edit the following line inVagrantfile, increasing allocated memory from 3072 to 4096 or more; for example:vb.customize ["modifyvm", :id, "--memory", 4096] # RAM allocated to each VM
- Every virtual machine will have a directory called
/vagrantinside the VM. This corresponds to theambari-vagrant/<os>directory on your local computer, making it easy to transfer files back and forth between your host Mac and the virtual machine. If you have any files to access from within the VM, you can place them in this shared directory. Start one or more VMs, using the
./up.shcommand. Each VM will run one HDP node. Recommendation: if you have at least 16GB of RAM on your Mac and wish to run a small cluster, start with three nodes../up.sh <# of VMs to launch>
For example, the following command starts 3 VMs:
./up.sh 3
On an early 2013 MacBook Pro, 2.7 GHz core i7 and 16 GB RAM, this step takes five minutes. For CentOS 7.0, the hostnames arec7001,c7002, andc7003.
Additional notes:
- If you ran the VMs before and usedvagrant destroyto remove the VM's, this is the step at which you would recreate and start the VMs.
- The defaultVagrantfile(in each OS subdirectory) can create up to 10 virtual machines.
- Theup.sh 3command is equivalent tovagrant up c700{1..3}.
- The fully-qualified domain name (FQDN) for each VM has the format<os-code>[01-10].ambari.apache.org, where<os-code>isc59(CentOS 5.9),c64(CentOS 6.4), etc. For example,c5901.ambari.apache.orgwill be the FQDN for node 01 running CentOS 5.9.
- The IP address for each VM has the format192.168.<os-subnet>.1[01-10], where<os-subnet>is64for CentOS 6.4,70for CentOS 7.0, and so on. For example,192.168.70.101will be the IP address for CentOS 7.0 nodec7001.Check the status of your VM(s), and review any errors. The following example shows the results of
./upsh 3for three VMs running with CentOS 7.0:LMBP:centos7.0 lkg$ vagrant status Current machine states: c7001 running (virtualbox) c7002 running (virtualbox) c7003 running (virtualbox) c7004 not created (virtualbox) c7005 not created (virtualbox) c7006 not created (virtualbox) c7007 not created (virtualbox) c7008 not created (virtualbox) c7009 not created (virtualbox) c7010 not created (virtualbox)
In the preceding list, three virtual machines are installed and running.
- At this point, you can snapshot the VMs to have a fresh set of running machines to reuse if desired. This is especially helpful when installing Apache Ambari and the HDP stack for the first time; it allows you to back out to fresh VMs and reinstall Ambari and HDP if you encounter errors. For more information about snapshots, see the
vagrant snapshotcommand in "Basic Vagrant Commands," later in this Quick Start.
Access Virtual Machines
Use the following steps when you want to access a running virtual machine:
To log on to a virtual machine, use the
vagrant sshcommand on your host machine, and specify the hostname; for example:LMBP:centos7.0 lkg$ vagrant ssh c7001 Last login: Tue Jan 12 11:20:28 2016 [vagrant@c7001 ~]$
From this point onward, this terminal window is connected to the virtual machine until you exit the virtual machine. All commands go to the VM, not to your Mac.
Recommendation: Open a second terminal window for your Mac. This is useful when accessing the Ambari Web UI. To distinguish between the two, terminal windows typically list the computer name or VM hostname on each command-line prompt and at the top of the terminal window.When you first access the VM you will be logged in as user
vagrant. Switch to therootuser; be sure to include the space between "su" and "-":[vagrant@c7001 ~]$ sudo su - Last login: Sun Sep 25 01:34:28 AEST 2016 on pts/0 root@c7001:~#
If at any time you wish to return the terminal window to your host machine:
- Use the
logoutcommand to log out of root - Use the
exitcommand to return to your host machine (Mac)
- Use the
At this point, the VMs are still running in the background. You can re-issue the vagrant ssh command later, to reconnect, or you can stop the virtual machines. For more information, see the vagrant snapshot command in "Basic Vagrant Commands," later in this Quick Start.
Install Ambari on the Virtual Machines
Prerequisites: Before installing Ambari, the following software packages must be installed on your VM:
rpm
curl
wget
pdsh
On CentOS: to check if a package is installed, run yum info <package-name>. To install a package, run yum install <package-name>.
To install Ambari, you can build it yourself from source (see Ambari Development), or you can use published binaries.
As this is a Quick Start Guide to get you going quickly, ready-made publicly-available binaries are referenced. Note that these binaries were built and publicly made available via Hortonworks, a commercial vendor for Hadoop. This is for your convenience. Note that using the binaries shown here would make HDP, Hortonworks' distribution, available to be installed via Apache Ambari. The instructions here should still work (only the repo URLs need to be changed) if you have Ambari binaries from any other vendor/organization/individuals (the instructions here can be updated if anyone wanted to expand this to include such ready-made, publicly accessible binaries from any source - such contributions are welcome). This would also work if you had built the binaries yourself.
From the terminal window on the VM where you want to run the main Ambari service, download the Ambari repository. The following commands download Ambari version 2.5.1.0 and install ambari-server. To install a different version of Ambari, specify the appropriate repo URL. Choose the appropriate commands for the operating system on your VMs:
# CentOS 6 (for CentOS 7, replace centos6 with centos7 in the repo URL)
#
# to test public release 2.5.1
wget -O /etc/yum.repos.d/ambari.repo http://public-repo-1.hortonworks.com/ambari/centos6/2.x/updates/2.5.1.0/ambari.repo
yum install ambari-server -y

# Ubuntu 14 (for Ubuntu 16, replace ubuntu14 with ubuntu16 in the repo URL)
# to test public release 2.5.1
wget -O /etc/apt/sources.list.d/ambari.list http://public-repo-1.hortonworks.com/ambari/ubuntu14/2.x/updates/2.5.1.0/ambari.list
apt-key adv --recv-keys --keyserver keyserver.ubuntu.com B9733A7A07513CAD
apt-get update
apt-get install ambari-server -y

# SUSE 11 (for SUSE 12, replace suse11 with suse12 in the repo URL)
# to test public release 2.5.1
wget -O /etc/zypp/repos.d/ambari.repo http://public-repo-1.hortonworks.com/ambari/suse11/2.x/updates/2.5.1.0/ambari.repo
zypper install ambari-server -y
On an early 2013 MacBook Pro, 2.7 GHz core i7 and 16 GB RAM, this step takes seven minutes. Timing also depends on internet download speeds.
To install Ambari with default settings, set up and start ambari-server:
ambari-server setup -s
ambari-server start
To check Ambari Server status, issue the following command:ambari-server status
After Ambari Server has started, launch a browser on your host machine (Mac). Access the Ambari Web UI at http://<hostname>.ambari.apache.org:8080. The <hostname> part of the URL specifies the VM where you installed Ambari; for example:
http://c7001.ambari.apache.org:8080
Note: The Ambari Server can take some time to launch and be ready to accept connections. Keep trying the URL until you see the login page.
At this point, you can snapshot the VMs to have a cluster with Ambari installed, to rerun later if desired. This is especially helpful when installing Apache Ambari and the HDP stack for the first time; it allows you to back out to fresh VMs running Ambari, and reinstall a fresh HDP stack if you encounter errors. For more information about snapshots, see the vagrant snapshot command in "Basic Vagrant Commands," later in this Quick Start.
Install the HDP Stack
The following instructions describe basic steps for using Ambari to install HDP components.
On the Ambari screen, login using default username
admin, passwordadmin.On the welcome page, choose "Launch Install Wizard."
Specify a name for your cluster, and then click Next.
On the Select Version page, choose which version of HDP to install, and then click Next.
On the Install Options page, complete the following steps:
List the FQDNs of the virtual machines. For example:
c7001.ambari.apache.org
c7002.ambari.apache.org
c7003.ambari.apache.org
Alternatively, you can use a range expression:
c70[01-03].ambari.apache.org
Upload the
insecure_private_keyfile that you created earlier: browse to theambari-vagrantdirectory, navigate to the operating system folder for your VM's, and choose the key file.Change the SSH User Account to
vagrant.Click "Register and Confirm."
On the Confirm Hosts page, Ambari displays installation status.
If you see a yellow banner with the following message, click on the link to review warnings:
See the Troubleshooting section (later on this page) for more information.- When all host checks pass, close the warning window:

- Click Next to continue:
- On the Choose Services page, uncheck any components that you do not expect to use. If any are required for selected components, Ambari will request to add them back in.
- On the Assign Masters screen, choose hosts or simply click Next to use default values.
- On the Assign Slaves and Clients screen, choose hosts or simply click Next to use default values.
- On the Customize Services screen
- Review services with warning notes, such as Hive and Ambari Metrics in the following image:

- Specify missing property values (such as admin passwords) as directed by the installation wizard. When all configurations have been addressed, click Next.
- Review services with warning notes, such as Hive and Ambari Metrics in the following image:
- On the Review screen, review the service definitions, and then click Next.
- The Install, Start and Test page shows deployment status. This step takes a while; on an early 2013 MacBook Pro, 2.7 GHz core i7 and 16 GB RAM, this step takes 45 minutes.
- When the cluster installs successfully, you can snapshot the VMs to have a fresh cluster with Ambari and HDP installed, to rerun later if desired. This allows you to experiment with the cluster and quickly restore back to a previous state if you wish. For more information about snapshots, see the
vagrant snapshotcommand in "Basic Vagrant Commands," later in this Quick Start.
Troubleshooting
This subsection describes a few error conditions that might occur during Ambari installation and HDP cluster deployment:
Confirm Hosts
If you see an error similar to the following on the Confirm Hosts page of the Ambari installation wizard, click the link to see the warnings:
'Some warnings were encountered while performing checks against the 3 registered hosts above. Click here to see the warnings."
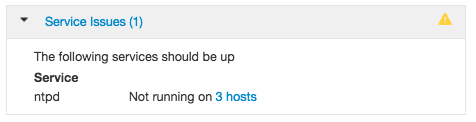
ntpd Error
On the Host Checks window, the following warning indicates that you need to start ntpd on each host:
To start the services, for each VM navigate to a terminal window (on your Mac, vagrant ssh <VM-name>). Issue the following commands:
service ntpd startservice ntpd status
You should see messages confirming that ntpd is running. Navigate back to the Host Checks window of the Ambari installation wizard and click Rerun Checks. When all checks complete successfully, click Close to continue the installation process.
Install, Start and Test
If the Install, Start and Test step fails with the following error during DataNode deployment:
Error: Package: snappy-devel-1.0.5-1.el6.x86_64 (HDP-UTILS-1.1.0.20)
Requires: snappy(x86-64) = 1.0.5-1.el6
Installed: snappy-1.1.0-3.el7.x86_64 (@anaconda/7.2)
Run the following commands under the root account on each VM:
yum remove -y snappy-1.1.0-3.el7.x86_64
yum install snappy-devel -y
Stopping and Restarting Virtual Machines
Hadoop is a complex ecosystem with a lot of status checks and cross-component messages. This can make it challenging to halt and restart several VMs and restore them later without warnings or errors.
Recommendations
If you would like to save state for a period of time and you plan to stop using your Mac during that time, if you sleep your Mac the cluster should continue from where it left off after you wake the Mac.
When stopping a set of VMs--if you don't need to save cluster state--it can be helpful to stop all services first, stop ambari-server (ambari-server stop), and then issue a Vagrant halt or suspend command.
When restarting a cluster after halting or taking a snapshot, check Ambari server status and restart it if necessary:
   ambari-server status
   ambari-server start
After logging into the Ambari Web UI, expect to see alert warnings or errors due to timeout conditions. Check the associated messages to determine whether they might affect your use of the virtual cluster. If so, it can be helpful to stop and restart one or more associated components.
Reference: Basic Vagrant Commands
The following table lists several common Vagrant commands. For more information, see Vagrant Command-Line Interface documentation.
| Command | Description |
|---|---|
| Create or rebuild a VM | |
| vagrant up <vm-name> | Create and configure guest machines. Example:
Note: if you do not specify the |
| Tear down a VM | |
| vagrant suspend [<vm-name>] | Save the current running state of a VM and stop the VM. A suspend effectively saves the exact point-in-time state of a machine. When you issue a When you are ready to begin working with it again, run Optional: Specify a specific VM to suspend. |
| vagrant halt <vm-name> | Gracefully shut down the guest operating system and power down the VM. When you are ready to begin working with it again, use vagrant up. The main benefit of halt is that it cleanly shuts down your machine, preserves disk contents, and allows VMs to be cleanly started again. The downside is that it takes some time to restart the VM, and the guest machine still consumes disk space. |
| vagrant destroy -f [<vm-name>] | Remove all traces of the guest machine from your system. The Optional: Specify a specific VM to destroy. |
| Connect to a VM | |
| vagrant ssh <vm-name> | Starts a SSH session to the host. Example: |
| Additional commands | |
| vagrant status [<vm-name>] | Shows which VMs are running, suspended, and so on. |
| vagrant snapshot | A Vagrant snapshot saves the current state of a VM so that you can restart the VM from the same point at a future time. Commands include push, pop, save, restore, list, and delete. For more information, see https://www.vagrantup.com/docs/cli/snapshot.html. Note: Upon resuming a snapshot, you may find that time-sensitive services such as the (HBase RegionServer) may be down. If this happens, you will need to restart those services. |
| vagrant --help | List information about Vagrant commands. |
Recommendation: After you start the VMs--but before you run anything on the VMs–save a snapshot. This allows you to restore the initial state of your VMs. This process is much faster than starting the VMs from scratch and then reinstalling Ambari and HDP. You can return to the initial state without destroying other named snapshots that you create later.
More information: https://www.vagrantup.com/docs/getting-started/teardown.html
If you have favorite ways of starting and stopping VMs running a Hadoop cluster, please feel free to share them in the Comments section. Thanks!