The following sub-sections describe the steps involved in configuring a cartridge on the OpenStack IaaS:
Step 1 - Spawning an instance
Follow the instructions below to spawn a configured instance of Debian/Ubuntu based Linux 12.04.1 LTS distributions on OpenStack:
- Log in to the OpenStack management console.

- Click Access & Security on the menu in the left side and click Create Security Group.

- In the Add Rule window, enter the configurations of the rules for the security group as required and click Add. For more information on the ports that should be defined, see Common IaaS Configurations.

- In the Create an Image window, enter the configurations for the image as required and click Create Image.

- In the Create Key Pair window, enter the configurations for the key pair as required and click Create Key Pair. When the message is prompted, download the key pair and keep it saved in a preferred location.

- In the Details section of the Launch Instance window, enter the configurations for the instance as required.

- In the Access & Security section enter the configurations for the instance as required and click Create.
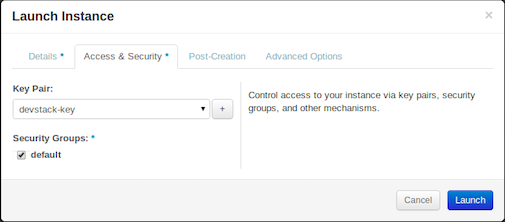
- Select the created instance in the Instances window and click Launch instance.
Step 2 - Configuring the cartridge
DevOps can create a cartridge either by using the quick guide or the detailed guide, as explained below: Follow the instructions below to configure a cartridge image for OpenStack or EC2. These instructions describe how to create a cartridge from an existing Debian/Ubuntu based Linux 12.04.1 LTS image as a quick guide. Obtain a spawned instance in the respective IaaS to create a cartridge on top of it and start the image using your IaaS. Use the complete set of instructions below to configure a cartridge image for Apache Stratos on Debian/Ubuntu based Linux 12.04.1 LTS distributions: Edit the Use the following command to set the timezone value. In this case we are setting the timezone to Etc/UTC: Execute the Follow the instructions below to configure a cartridge image for OpenStack or EC2. These instructions describe how to create a cartridge from an existing Debian/Ubuntu based Linux 12.04.1 LTS image as a more detailed guide. Obtain a spawned instance in the respective IaaS to create a cartridge on top of it and start the Ubuntu image 12.04.1 using your IaaS. Navigate into your Ubuntu image using SSH and get root access. Install zip. Navigate to the root directory. Create a new folder named Create a Make the Create an Make the Navigate to the Create a new directory named Create a file named Make the Create a file named Execute the Quick Guide
sudo -i
apt-get install zip unzip
mkdir -p /root/bin
cd /root/bin
wget "https://git-wip-us.apache.org/repos/asf?p=stratos.git;a=blob_plain;f=tools/puppet3-agent/config.sh;hb=HEAD" -O config.sh
chmod +x config.sh
wget "https://git-wip-us.apache.org/repos/asf?p=stratos.git;a=blob_plain;f=tools/puppet3-agent/init.sh;hb=HEAD" -O init.sh
chmod +x init.sh
mkdir -p /root/bin/puppetinstall
wget "https://git-wip-us.apache.org/repos/asf?p=stratos.git;a=blob_plain;f=tools/puppet3-agent/puppetinstall/puppetinstall;hb=HEAD" -O puppetinstall/puppetinstall
chmod +x puppetinstall/puppetinstall
wget "https://git-wip-us.apache.org/repos/asf?p=stratos.git;a=blob_plain;f=tools/puppet3-agent/stratos_sendinfo.rb;hb=HEAD" -O stratos_sendinfo.rb
/root/bin/puppetinstall/puppetinstall script to set the TIMEZONE value to match the timezone set on the Puppet Master.
sed -i 's:^TIMEZONE=.*$:TIMEZONE=\"Etc/UTC\":g' /root/bin/puppetinstall/puppetinstall
config.sh file and provide the stratos service-name, puppet master IP, and puppet master hostname when prompted as follows:stratos service-name - Enter one of the modules that are provided as templates in Stratos. For further details on the modules that can be used as values, see step 7(f) of Configuring Puppet Master. If you enter 'default', a generic cartridge will be created.puppet master IP - Enter the IP address of the machine on which Puppet Master is configured.puppet master hostname - This should be identical to the output received when running the hostname command. See step 5(b) of Configuring Puppet Master for further details on executing the hostname command.
This script will install and configure puppet agent, do you want to continue [y/N] y
Please provide stratos service-name: php
Please provide puppet master IP: 192.168.1.1
Please provide puppet master hostname [puppet.test.org]: puppet.test.org
Node Id 076227021438.default.php

Domain puppet.test.org
Running puppet installation with arguments: -n076227021438.default.php -dpuppet.test.org -s192.168.1.1
Detailed Guide
sudo -i
apt-get install zip unzip
cd /root bin in the root/ directory.
mkdir bin config.sh file in the/root/bin/ directory, copy the configurations from the config.sh file, and save the file .config.sh file executable.
chmod +x config.shinit.sh file in the /root/bin/ directory, copy the configurations from the init.sh file, and save the file.init.sh file executable.
chmod +x init.sh /root/bin/ directory.
cd /root/bin/ puppetinstall in the /root/bin/ directory.
mkdir puppetinstallpuppetinstall in the /root/bin/puppetinstall/ directory, copy the configurations from the puppet install file, and save the file.puppetinstall file executable.
chmod +x puppetinstall
stratos_sendinfo.rb inside the /root/bin/ directory. Copy the configurations from the stratos_sendinfo.rb file and save the file .config.sh file and provide the Stratos service-name, p uppet master IP, and puppet master hostname when prompted as follows:stratos service-name - Enter one of the modules that are provided as templates in Stratos. For further details on the modules that can be used as values, see step 7(f) of Configuring Puppet Master. If you enter default, a generic cartridge will be created.puppet master IP - Enter the IP address of the machine on which Puppet Master is configured.puppet master hostname - This should be identical to the output received when running the hostname command. See step 5(b) of Configuring Puppet Master for further details on executing the hostname command.
This script will install and configure puppet agent, do you want to continue [y/N] y
Please provide stratos service-name: php
Please provide puppet master IP: 192.168.1.1
Please provide puppet master hostname [puppet.test.org]: puppet.test.org
Node Id 076227021438.default.php

Domain puppet.test.org
Running puppet installation with arguments: -n076227021438.default.php -dpuppet.test.org -s192.168.1.1
Step 3 - Repackaging the cartridge as a machine image
Follow the instructions below to repackage the cartridge as a machine image on OpenStack:
- Log in to the OpenStack management console.
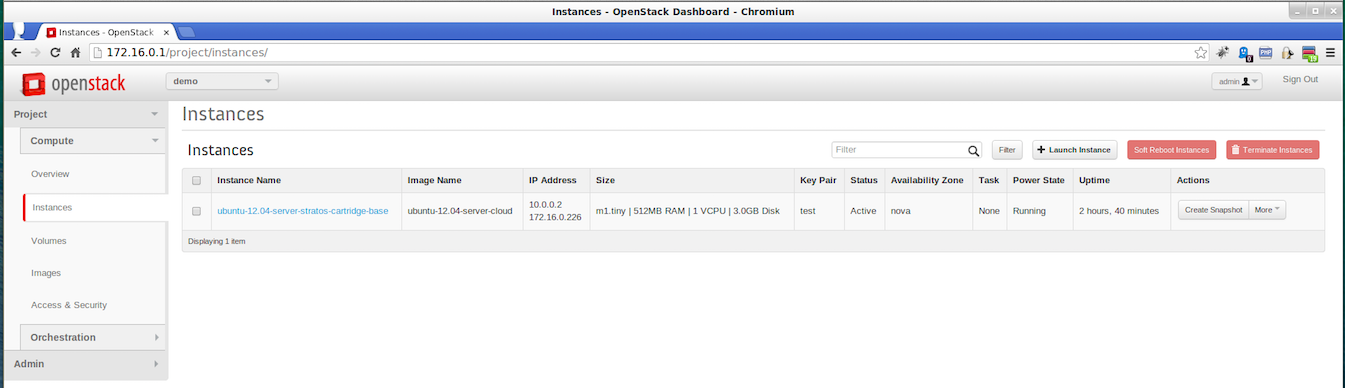
- Navigate to Instances on the menu on the left side.
- Select the respective instance and click Create Snapshot.
- Enter a name for the image and click Create Snapshot.

- Navigate to Images on the menu on the left side and get the Image ID that will be used in the Sample Cartridge Definition JSON file.

After you have finished creating the cartridge, make a note of the image ID you created for the cartridge, as you will need this when you use Stratos Manager to deploy the cartridge. For more information on deploying the created cartridge using the Stratos Manager, see Configuring Stratos.
Overview
Content Tools
Apps