...
- SUN JDK 6.0+(J2SE 1.6)
- Eclipse IDS for Java EE Developers, which is platform specific
- Apache Geronimo Eclipse Plugin 3v3.*0
- OSGi Application Development Tools
- Apache Geronimo Server 3v3.*0
Details on installing Eclipse are provided in the Development environment section. This tutorial is organized in the following sections:
...
- Launch Eclipse and switch to Java EE perspective.

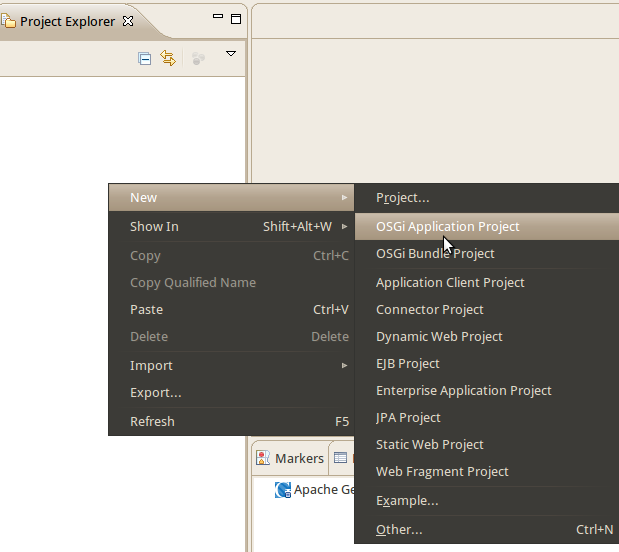
- Right click under the project explorer and select OSGi Enterprise Application Project as shown in the figure.
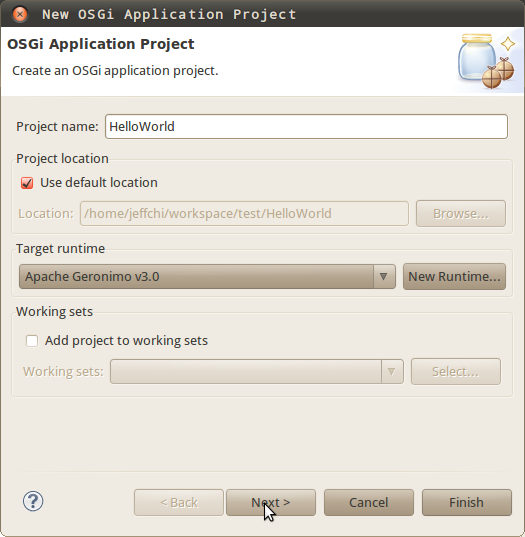
- Name the project as HelloWorld and click Next. Make sure that the target runtime is Apache Geronimo v3.0.
- Click New Bundle... to define api, client and server bundles to be included in this application. Note that interface and implementation classes should be kept in separate bundles so that the implementations could be replaced independently of their interfaces. Select Change the active Target Platform if necessary.
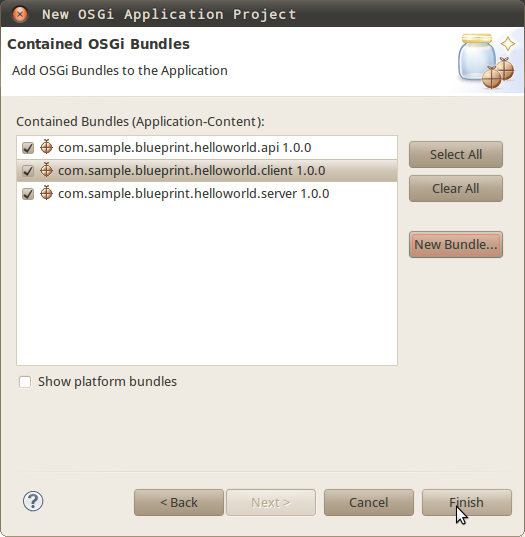
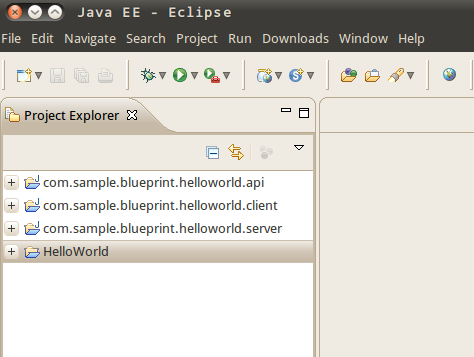
- Click Finish and all relevant projects are created as followed.
Adding a class to the api project
...
- Right-click the project
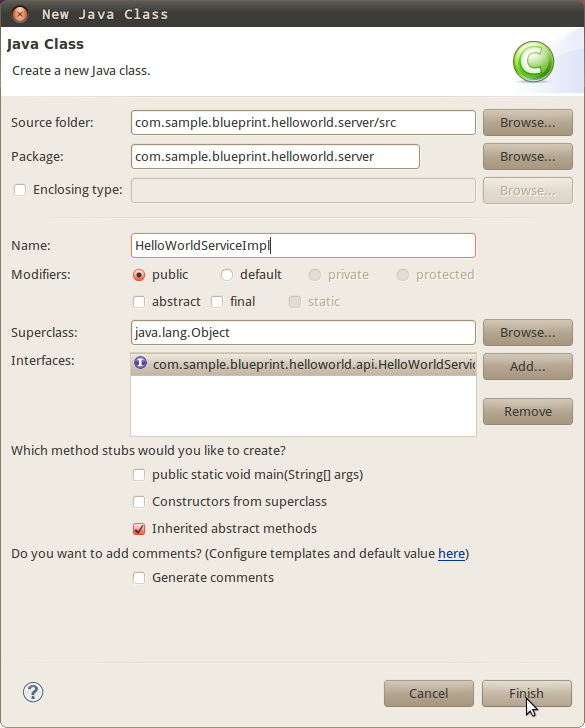
com.sample.blueprint.helloworld.serverand create a new class as shown in the figure.
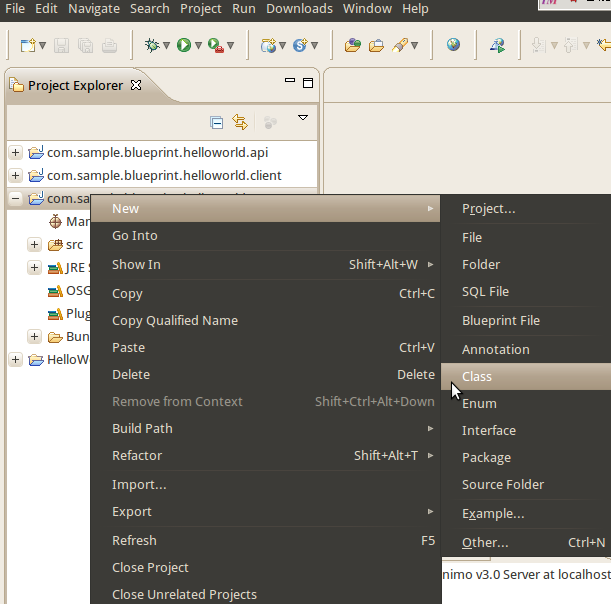
- Name the class as HelloWorldServiceImpl and the interface as HelloWorldService, then click Finish.
- Modify the code of
HelloWorldServiceImplas follows.Code Block java java title HelloWorldServiceImpl.java package com.sample.blueprint.helloworld.server; import com.sample.blueprint.helloworld.api.*; public class HelloWorldServiceImpl implements HelloWorldService { public void hello() { System.out.println("======>>> A message from the server: Hello World!"); } public void startUp() { System.out.println("======>>> Starting HelloWorld Server"); } } - Right-click the project name and create a Blueprint file, then modify the xml file as follows. The blueprint file is placed under
OSGI-INF\blueprintdirectory automatically.Code Block xml blueprint.xml <?xml version="1.0" encoding="UTF-8"?> <blueprint xmlns="http://www.osgi.org/xmlns/blueprint/v1.0.0"> <bean id="helloservice" class="com.sample.blueprint.helloworld.server.HelloWorldServiceImpl" init-method="startUp"> </bean> <service ref="helloservice" interface="com.sample.blueprint.helloworld.api.HelloWorldService"/> </blueprint>
- Modify
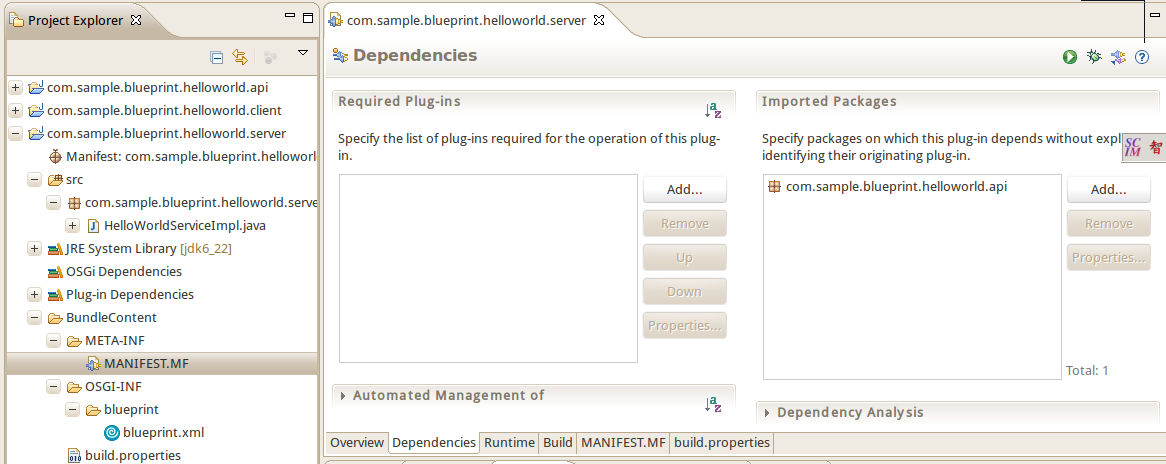
META-INF\MANIFEST.MFand make surecom.sample.blueprint.helloworld.apiis listed under Import-Pakcage.
Creating the client to consume the services
- Right-click the project
com.sample.blueprint.helloworld.clientand create a new class as shown in the figure.

- Name the class as HelloWorldClient and click Finish.

- Modify the code of
HelloWorldClientas follows.Code Block java java title HelloWorldClient.java package com.sample.blueprint.helloworld.client; import com.sample.blueprint.helloworld.api.HelloWorldService; public class HelloWorldClient { HelloWorldService helloWorldService = null; public void startUp() { System.out .println("========>>>>Client HelloWorld: About to execute a method from the Hello World service"); helloWorldService.hello(); System.out .println("========>>>>Client HelloWorld: ... if you didn't just see a Hello World message something went wrong"); } public HelloWorldService getHelloWorldService() { return helloWorldService; } public void setHelloWorldService(HelloWorldService helloWorldService) { this.helloWorldService = helloWorldService; } } - Right-click the project name and create a Blueprint file, then modify the xml file as follows. The xml is placed under
OSGI-INF\blueprintdirectory automatically.Code Block xml blueprint.xml <?xml version="1.0" encoding="UTF-8"?> <blueprint xmlns="http://www.osgi.org/xmlns/blueprint/v1.0.0"> <reference id="helloservice" interface="com.sample.blueprint.helloworld.api.HelloWorldService" /> <bean id="helloclient" class="com.sample.blueprint.helloworld.client.HelloWorldClient" init-method="startUp"> <property name="helloWorldService" ref="helloservice" /> </bean> </blueprint>
- Modify
META-INF\MANIFEST.MFand make surecom.sample.blueprint.helloworld.apiis listed under Import-Pakcage.

Run and deploy
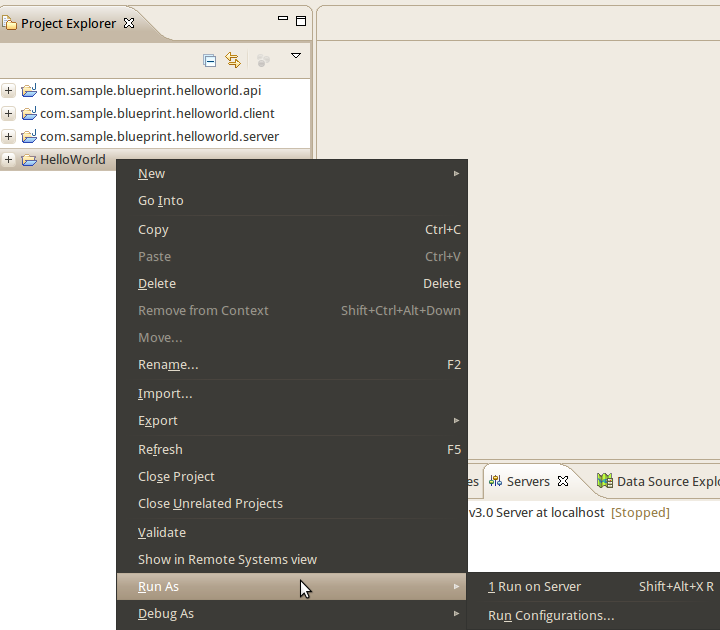
- Deploy the HelloWorld project on the server.
- Check the console of the server, the messages displays as each bundles initialized sequentially.
