Follow the instructions below to deploy Apache Stratos on a preferred IaaS, i.e., Kubernetes, Amazon Elastic Compute Cloud (EC2), OpenStack and Google Compute Engine (GCE), in a single JVM:

Step 1 - Configure external databases for Stratos

For testing purposes you can run your Stratos setup on the internal database (DB), which is the H2 DB. In the latter mentioned scenario, you do not need to setup the internal DB. However, in a production environment it is recommend to use an external RDBMS (e.g., MySQL).

Follow the instructions given below to configure Stratos with external databases:

Stratos 4.1.0 requires the following external databases: User database, Governance database and Config database. Therefore, before using the above databases, you need to create these DBs and configure Stratos as mentioned below.

  1. Copy the MySQL JDBC driver to the <STRATOS_HOME>/repository/components/lib directory.

  2. Create 3 empty databases, in the <STRATOS_HOME>/dbscripts directory, in your MySQL server with the following names and grant permission to the databases, so that they can be accessed through a remote server.

    stratos_registry_db
    stratos_user_db
    stratos_config_db
     

  3. Navigate to the <STRATOS_HOME>/repository/conf/datasources directory and add the datasources that correspond to your DB in the master-datasources.xml file.
    Change the IP addresses and ports based on your environment.

    <datasource>
        <name>STRATOS_GOVERNANCE_DB</name>
        <description>The datasource used for governance MySQL database</description>
        <jndiConfig>
            <name>jdbc/registry</name>
        </jndiConfig>
        <definition type="RDBMS">
            <configuration>
                <url>jdbc:mysql://[MYSQL_HOSTNAME]:[MYSQL_PORT]/stratos_registry_db?autoReconnect=true</url>
                <username>[USERNAME]</username>
                <password>[PASSWORD]</password>
                <driverClassName>com.mysql.jdbc.Driver</driverClassName>
                <maxActive>50</maxActive>
                <maxWait>60000</maxWait>
                <testOnBorrow>true</testOnBorrow>
                <validationQuery>SELECT 1</validationQuery>
                <validationInterval>30000</validationInterval>
            </configuration>
        </definition>
     </datasource>
     <datasource>
        <name>STRATOS_CONFIG_DB</name>
        <description>The datasource used for CONFIG MySQL database</description>
        <jndiConfig>
            <name>jdbc/stratos_config</name>
        </jndiConfig>
        <definition type="RDBMS">
            <configuration>
                <url>jdbc:mysql://[MYSQL_HOSTNAME]:[MYSQL_PORT]/stratos_config_db?autoReconnect=true</url>
                <username>[USERNAME]</username>
                <password>[PASSWORD]</password>
                <driverClassName>com.mysql.jdbc.Driver</driverClassName>
                <maxActive>50</maxActive>
                <maxWait>60000</maxWait>
                <testOnBorrow>true</testOnBorrow>
                <validationQuery>SELECT 1</validationQuery>
                <validationInterval>30000</validationInterval>
            </configuration>
        </definition>
     </datasource>
     <datasource>
        <name>STRATOS_USER_DB</name>
        <description>The datasource used for userstore MySQL database</description>
        <jndiConfig>
            <name>jdbc/userstore</name>
        </jndiConfig>
        <definition type="RDBMS">
            <configuration>
                <url>jdbc:mysql://[MYSQL_HOSTNAME]:[MYSQL_PORT]/stratos_user_db?autoReconnect=true</url>
                <username>[USERNAME]</username>
                <password>[PASSWORD]</password>
                <driverClassName>com.mysql.jdbc.Driver</driverClassName>
                <maxActive>50</maxActive>
                <maxWait>60000</maxWait>
                <testOnBorrow>true</testOnBorrow>
                <validationQuery>SELECT 1</validationQuery>
                <validationInterval>30000</validationInterval>
            </configuration>
        </definition>
    </datasource>
  4. Navigate to the <STRATOS_HOME>/repository/conf directory and change the datasources in both the user-mgt.xml and identity.xml files as follows: 

    <Property name="dataSource">jdbc/userstore</Property>
  5. Navigate to the <STRATOS_HOME>/repository/conf directory and add the following configurations in the registry.xml file. Change your IP addresses and ports based on your environment.

    <dbConfig name="governance">
        <dataSource>jdbc/registry</dataSource>
    </dbConfig>
    <remoteInstance url="https://localhost:9443/registry">
        <id>governance</id>
        <dbConfig>governance</dbConfig>
        <readOnly>false</readOnly>
        <registryRoot>/</registryRoot>
        <enableCache>true</enableCache>
        <cacheId>root@jdbc:mysql://52.88.160.106:3306/stratos_registry_db</cacheId>
    </remoteInstance>
    <dbConfig name="config">
        <dataSource>jdbc/stratos_config</dataSource>
    </dbConfig>
    <remoteInstance url="https://localhost:9443/registry">
        <id>config</id>
        <dbConfig>config</dbConfig>
        <readOnly>false</readOnly>
        <registryRoot>/</registryRoot>
        <enableCache>true</enableCache>
        <cacheId>root@jdbc:mysql://52.88.160.106:3306/stratos_config_db</cacheId>
    </remoteInstance>
    <mount path="/_system/governance" overwrite="true">
        <instanceId>governance</instanceId>
        <targetPath>/_system/governance</targetPath>
    </mount>
    <mount path="/_system/config" overwrite="true">
        <instanceId>config</instanceId>
        <targetPath>/_system/config</targetPath>
    </mount>

Step 2 - Setup ActiveMQ

Stratos uses the Message Broker (MB) to handle the communication among all the components in a loosely coupled manner. Currently, Stratos uses Apache ActiveMQ; however, Stratos supports any Advanced Message Queuing Protocol (AMQP) Message Broker.

Follow the instructions below to run ActiveMQ in a separate host:

  1. Download and unzip Apache ActiveMQ.

  2. Start ActiveMQ.

    ./activemq start

Step 3 - Setup and start WSO2 CEP

By default, Stratos is shipped with an embedded  WSO2 Complex Event Processor (CEP). It is recommended to use the embedded CEP only for testing purposes and to configure CEP externally in a production environment. Furthermore, the compatible CEP versions differ based on whether the CEP is internal or external. WSO2 CEP 3.0.0 is embedded into Stratos. However, Stratos uses CEP 3.1.0 when working with CEP externally. 

Configuring CEP internally

Follow the instructions below to configure the embedded CEP:

Update the MB_HOSTNAME and MB_LISTEN_PORT with relevant values in the JMSOutputAdaptor.xml file, which is in the <STRATOS_HOME>/repository/deployment/server/outputeventadaptors directory, as follows:

property name="java.naming.provider.url">tcp://MB_HOSTNAME:MB_LISTEN_PORT</property>

Configuring CEP externally

Follow the instructions below to configure CEP with Stratos as an external component:


Step 1 - Configure the Thrift client
  1. Enable thrift stats publishing in the thrift-client-config.xml file, which is in the <STRATOS_HOME>/repository/conf directory. Here you can set multiple CEP nodes for a High Availability (HA) setup.

    <cep>
       <node id="node-01">
          <statsPublisherEnabled>true</statsPublisherEnabled>
          <username>admin</username>
          <password>admin</password>
          <ip>localhost</ip>
          <port>7611</port>
       </node>
       <!--<node id="node-02">
          <statsPublisherEnabled>true</statsPublisherEnabled>
          <username>admin</username>
          <password>admin</password>
          <ip>10.10.1.1</ip>
          <port>7714</port>
       </node>-->
    </cep>
  2. Restart the Stratos server. You can skip this step if you have not already started the Stratos server.
Step 2 - Configure CEP
  1. If you are configuring the external CEP in the High Availability (HA) mode, create a CEP HA deployment cluster in full-active-active mode. Note that it is recommended to setup CEP in a HA mode.

    Skip this step if you are setting up the external CEP in a single node.

    For more information on CEP clustering see the CEP clustering guide.
    When following the steps in the CEP clustering guide, note that you need to configure all the CEP nodes in the cluster as mentioned in step 3 and only then carryout the preceding steps.

  2. Download the CEP extension from the Stratos product page on the WSO2 website and uncompress the file. The extracted distribution is referred to as <STRATOS_CEP_DISTRIBUTION>.
  3. Copy the following stream-manager-config.xml file from the <STRATOS_CEP_DISTRIBUTION>/wso2cep-3.1.0/streamdefinitions directory to the <CEP_HOME>/repository/conf directory. 
  4. Replace the content in the jndi.properties file, which is in the <CEP_HOME>/repository/conf directory, with the following configurations. Update the message-broker-ip and message-broker-port values.

    connectionfactoryName=TopicConnectionFactory
    java.naming.provider.url=tcp://[MB_IP]:[MB_Port]
    java.naming.factory.initial=org.apache.activemq.jndi.ActiveMQInitialContextFactory
    
    # register some topics in JNDI using the form
    # topic.[jndiName]=[physicalName]
    topic.lb-stats=lb-stats
    topic.instance-stats=instance-stats
    topic.summarized-health-stats=summarized-health-stats
    topic.topology=topology
    topic.ping=ping
  5. Add the following content to the siddhi.extension file, which is in the <CEP_HOME>/repository/conf/siddhi directory.

    org.apache.stratos.cep.extension.GradientFinderWindowProcessor
    org.apache.stratos.cep.extension.SecondDerivativeFinderWindowProcessor
    org.apache.stratos.cep.extension.FaultHandlingWindowProcessor
    org.apache.stratos.cep.extension.ConcatWindowProcessor
    org.apache.stratos.cep.extension.MemeberRequestHandlingCapabilityWindowProcessor
    org.apache.stratos.cep.extension.SystemTimeWindowProcessor
  6. Copy the  following JARs, which are in the <STRATOS_CEP_DISTRIBUTION>/wso2cep-3.1.0/lib directory to the <CEP_HOME>/repository/components/lib directory.

    • org.apache.stratos.cep.310.extension-4.1.5.jar
  7. Copy the following JARs, which are in the <STRATOS_CEP_DISTRIBUTION>/lib directory to the <CEP_HOME>/repository/components/lib directory.

    • org.apache.stratos.messaging-4.1.x.jar

    • org.apache.stratos.common-4.1.x.jar

  8. Download any dependencies on ActiveMQ 5.10.0 or the latest stable ActiveMQ TAR file from activemq.apache.org. The folder path of this file is referred to as <ACTIVEMQ_HOME>. Copy the following ActiveMQ client JARSs from the <ACTIVEMQ_HOME> /lib directory to the <CEP_HOME>/repository/components/lib directory.

    • activemq-broker-5.10.0.jar 

    • activemq-client-5.10.0.jar 

    • geronimo-j2ee-management_1.1_spec-1.0.1.jar 

    • geronimo-jms_1.1_spec-1.1.1.jar 

    • hawtbuf-1.10.jar

  9. Download the commons-lang3-3.4.jar files from commons.apache.org and commons-logging-1.2.jar files from commons.apache.org. Copy the downloaded files to the  <CEP_HOME>/repository/components/lib directory.
  10. Copy the following files from the <STRATOS_CEP_DISTRIBUTION>/wso2cep-3.1.0/eventbuilders directory, which you downloaded in step 2.2, to the <CEP_HOME>/repository/deployment/server/eventbuilders directory:
    • HealthStatisticsEventBuilder.xml
    • LoadBalancerStatisticsEventBuilder.xml
  11. Copy the following file from the <STRATOS_CEP_DISTRIBUTION>/wso2cep-3.1.0/inputeventadaptors directory, which you downloaded in step 2.2, to the <CEP_HOME>/repository/deployment/server/inputeventadaptors directory:
    • DefaultWSO2EventInputAdaptor.xml
  12. Copy the <STRATOS_CEP_DISTRIBUTION>/wso2cep-3.1.0/outputeventadaptors/JMSOutputAdaptor.xml file, which you downloaded in step 2.2, to the <CEP_HOME>/repository/deployment/server/outputeventadaptors directory:
  13. Update the MB_HOSTNAME and MB_LISTEN_PORT with relevant values in the JMSOutputAdaptor.xml file, which you copied in the above step, as follows:

    property name="java.naming.provider.url">tcp://MB_HOSTNAME:MB_LISTEN_PORT</property>
  14. Copy the following files from the <STRATOS_CEP_DISTRIBUTION>/wso2cep-3.1.0/executionplans directory, which you downloaded in step 2.2, to the <CEP_HOME>/repository/deployment/server/executionplans directory:
    • AverageHeathRequest.xml
    • AverageInFlightRequestsFinder.xml
    • GradientOfHealthRequest.xml
    • GradientOfRequestsInFlightFinder.xml
    • SecondDerivativeOfHealthRequest.xml
    • SecondDerivativeOfRequestsInFlightFinder.xml
  15. If you are setting up the external CEP in a single node, change the siddhi.enable.distibuted.processing property, in all the latter mentioned CEP 3.1.0 execution plans, from  RedundantMode  to  false.
  16. Copy the following files from the <STRATOS_CEP_DISTRIBUTION>/wso2cep-3.1.0/eventformatters directory, which you downloaded in step 2.2, to the <CEP_HOME>/repository/deployment/server/eventformatters directory:
    • AverageInFlightRequestsEventFormatter.xml
    • AverageLoadAverageEventFormatter.xml
    • AverageMemoryConsumptionEventFormatter.xml
    • FaultMessageEventFormatter.xml
    • GradientInFlightRequestsEventFormatter.xml
    • GradientLoadAverageEventFormatter.xml
    • GradientMemoryConsumptionEventFormatter.xml
    • MemberAverageLoadAverageEventFormatter.xml
    • MemberAverageMemoryConsumptionEventFormatter.xml
    • MemberGradientLoadAverageEventFormatter.xml
    • MemberGradientMemoryConsumptionEventFormatter.xml
    • MemberSecondDerivativeLoadAverageEventFormatter.xml
    • MemberSecondDerivativeMemoryConsumptionEventFormatter.xml
    • SecondDerivativeInFlightRequestsEventFormatter.xml
    • SecondDerivativeLoadAverageEventFormatter.xml
    • SecondDerivativeMemoryConsumptionEventFormatter.xml
  17. Add the CEP URLs as a payload parameter to the network partition. 

    If you are deploying Stratos on Kubernetes, then add the CEP URLs to the Kubernetes cluster.

    Example: 

    {
        "name": "payload_parameter.CEP_URLS",
        "value": "192.168.0.1:7712,192.168.0.2:7711"
    }

Update the following configuration and artifact files in the Complex Event Processor (CEP):

  1. Download WSO2 Complex Event processor 3.0.0.
  2. Update the port offset of the Complex Event Processor in the in the carbon.xml file, which is found in the <CEP_HOME>/repository/conf/ directory as follows: 
    <offset>4</offset>
    The default offset value given to Complex Event Processor in Apache Stratos is 4. The resulting Complex Event Processor Thrift port is 7615.
  3. Copy the following stream-manager-config.xml file from the <STRATOS_SOURCE_HOME>/extensions/cep/artifacts/stream_definitions directory to <CEP_HOME>/repository/conf directory. Where <STRATOS_SOURCE_HOME> refers to the Apache Stratos source repository.
  4. Replace the content in the jndi.properties file, which is in the <CEP_HOME>/repository/conf directory, with the following configurations. Update the message-broker-ip and message-broker-port values.

    connectionfactoryName=TopicConnectionFactory
    java.naming.provider.url=tcp://[MB_IP]:[MB_Port]
    java.naming.factory.initial=org.apache.activemq.jndi.ActiveMQInitialContextFactory
    
    # register some topics in JNDI using the form
    # topic.[jndiName]=[physicalName]
    topic.lb-stats=lb-stats
    topic.instance-stats=instance-stats
    topic.summarized-health-stats=summarized-health-stats
    topic.topology=topology
    topic.ping=ping
  5. Add the following content to the siddhi.extension file, which is in the <CEP_HOME>/repository/conf/siddhi directory.

    org.apache.stratos.cep.extension.GradientFinderWindowProcessor
    org.apache.stratos.cep.extension.SecondDerivativeFinderWindowProcessor
    org.apache.stratos.cep.extension.FaultHandlingWindowProcessor
    org.apache.stratos.cep.extension.ConcatWindowProcessor
    org.apache.stratos.cep.extension.MemeberRequestHandlingCapabilityWindowProcessor
  6. Build the project in the <STRATOS_SOURCE_HOME>/extensions/cep/stratos-cep-extension directory. Thereafter, copy the org.apache.stratos.cep.extension-4.1.x.jar file that can be found in the <STRATOS_SOURCE_HOME>/extensions/cep/stratos-cep-extension/target  directory, to the <CEP_HOME>/repository/components/lib/ directory.
  7. Download any dependency on 5.9.1 or any latest stable ActiveMQ TAR file from https://activemq.apache.org/download.html. The folder path of this file will be referred to as  <ACTIVEMQ_HOME>. Copy the following ActiveMQ client JARSs from <ActiveMQ_HOME> /lib directory to the <CEP_HOME>/repository/components/lib directory.

    • activemq-broker-5.9.1.jar 

    • activemq-client-5.9.1.jar 

    • geronimo-j2ee-management_1.1_spec-1.0.1.jar 

    • geronimo-jms_1.1_spec-1.1.1.jar 

    • hawtbuf-1.9.jar

  8. Copy the following WSO2 MB client libraries to the <CEP_HOME>/repository/components/dropins directory.
    • andes-client-0.13.wso2v8.1.jar 
    • geronimo-jms_1.1_spec-1.1.0.wso2v1.jar
  9. Download the  commons-lang3-3.4.jar files from commons.apache.org and commons-logging-1.2.jar files from commons.apache.org. Copy the downloaded files to the  <CEP_HOME>/repository/components/lib directory.
  10. Copy the following files from the <STRATOS_SOURCE_HOME>/extensions/cep/artifacts/eventbuilders directory to the <CEP_HOME>/repository/deployment/server/eventbuilders directory:
    • HealthStatisticsEventBuilder.xml
    • InstanceStatisticsEventBuilder.xml
    • LoadBalancerStatisticsEventBuilder.xml
  11. Copy the following files from the respective directories to the  <CEP_HOME>/repository/components/lib directory.
    • org.apache.stratos.messaging-4.1.x-SNAPSHOT.jar file in the <STRATOS_SOURCE_HOME>/components/org.apache.stratos.messaging/target directory.
    • org.apache.stratos.common-4.1.x-SNAPSHOT.jar file in the <STRATOS_SOURCE_HOME>/components/org.apache.stratos.common/target directory.

  12. Copy the following file from <STRATOS_SOURCE_HOME>/extensions/cep/artifacts/inputeventadaptors/ directory to the <CEP_HOME>/repository/deployment/server/inputeventadaptors directory:
    • DefaultWSO2EventInputAdaptor.xml
  13. Copy the following files from the <STRATOS_SOURCE_HOME>/extensions/cep/artifacts/outputeventadaptors directory to the <CEP_HOME>/repository/deployment/server/outputeventadaptors directory:
    • DefaultWSO2EventOutputAdaptor.xml
    • JMSOutputAdaptor.xml
  14. Update the MB_HOSTNAME and MB_LISTEN_PORT with relevant values in the JMSOutputAdaptor.xml file that was copied in the above step, as follows:

    property name="java.naming.provider.url">tcp://MB_HOSTNAME:MB_LISTEN_PORT</property>
  15. Copy the following files from the <STRATOS_SOURCE_HOME>/extensions/cep/artifacts/executionplans directory to the <CEP_HOME>/repository/deployment/server/executionplans directory:
    • AverageHeathRequest.xml
    • AverageInFlightRequestsFinder.xml
    • GradientOfHealthRequest.xml
    • GradientOfRequestsInFlightFinder.xml
    • SecondDerivativeOfHealthRequest.xml
    • SecondDerivativeOfRequestsInFlightFinder.xml
  16. Copy the following files from the <STRATOS_SOURCE_HOME>/extensions/cep/artifacts/eventformatters directory to the <CEP_HOME>/repository/deployment/server/eventformatters directory:
    • AverageInFlightRequestsEventFormatter.xml
    • AverageLoadAverageEventFormatter.xml
    • AverageMemoryConsumptionEventFormatter.xml
    • FaultMessageEventFormatter.xml
    • GradientInFlightRequestsEventFormatter.xml
    • GradientLoadAverageEventFormatter.xml
    • GradientMemoryConsumptionEventFormatter.xml
    • MemberAverageLoadAverageEventFormatter.xml
    • MemberAverageMemoryConsumptionEventFormatter.xml
    • MemberGradientLoadAverageEventFormatter.xml
    • MemberGradientMemoryConsumptionEventFormatter.xml
    • MemberSecondDerivativeLoadAverageEventFormatter.xml
    • MemberSecondDerivativeMemoryConsumptionEventFormatter.xml
    • SecondDerivativeInFlightRequestsEventFormatter.xml
    • SecondDerivativeLoadAverageEventFormatter.xml
    • SecondDerivativeMemoryConsumptionEventFormatter.xml

Step 4 - Setup and start WSO2 DAS (Optional)

This step is only relevant to Stratos 4.1.5.
Skip this step if you do not want to enable monitoring and metering in Stratos using DAS. Even though this step is optional we recommend that you enable monitoring and metering in Stratos.

Optionally, you can configure Stratos to work with WSO2 Data Analytics Server (DAS), so that it can handle the monitoring and metering aspect related to Stratos.

If you want to use DAS with Stratos, prior to carrying out the steps below, download WSO2 DAS 3.0.0 and unzip the ZIP file.

These configurations are only valid when using Apache Stratos 4.1.5.

When using Apache Stratos 4.1.5 onwards, you can configure Stratos to work with WSO2 Data Analytics Server (DAS), so that it can handle the monitoring and metering aspect related to Stratos.

Use MySQL 5.6 and the 5.1.x MySQL Connector for Java when carrying out the following configurations.

Follow the instructions below to manually setup DAS with Stratos:

Step 1 - Configure Stratos

  1. Enable thrift stats publishing with the DAS_HOSTNAME and DAS_TCP_PORT values in the thrift-client-config.xml file, which is in the <STRATOS_HOME>/repository/conf directory. If needed, you can set multiple DAS nodes for a High Availability (HA) setup.

    <!-- Apache thrift client configuration for publishing statistics to WSO2 CEP and WSO2 DAS-->
    <thriftClientConfiguration>
            .
            .
            .
           <das>
                <node id="node-01">
                     <statsPublisherEnabled>false</statsPublisherEnabled>
                     <username>admin</username>
                     <password>admin</password>
                     <ip>[DAS_HOSTNAME]</ip>
                     <port>[DAS_TCP_PORT]</port>
                </node>
                <!--<node id="node-02">
                     <statsPublisherEnabled>true</statsPublisherEnabled>
                     <username>admin</username>
                     <password>admin</password>
                     <ip>localhost</ip>
                     <port>7613</port>
                </node>-->
           </das>
       </config>
    </thriftClientConfiguration>
  2. Configure the Stratos metering dashboard URL with the DAS_HOSTNAME and DAS_PORTAL_PORT values in the <STRATOS_HOME>/repository/conf/cartridge-config.properties file as follows:

    das.metering.dashboard.url=https://<DAS_HOSTNAME>:<DAS_PORTAL_PORT>/portal/dashboards/metering-dashboard


  3. Configure the Stratos monitoring dashboard URL with the DAS_HOSTNAME and DAS_PORTAL_PORT values in the <STRATOS_HOME>/repository/conf/cartridge-config.properties file as follows:

    das.monitoring.dashboard.url=https://<DAS_HOSTNAME>:<DAS_PORTAL_PORT>/portal/dashboards/monitoring-dashboard

Step 2 - Configure DAS

  1. Create the ANALYTICS_FS_DB, ANALYTICS_EVENT_STORE and ANALYTICS_PROCESSED_STORE databases in MySQL using the following MySQL scripts:

    CREATE DATABASE ANALYTICS_FS_DB;
    CREATE DATABASE ANALYTICS_EVENT_STORE;
    CREATE DATABASE ANALYTICS_PROCESSED_DATA_STORE;
  2. Configure DAS analytics-datasources.xml file, which is in the <DAS_HOME>/repository/conf/datasources directory, as follows to create the ANALYTICS_FS_DB, ANALYTICS_EVENT_STORE and ANALYTICS_PROCESSED_STORE datasources.

    <datasources-configuration>
       <providers>
          <provider>org.wso2.carbon.ndatasource.rdbms.RDBMSDataSourceReader</provider>
       </providers>
       <datasources>
          <datasource>
             <name>WSO2_ANALYTICS_FS_DB</name>
             <description>The datasource used for analytics file system</description>
             <definition type="RDBMS">
                <configuration>
                   <url>jdbc:mysql://127.0.0.1:3306/ANALYTICS_FS_DB</url>
                   <username>root</username>
                   <password>root</password>
                   <driverClassName>com.mysql.jdbc.Driver</driverClassName>
                   <maxActive>50</maxActive>
                   <maxWait>60000</maxWait>
                   <testOnBorrow>true</testOnBorrow>
                   <validationQuery>SELECT 1</validationQuery>
                   <validationInterval>30000</validationInterval>
                   <defaultAutoCommit>false</defaultAutoCommit>
                </configuration>
             </definition>
          </datasource>
          <datasource>
             <name>WSO2_ANALYTICS_EVENT_STORE_DB</name>
             <description>The datasource used for analytics record store</description>
             <definition type="RDBMS">
                <configuration>
                   <url>jdbc:mysql://127.0.0.1:3306/ANALYTICS_EVENT_STORE</url>
                   <username>root</username>
                   <password>root</password>
                   <driverClassName>com.mysql.jdbc.Driver</driverClassName>
                   <maxActive>50</maxActive>
                   <maxWait>60000</maxWait>
                   <testOnBorrow>true</testOnBorrow>
                   <validationQuery>SELECT 1</validationQuery>
                   <validationInterval>30000</validationInterval>
                   <defaultAutoCommit>false</defaultAutoCommit>
                </configuration>
             </definition>
          </datasource>
          <datasource>
             <name>WSO2_ANALYTICS_PROCESSED_DATA_STORE_DB</name>
             <description>The datasource used for analytics record store</description>
             <definition type="RDBMS">
                <configuration>
                   <url>jdbc:mysql://127.0.0.1:3306/ANALYTICS_PROCESSED_DATA_STORE</url>
                   <username>root</username>
                   <password>root</password>
                   <driverClassName>com.mysql.jdbc.Driver</driverClassName>
                   <maxActive>50</maxActive>
                   <maxWait>60000</maxWait>
                   <testOnBorrow>true</testOnBorrow>
                   <validationQuery>SELECT 1</validationQuery>
                   <validationInterval>30000</validationInterval>
                   <defaultAutoCommit>false</defaultAutoCommit>
                </configuration>
             </definition>
          </datasource>
       </datasources>
    </datasources-configuration>
  3. Set the analytics datasources created in above step (WSO2_ANALYTICS_FS_DB, WSO2_ANALYTICS_EVENT_STORE_DB and WSO2_ANALYTICS_PROCESSED_STORE_DB) in the DAS analytics-config.xml file, which is in the <DAS_HOME>/repository/conf/analytics directory.

    <analytics-dataservice-configuration>
       <!-- The name of the primary record store -->
       <primaryRecordStore>EVENT_STORE</primaryRecordStore>
       <!-- The name of the index staging record store -->
       <indexStagingRecordStore>INDEX_STAGING_STORE</indexStagingRecordStore>
       <!-- Analytics File System - properties related to index storage implementation -->
       <analytics-file-system>
          <implementation>org.wso2.carbon.analytics.datasource.rdbms.RDBMSAnalyticsFileSystem</implementation>
          <properties>
                <!-- the data source name mentioned in data sources configuration -->
                <property name="datasource">WSO2_ANALYTICS_FS_DB</property>
                <property name="category">large_dataset_optimized</property>
          </properties>
       </analytics-file-system>
       <!-- Analytics Record Store - properties related to record storage implementation -->
       <analytics-record-store name="EVENT_STORE">
          <implementation>org.wso2.carbon.analytics.datasource.rdbms.RDBMSAnalyticsRecordStore</implementation>
          <properties>
                <property name="datasource">WSO2_ANALYTICS_EVENT_STORE_DB</property>
                <property name="category">large_dataset_optimized</property>
          </properties>
       </analytics-record-store>
       <analytics-record-store name="INDEX_STAGING_STORE">
          <implementation>org.wso2.carbon.analytics.datasource.rdbms.RDBMSAnalyticsRecordStore</implementation>
          <properties>
                <property name="datasource">WSO2_ANALYTICS_EVENT_STORE_DB</property>
                <property name="category">limited_dataset_optimized</property>
          </properties>
       </analytics-record-store>
       <analytics-record-store name = "PROCESSED_DATA_STORE">
          <implementation>org.wso2.carbon.analytics.datasource.rdbms.RDBMSAnalyticsRecordStore</implementation>
          <properties>
                <property name="datasource">WSO2_ANALYTICS_PROCESSED_DATA_STORE_DB</property>
                <property name="category">large_dataset_optimized</property>
          </properties>
       </analytics-record-store>
       <!-- The data indexing analyzer implementation -->
       <analytics-lucene-analyzer>
       	<implementation>org.apache.lucene.analysis.standard.StandardAnalyzer</implementation>
       </analytics-lucene-analyzer>
       <!-- The maximum number of threads used for indexing per node, -1 signals to aute detect the optimum value,
            where it would be equal to (number of CPU cores in the system - 1) -->
       <indexingThreadCount>-1</indexingThreadCount>
       <!-- The number of index shards, should be equal or higher to the number of indexing nodes that is going to be working,
            ideal count being 'number of indexing nodes * [CPU cores used for indexing per node]' -->
       <shardCount>6</shardCount>
       <!-- Data purging related configuration -->
       <analytics-data-purging>
          <!-- Below entry will indicate purging is enable or not. If user wants to enable data purging for cluster then this property
           need to be enable in all nodes -->
          <purging-enable>false</purging-enable>
          <cron-expression>0 0 0 * * ?</cron-expression>
          <!-- Tables that need include to purging. Use regex expression to specify the table name that need include to purging.-->
          <purge-include-tables>
             <table>.*</table>
             <!--<table>.*jmx.*</table>-->
          </purge-include-tables>
          <!-- All records that insert before the specified retention time will be eligible to purge -->
          <data-retention-days>365</data-retention-days>
       </analytics-data-purging>
       <!-- Receiver/Indexing flow-control configuration -->
       <analytics-receiver-indexing-flow-control enabled = "true">
           <!-- maximum number of records that can be in index staging area before receiving is throttled -->
           <recordReceivingHighThreshold>10000</recordReceivingHighThreshold>
           <!-- the limit on number of records to be lower than, to reduce throttling -->
           <recordReceivingLowThreshold>5000</recordReceivingLowThreshold>    
       </analytics-receiver-indexing-flow-control>
    </analytics-dataservice-configuration>
  4. Add the MySQL Java connector 5.1.x JAR file, which is supported by MYSQL 5.6, in the <DAS_HOME>/repository/components/lib directory.


Step 2.1 - Download the DAS extension distribution

Download the DAS extension from the  Stratos product page  and uncompress the file. The extracted distribution is referred to as  <STRATOS_DAS_DISTRIBUTION>.


Step 2.2 - Create Stratos Metering Dashboard with DAS

  1. Add the org.apache.stratos.das.extension-4.1.5.jar  file, which is in the  <STRATOS_DAS_DISTRIBUTION>/lib  directory, into the <DAS_HOME>/repository/components/lib directory.
  2. Add the following Java class path into the spark-udf-config.xml file in the <DAS_HOME>/repository/conf/analytics/spark directory.

    <class-name>org.apache.stratos.das.extension.TimeUDF</class-name>
  3. Add Jaggery files, which are in the <STRATOS_DAS_DISTRIBUTION>/metering-dashboard/jaggery-files directory into the <DAS_HOME>/repository/deployment/server/jaggeryapps/portal/controllers/apis directory.

  4. Manually create MySQL databases and tables using the queries, which are in the <STRATOS_DAS_DISTRIBUTION>/metering-dashboard/metering-mysqlscript.sql file. 

    CREATE DATABASE IF NOT EXISTS ANALYTICS_FS_DB;
    CREATE DATABASE IF NOT EXISTS ANALYTICS_EVENT_STORE;
    CREATE DATABASE IF NOT EXISTS ANALYTICS_PROCESSED_DATA_STORE;
    CREATE TABLE ANALYTICS_PROCESSED_DATA_STORE.MEMBER_STATUS(Time long, ApplicationId VARCHAR(150), ClusterAlias VARCHAR(150), MemberId VARCHAR(150), MemberStatus VARCHAR(50));
    CREATE TABLE ANALYTICS_PROCESSED_DATA_STORE.MEMBER_COUNT(Time long, ApplicationId VARCHAR(150), ClusterAlias VARCHAR(150), CreatedInstanceCount int, InitializedInstanceCount int, ActiveInstanceCount int, TerminatedInstanceCount int);
    CREATE TABLE ANALYTICS_PROCESSED_DATA_STORE.MEMBER_INFORMATION(MemberId VARCHAR(150), InstanceType VARCHAR(150), ImageId VARCHAR(150), HostName VARCHAR(150), PrivateIPAddresses VARCHAR(150), PublicIPAddresses VARCHAR(150), Hypervisor VARCHAR(150), CPU VARCHAR(10) , RAM VARCHAR(10), OSName VARCHAR(150), OSVersion VARCHAR(150));
  5. Apply a WSO2 User Engagement Server (UES) patch to the DAS dashboard.
    You need to do this to populate the metering dashboard.

    1. Copy the ues-gadgets.js and the ues-pubsub.js files from the <STRATOS_DAS_DISTRIBUTION>/metering-dashboard/ues-patch directory into the <DAS_HOME>/repository/deployment/server/jaggeryapps/portal/js directory.

    2. Copy the dashboard.jag file from the <STRATOS_DAS_DISTRIBUTION> directory into the <DAS_HOME>/repository/deployment/server/jaggeryapps/portal/theme/templates directory.

  6. Add the stratos-metering-service.car file, which is in the <STRATOS_DAS_DISTRIBUTION>/metering-dashboard  directory, into the <DAS_HOME>/repository/deployment/server/carbonapps directory to generate the metering dashboard.

    If the <DAS_HOME>/repository/deployment/server/carbonapps folder does not exist, initially create the folder before moving the CAR file.

    You can navigate to the metering dashboard from the Stratos application topology view at the application or cluster level as shown below.
     

    The following is a sample metering dashboard:

Step 2.3 - Create the Stratos Monitoring Dashboard with DAS

  1. Add the Jaggery files, which are in the <STRATOS_DAS_DISTRIBUTION>/monitoring-dashboard/jaggery-files directory into the <DAS_HOME>/repository/deployment/server/jaggeryapps/portal/controllers/apis directory.
  2. Manually create the MySQL database and tables using the queries in the <STRATOS_DAS_DISTRIBUTION>/monitoring-dashboard/jaggery-files/monitoring-mysqlscript.sql file. 

    CREATE DATABASE IF NOT EXISTS ANALYTICS_FS_DB;
    CREATE DATABASE IF NOT EXISTS ANALYTICS_EVENT_STORE;
    CREATE DATABASE IF NOT EXISTS ANALYTICS_PROCESSED_DATA_STORE;
    CREATE TABLE ANALYTICS_EVENT_STORE.AVERAGE_MEMORY_CONSUMPTION_STATS(Time long, ClusterId VARCHAR(150), ClusterInstanceId VARCHAR(150), NetworkPartitionId VARCHAR(150), Value DOUBLE);
    CREATE TABLE ANALYTICS_EVENT_STORE.MEMBER_AVERAGE_MEMORY_CONSUMPTION_STATS(Time long, MemberId VARCHAR(150), ClusterId VARCHAR(150), ClusterInstanceId VARCHAR(150), NetworkPartitionId VARCHAR(150), Value DOUBLE);
    CREATE TABLE ANALYTICS_EVENT_STORE.AVERAGE_LOAD_AVERAGE_STATS(Time long, ClusterId VARCHAR(150), ClusterInstanceId VARCHAR(150), NetworkPartitionId VARCHAR(150), Value DOUBLE);
    CREATE TABLE ANALYTICS_EVENT_STORE.MEMBER_AVERAGE_LOAD_AVERAGE_STATS(Time long, MemberId VARCHAR(150), ClusterId VARCHAR(150), ClusterInstanceId VARCHAR(150), NetworkPartitionId VARCHAR(150), Value DOUBLE);
    CREATE TABLE ANALYTICS_EVENT_STORE.AVERAGE_IN_FLIGHT_REQUESTS(Time long, ClusterId VARCHAR(150), ClusterInstanceId VARCHAR(150), NetworkPartitionId VARCHAR(150), COUNT DOUBLE);
    CREATE TABLE ANALYTICS_EVENT_STORE.SCALING_DETAILS(Time VARCHAR(50), ScalingDecisionId VARCHAR(150), ClusterId VARCHAR(150), MinInstanceCount INT, MaxInstanceCount INT, RIFPredicted INT, RIFThreshold INT ,RIFRequiredInstances INT, MCPredicted INT, MCThreshold INT, MCRequiredInstances INT ,LAPredicted INT, LAThreshold INT,LARequiredInstances INT,RequiredInstanceCount INT ,ActiveInstanceCount INT, AdditionalInstanceCount INT, ScalingReason VARCHAR(150));
  3. Copy the CEP EventFormatter artifacts, which are in the <STRATOS_DAS_DISTRIBUTION>/wso2cep-<VERSION>/eventformatters directory, into the <CEP_HOME>/repository/deployment/server/eventformatters directory.
  4. Copy CEP OutputEventAdapter artifacts, which are in the <STRATOS_DAS_DISTRIBUTION>/wso2cep-<VERSION>/outputeventadaptors directory, into the <CEP_HOME>/repository/deployment/server/outputeventadaptors directory and update the receiverURL and authenticatorURL with the DAS_HOSTNAME and DAS_TCP_PORT and  DAS_SSL_PORT values as follows:

    <outputEventAdaptor name="DefaultWSO2EventOutputAdaptor"
      statistics="disable" trace="disable" type="wso2event" xmlns="http://wso2.org/carbon/eventadaptormanager">
      <property name="username">admin</property>
      <property name="receiverURL">tcp://<DAS_HOSTNAME>:<DAS_TCP_PORT></property>
      <property name="password">admin</property>
      <property name="authenticatorURL">ssl://<DAS_HOSTNAME>:<DAS_SSL_PORT></property>
    </outputEventAdaptor>
  5. Add the stratos-monitoring-service.car file, which is in the <STRATOS_DAS_DISTRIBUTION>/metering-dashboard  directory into the <DAS_HOME>/repository/deployment/server/carbonapps directory to generate the monitoring dashboard.

    If the <DAS_HOME>/repository/deployment/server/carbonapps folder does not exist, initially create the folder before moving the CAR file.

  6. Navigate to monitoring dashboard from the Stratos Console using the Monitoring menu.

    The following is a sample monitoring dashboard:
  7. Once you have carriedout all the configurations, start the DAS server. After the DAS server has started successfully start the Stratos server.

After you have successfully configured DAS in a separate host, start the DAS server:

./wso2server.sh

Step 5 - Setup Stratos

When using a VM setup or Kubernetes, you need to configure Stratos accurately before attempting to deploy an application on the PaaS.

Follow the instructions below to configure Stratos:

Some steps are marked as optional as they are not applicable to all IaaS.
Therefore, only execute the instructions that correspond to the IaaS being used!

Step 1 - Install Prerequisites

Ensure that the following prerequisites have been met based on your environment and IaaS.

  1. Install the prerequisites listed below.

    • Oracle Java SE Development Kit (JDK)

    • Apache ActiveMQ

    For more information on the prerequisites, see Prerequisites.

  2. Download the Stratos binary distribution from  Apache Download Mirrors and unzip it. 


Step 2 - Setup a Kubernetes Cluster (Optional)

This step is only mandatory if you are using Kubernetes.

You can setup a Kubernetes cluster using one of the following approaches:

When working in a productions environment, setup the Kubernetes cluster based on your environment requirements. For more information, see the Kubernetes documentation.

Prerequisites 

Before starting, download and install the following prerequisites:

Follow the instructions below to setup Kubernetes with Vagrant:

  1. Clone the following Vagrant Git repository. This folder is referred to as <VAGRANT_KUBERNETES_SETUP>.

    git clone https://github.com/imesh/kubernetes-vagrant-setup.git
  2. Disable DHCP server in VirtualBox:

    VBoxManage dhcpserver remove --netname HostInterfaceNetworking-vboxnet0
  3. Start a new Kubernetes cluster using the following command, which will start one master node and one minion:

    run.sh


    1. If more than one minion is needed, run the following command with the required number of instances. The number of instances you require is defined by n.

      run.sh NUM_INSTANCES=2
    2. If you need to specify the minion's memory and CPU, use the following command:
      Example: 

      run.sh NUM_INSTANCES=2 NODE_MEM=4096 NODE_CPUS=2
  4. Once the nodes are connected to the cluster and the state of the nodes are changed to Ready, the Kubernetes cluster is ready for use.
    Execute the following Kubernetes CLI commands and verify the cluster status:

    kubectl get nodes
    
    NAME           LABELS                                STATUS
    172.17.8.102   kubernetes.io/hostname=172.17.8.102   Ready

Access the Kubernetes UI using the following URL http://<HOST>:<HTTP_PORT>/ui

Example: http://172.17.8.101:8080/ui

If you get a notification mentioning that the \"kube-ui\" endpoints cannot be found, execute the kube-ui-pod.sh script.

Follow the instructions below to create an elastic Kubernetes cluster with three worker nodes and a master on a Mac Operating System, which is running in EC2:

The Kubernetes cluster will also include the following sections:


  1. Install and configure Kubectl.

    Kubectl is a client command line tool provided by the Kubernetes team. It helps monitor and manage Kubernetes Clusters.

    wget https://storage.googleapis.com/kubernetes-release/release/v1.0.1/bin/linux/amd64/kubectl
    chmod +x kubectl
    mv kubectl /usr/local/bin/

    For more information, see installing and configuring Kubectl.

  2. Install and configure the AWS Command Line Interface.

    wget https://bootstrap.pypa.io/get-pip.py
    sudo python get-pip.py
    sudo pip install awscli

    If you encounter an issue, use the following command to resolve it:

    sudo pip uninstall six
    sudo pip install --upgrade python-heatclient

    For more information see, AWS command line interface.

  3. Create the Kubernetes Security Group.

    aws ec2 create-security-group --group-name kubernetes --description "Kubernetes Security Group"
    aws ec2 authorize-security-group-ingress --group-name kubernetes --protocol tcp --port 22 --cidr 0.0.0.0/0
    aws ec2 authorize-security-group-ingress --group-name kubernetes --protocol tcp --port 80 --cidr 0.0.0.0/0
    aws ec2 authorize-security-group-ingress --group-name kubernetes --protocol tcp -p 30000-32767 --cidr 0.0.0.0/0
    aws ec2 authorize-security-group-ingress --group-name kubernetes --source-security-group-name kubernetes

    The port 8080 is not fixed. It will change based on the KUBERNETES_MASTER_PORT value you define in the Kubernetes Cluster resource definition.

    You can configure the KUBERNETES_MASTER_PORT by defining it under the Kubernetes Master property parameter.

    Example:

    {
      "name": "KUBERNETES_MASTER_PORT",
      "value": "8080"
    }
  4. Configure and save the master cloud-configs file. For more information, see the configuration details for master.yaml .
  5. Configure and save the node cloud-configs. For more information, see the configuration details for node.yaml .
  6. Launch the master.

    Replace the <ami_image_id> with a suitable version of the CoreOS image for AWS. It is recommend to use the following CoreOS alpha channel AMI Image ID: ami-f7a5fec7

    1. Run the instance.

      aws ec2 run-instances --image-id <ami_image_id> --key-name <keypair> \
      --region us-west-2 --security-groups kubernetes --instance-type m3.medium \
      --user-data file://master.yaml
    2. Record the InstanceId of the master.
    3. Gather the public and private IP ranges of the master node:

      aws ec2 describe-instances --instance-id <instance-id>

      The output:

      "Reservations": [
        {
          "Instances": [
            {
              "PublicDnsName": "ec2-54-68-97-117.us-west-2.compute.amazonaws.com",
              "RootDeviceType": "ebs",
              "State": {
                "Code": 16,
                "Name": "running"
              },
              "PublicIpAddress": "54.68.97.117",
              "PrivateIpAddress": "172.31.9.9",
              }
  7. Update the node.yaml cloud-config file.

    Replace all instances of the <master-private-ip> in the node.yaml file with the private IP address of the master node.

  8. Launch the three worker nodes.

    Replace the <ami_image_id> with a suitable version of the CoreOS image, for AWS. It is recommend to use the same AMI image ID used by the master.

    aws ec2 run-instances --count 3 --image-id <ami_image_id> --key-name <keypair> \
    --region us-west-2 --security-groups kubernetes --instance-type m3.medium \
    --user-data file://node.yaml
  9. Configure the Kubectl SSH tunnel.

    This command enables a secure communication between the Kubectl client and the Kubernetes API.

    ssh -i key-file -f -nNT -L 8080:127.0.0.1:8080 core@<master-public-ip>
  10. List the worker nodes.

    Once the worker instances are fully booted, the kube-register service running on the master node will automatically register the Kubernetes API server. This process will take several minutes.

    kubectl get nodes

Step 3 - Setup Puppet Master (Optional)

This step is only mandatory if you are deploying Stratos on a Virtual Machine (e.g., EC2, OpenStack, GCE).

Puppet is an open source configuration management utility. In Stratos, Puppet has been used as the orchestration layer. Private PaaS does not have any templates, configurations in puppet, it consists only of the product distributions. Puppet acts as a file server while the Configurator does the configuration in runtime.

Follow the instructions below to setup the Puppet Master.

Step 1 - Configure Puppet Master

Follow the instructions below to configure Puppet Master for Apache Stratos on Debian/Ubuntu 12.04.1 LTS based Linux distributions:

  1. Get root access.
    sudo -i
  2. Install Git.
    apt-get install git
  3. Obtain the Puppet Master installation script. This will create a folder named puppetinstall.
    git clone https://github.com/thilinapiy/puppetinstall
  4. Navigate to the puppetinstall folder using the following command:
    cd puppetinstall
  5. Install Puppet Master (v3) as follows:
    1. Execute the following command. When you execute this command, your system hostname will get modified.
      ./puppetinstall -m -d <PUPPETMASTER-DOMAIN> -s <PUPPET-MASTER-IP>

      Short codeDescription
      -mInstall Puppet Master on the system.
      -d

      Domain name of the environment. This will act as a prefix to all the servers of the domain.
      For example:
      If a server is: server23.dc1.example.com,  your domain should be as follows: dc1.example.com

      -s

      IP address of the Puppet master server. This IP address will be added to the /etc/hosts file.


      For example:
      ./puppetinstall -m -d test.org
       

      If requested, press enter. If you have successfully installed Puppet Master, the following message will appear:
      Installation completed successfully"

    2. Execute the hostname command. This will show that your system hostname has been modified.
      For example:
      puppet.test.org
    3. Verify your Puppet Master (v3) installation by running the following command in the puppetinstall folder:
      ps -ef | grep puppet
      The output will be as follows:

      puppet 5324 1 0 14:59 ? 00:00:00 /usr/bin/ruby /usr/bin/puppet master --masterport=8140
      root 5332 1071 0 15:05 pts/0 00:00:00 grep --color=auto puppet
    Follow below instructions in order to install puppet master in ubuntu 14 instead of following step 1-5
    1.  wget https://apt.puppetlabs.com/puppetlabs-release-trusty.deb
    2. sudo dpkg -i puppetlabs-release-trusty.deb
    3. sudo apt-get update
    4.  sudo apt-get install puppetmaster
    5. Set the hostname "127.0.0.1 puppet.test.org" to /etc/hosts
    6. sudo hostname puppet.test.org to change the hostname in ubuntu 14
    7. add  *.test.org in /etc/puppet/autosign.conf
    8.  add "server=puppet.test.org" to /etc/puppet/puppet.conf
    9. /etc/init.d/puppetmaster restart

  6. Obtain the Apache Stratos Puppet scripts as follows:
    1. Navigate to the home folder (or a folder of your choice).
      cd
    2. Obtain the Apache Stratos Puppet scripts.
      git clone https://github.com/apache/stratos.git
    3. Navigate to the <stratos>/tools/puppet3/ directory.
      cd stratos/tools/puppet3/
    4. Check the list of files.
      ls  
      The output should be as follows:
      auth.conf  autosign.conf  fileserver.conf manifests modules  puppet.conf
  7. Copy the Stratos Puppet scripts to the Puppet Master configurations directory as follows:
    1. Navigate to the puppet folder.
      cd /etc/puppet/ 
    2. Check the list of files in the puppet folder:
      ls
      The output will be as follows:
      auth.conf  autosign.conf fileserver.conf manifests modules puppet.conf templates
    3. Copy the content from the/root/stratos/tools/puppet3/manifests/ directory to the /etc/puppet/manifests/ directory.
      For example:
      cp -R /root/stratos/tools/puppet3/manifests/* manifests/
    4. Copy the content from the /root/stratos/tools/puppet3/modules/ directory to the /etc/puppet/modules/ directory.
      For example:
      cp -R /root/stratos/tools/puppet3/modules/* modules/

    5. Check the list of files in the /etc/puppet/manifests/ directory.
      ls manifests/
      The output should be as follows:
      nodes.pp  site.pp  nodes 
    6. Check the list of files in the /etc/puppet/manifests/nodes directory. 
      ls manifests/nodes 

      The output should be as follows:

      base.pp  default.pp  haproxy.pp  lb.pp  mysql.pp  nodejs.pp  php.pp  ruby.pp  tomcat.pp  wordpress.pp       
              
    7. Check the list of files in the /etc/puppet/modules/ directory.
      ls  modules/
      The output should be as follows:
      agent java  lb  mysql nodejs  php  python_agent ruby  tomcat  wordpress
  8. Change the $mb_url, $cep_port and $cep_ip values in the base.pp file according to your setup. 
    vi /etc/puppet/manifests/nodes/base.pp

      #following directory is used to store binary packages
      $local_package_dir	= '/mnt/packs'
      # Stratos message broker IP and port
      $mb_url	            = 'tcp://127.0.0.1:1883'
      $mb_type          	= 'activemq'
      # Stratos CEP IP and port
      $cep_ip           	= '10.4.128.10'
      $cep_port         	= '7611'
      # Stratos Cartridge Agent’s trust store password
      $truststore_password	= 'wso2carbon'
  9. Enter the domain names that the master should automatically sign.
    1. Navigate to the /etc/puppet/ directory.
      cd /etc/puppet/ 
    2. Add the domain names in the autosign.conf file and save the file.
    3. You can view the contents of the autosign.conf file as follows:
      cat autosign.conf
      Based on the example the output will be as follows:
      *.test.org 
  10. Download a Java distribution and define the Java distribution in the /etc/puppet/manifests/ directory.

  11. Create the files folder in the /etc/puppet/modules/java/ directory.
    mkdir /etc/puppet/modules/java/files

  12. Download a Java distribution (e.g., jdk-7u51-linux-x64.tar.gz ) and copy it to the /etc/puppet/modules/java/files/ directory. 

    To get support for 32 bits, download the Java 32-bit distribution and change the $java_distribution parameter in the nodes.pp file accordingly.

  13. Update the the following two values in your  /etc/puppet/manifests/nodes/base.pp  file based on your Java distribution. Where $java_distribution is the downloaded Java distribution name and $java_name is the the name of the unzipped Java distribution. 

    $java_distribution    = 'jdk-7u51-linux-x64.tar.gz'
    $java_name            = 'jdk1.7.0_51'
  14. Build the Python cartridge agent.

    1. Checkout the Python cartridge agent source from Apache Stratos remote repository to a folder of your choice.

      git clone https://git-wip-us.apache.org/repos/asf/stratos.git <local-folder-name>

      For example: 
      git clone https://git-wip-us.apache.org/repos/asf/stratos.git myLocalRepo 

       
    2. Build using Maven
      1. Go to the top level of the directory in which you checked out the source.

        cd <local-folder-name>

        For example: 
        cd myLocalRepo
         
      2. Use Maven to build the source distribution of the release.
        mvn clean install  

    If Stratos has been built successfully, the deployable cartridge agent ZIP file named apache-stratos-python-cartridge-agent-<VERSION>-SNAPSHOT.zip (e.g., apache-stratos-python-cartridge-agent-4.1.x-SNAPSHOT.zip) can be found in the /products/python-cartridge-agent/target/ directory.

  15. Copy the Python Cartridge Agent distribution (apache-stratos-python-cartridge- agent-4.1.x-SNAPSHOT.zip), which is in the <STRATOS_HOME>/products/python-cartridge-agent/ target/ directory, to the /etc/puppet/modules/python_agent/files/ directory.

  16. Copy the Apache Stratos Load Balancer distribution (apache-stratos-load-balancer- 4.1.x-SNAPSHOT.zip), which is in the <source-home>/products/load-balancer/modules/distribution/target/ directory, to the /etc/puppet/modules/lb/files/ directory.

  17. Download any dependency on 5.9.1 or any latest stable ActiveMQ TAR file from https://activemq.apache.org/download.html. The folder path of this file will be referred to as <ActiveMQ_HOME>. Copy the following ActiveMQ client JARSs from <ActiveMQ_HOME> /lib/ directory to the /etc/puppet/modules/lb/files/activemq/ directory. 

    • activemq-broker-5.9.1.jar 

    • activemq-client-5.9.1.jar 

    • geronimo-j2ee-management_1.1_spec-1.0.1.jar 

    • geronimo-jms_1.1_spec-1.1.1.jar 

    • hawtbuf-1.9.jar


    1. Navigate to the /etc/puppet/modules/lb/files/ activemq/ directory.
      cd /etc/puppet/modules/lb/files/activemq 
    2. Check the list of files in the puppet folder:
      ls
      The output will be as follows:
      activemq-broker-5.9.1.jar   activemq-client-5.9.1.jar geronimo-j2ee-management_1.1_spec-1.0.1.jar geronimo-jms_1.1_spec-1.1.1.jar hawtbuf-1.9.jar


Step 2 - Update the cartridge-config.properties file

Update the values of the following parameters in the cartridge-config.properties file, which is in the <STRATOS_HOME>/repository/conf  directory.

The values are as follows:

  • [PUPPET_IP] - The IP address of the running Puppet instance.

  • [PUPPET_HOST_NAME] - The host name of the running Puppet instance.


Step 4 - Create a cartridge base image (Optional)

This step is only mandatory if you are deploying Stratos on a Virtual Machine (e.g., EC2, OpenStack, GCE).

Create the cartridge base image based on the IaaS that you are using to run Stratos.

Follow the instructions below to create a cartridge on the EC2 IaaS:

Step 1 - Log in to your EC2 account

To follow this guide, you need an EC2 account. If you do not have an account, create an AWS account. For more information, see Sign Up for Amazon EC2. This account must be authorized to manage EC2 instances (including starting and stopping instances, and creating security groups and key pairs).

Step 2 - Create a security group

Before launching the instance, you need to create the right security group. This security group defines firewall rules for your instances, which are a list of ports that are used as part of the default Stratos deployment. These rules specify which incoming network traffic is delivered to your instance. All other traffic is ignored. The ports that should be defined are listed in as default ports.

Follow the instructions below to create the security group and configure it:

  1. On the Network and Security menu, click Security Groups.
  2. Click Create Security Group.
  3. Enter the name and description of the security group.
  4. Click Yes, Create.
  5. Click Inbound.
  6. Select Custom TCP rule.

  7. Enter the port or port range.
    There are two kinds of ports listed in the default ports, which are namely open for outside access and restricted internal access. You will have to ideally enter each of the ports as separate rules.
  8. Click Add Rule and then click Apply Rule Changes

    Always apply rule changes, as your rule will not get saved unless the rule changes are applied.
    Repeat steps 6 to 8 to add all the ports mentioned, as each port or port range has to be added as a separate rule.

    Write down the names of your security groups if you wish to enter your user data in the wizard.

Step 3 - Create a key pair

Save your private key in a safe place on your computer. Note down the location, because you will need the key pair to connect to your instance.

Follow the instructions below to create a key pair, download it and secure it:

  1. On the Network and Security menu, click Key Pairs.
  2. Click Create New Key Pair.
  3. Enter a name for your key pair.
  4. Click Create. After the key pair automatically downloads, click Close.
  5. Protect your key pair by executing the following command in your terminal.
    By default, your PEM file will be unprotected.  Use the following command to secure your PEM file, so that others will not have access to it: 

    chmod 0600 <path-to-the-private-key>

Step 4 - Spawn an instance on EC2

Follow the instructions below to spawn an instance on EC2:

  1. Sign in to the Amazon Web Services (AWS) Management Console and open the Amazon EC2 console at  https://console.aws.amazon.com/ec2/.  
  2. Click EC2 on the home console.
  3. Select the Region for the instance from the region drop-down list.
  4. Click Launch Instance.

  5. Select Quick Launch Wizard.

  6. Name your instance, for example StratosCartridgeInstance.

  7. Select the key pair that you created.
  8. Select More Amazon Machine Images and click on Continue.

  9. On the next page, specify the image.
  10. Click Continue.
  11. Click Edit Details.
  12. Edit the image size. 
    1. Select the Instance Details option.
    2. Change the image type as required.
  13. Select a security group.
    1. Select the Security Settings option.
    2. Click Select Existing Security Groups.
    3. Select the Stratos security group you created previously.
  14. Click Launch to start the EC2 instance.

  15. Click Close.
    This will redirect you to the instance page. It takes a short time for an instance to launch. The instance's status appears as pending while it is launching. After the instance is launched, its status changes to running.

Step 5 - Configure the cartridge base image

Follow the steps given below to configure a base Image:

  1. Start up a virtual machine (VM) instance using a preferred OS, on a preferred IaaS.

  2. Install the Puppet agent.

    If you are using Ubuntu 12, you will require the following Puppet repository to install the Puppet agent.

    wget http://apt.puppetlabs.com/puppetlabs-release-precise.deb
    dpkg -i puppetlabs-release-precise.deb
    sudo apt-get update
    sudo apt-get install puppet


     If you are using Ubuntu 14, you will require the following Puppet repository to install the Puppet agent.

    wget http://apt.puppetlabs.com/puppetlabs-release-trusty.deb
    dpkg -i puppetlabs-release-trusty.deb
    sudo apt-get update
    sudo apt-get install puppet


    1. Enable dependencies and Puppet labs repository on Master.

      # rpm -ivh http://yum.puppetlabs.com/puppetlabs-release-el-7.noarch.rpm
      # rpm -ivh http://yum.puppetlabs.com/puppetlabs-release-el-6.noarch.rpm
      # rpm -ivh http://yum.puppetlabs.com/puppetlabs-release-el-5.noarch.rpm
    2. Install and upgrade Puppet on the agent node.

      # yum install puppet
      # puppet resource package puppet ensure=latest
      # /etc/init.d/puppet restart

    For more information on installing the Puppet agent on CentOS, see installing Puppet on CentOS.

  3. Open the puppet file, which is in the <PUPPET_AGENT>/etc/default directory and configure it as follows:

    START=yes
  4. Add the following to the puppet.conf file, which is in the <PUPPET_AGENT> /etc/puppet directory:

    [main]
    server=puppet.stratos.org

    If you are unsure of the server name, use a dummy hostname. Stratos will update the above with the respective server name, when it starts running.

  5. Stop the puppet instance or instances that are running.

    cd /etc/init.d/puppet
    stop
    • When the Puppet agent is installed as mentioned in step 1, there is a high tendency that a puppet instance will start running. Therefore before creating the base image you need to stop any puppet instances that are running.
    • Execute the following command to identify the running puppet instances:

      ps -ef | grep puppet

      The following output will be given, if any Puppet instances are running.

      Example:

      root      1321     1  0 Sep09 ?        00:00:17 /usr/bin/ruby /usr/bin/puppet agent
      root     12149 12138  0 05:44 pts/0    00:00:00 grep --color=auto puppet
  6. Copy the init.sh script into the <PUPPET_AGENT>/root/bin directory.

    You can find the init.sh script for the respective IaaS here.

    The init.sh file differs based on the IaaS. If you wish to find the init.sh script for a different IaaS, go to init-scripts. You can find the respective init.sh script by navigating to the init-script/<IAAS>/<OS> path.

  7. Update the /etc/rc.local file.

    /root/bin/init.sh > /tmp/puppet_log
    exit 0
  8. Execute the following commands:

    rm -rf /var/lib/puppet/ssl/*
    rm -rf /tmp/*

    By executing the above commands you will be cleaning up the base image, for Stratos to install the required certificates and payloads. This is done to avoid any errors that will be given, if Stratos starts installing a certificate or payload that already exists in the base image.

Step 4 - Create a snapshot of the instance

Follow the instructions below to create a snapshot of the instance on EC2:

  1. Open the Amazon EC2 console at https://console.aws.amazon.com/ec2/.

  2. Make sure the appropriate Region is selected in the region selector of the navigation bar.

  3. Click Instances in the navigation pane.

  4. On the Instances page, right-click your running instance and select Create Image.
  5. Fill in a unique image name and an optional description of the image (up to 255 characters), and click Create Image.

    In Amazon EC2 instance store-backed AMIs, the image name replaces the manifest name (such as s3_bucket/something_of_your_choice.manifest.xml), which uniquely identifies each Amazon Amazon EC2 instance store-backed AMI.

    Amazon EC2 powers down the instance, takes images of any volumes that were attached, creates and registers the AMI, and then reboots the instance.

  6. Go to the AMIs page and view the AMI's status. While the new AMI is being created, its status is pending.

    It takes a few minutes for the whole process to finish.

  7. Once your new AMI's status is available, go to the Snapshots page and get the Snapshot ID of the new snapshot that was created for the new AMI that will be used in the Sample Cartridge Definition JSON file. Any instance you launch from the new AMI uses this snapshot for its root device volume. 

After you have finished creating the cartridge base image, make a note of the image ID as you will need this later when creating a cartridge.

The following sub-sections describe the steps involved in creating a cartridge base image on the OpenStack IaaS:

Step 1 - Spawn an instance 

Follow the instructions below to spawn a configured instance of Debian/Ubuntu based Linux 12.04.1 LTS distributions on OpenStack:

  1. Log in to the OpenStack management console.
  2. Click Access & Security on the menu in the left side and click Create Security Group.
  3. In the Add Rule window, enter the configurations of the rules for the security group as required and click Add. For more information on the ports that should be defined, see Required Ports.

  4. In the Create an Image window, enter the configurations for the image as required and click Create Image.
  5. In the Create Key Pair window, enter the configurations for the key pair as required and click Create Key Pair. When the message is prompted, download the key pair and keep it saved in a preferred location.
  6. Protect your key pair by executing the following command in your terminal.
    By default, your PEM file will be unprotected.  Use the following command to secure your PEM file so that others will not have access to it: 

    chmod 0600 <path to the private key>
  7. In the Details section of the Launch Instance window, enter the configurations for the instance as required.
  8. In the Access & Security section enter the configurations for the instance as required and click Create.
  9. Select the created instance in the Instances window and click Launch instance.

Step 2 - Configure the cartridge base image

Follow the steps given below to configure a base Image:

  1. Start up a virtual machine (VM) instance using a preferred OS, on a preferred IaaS.

  2. Install the Puppet agent.

    If you are using Ubuntu 12, you will require the following Puppet repository to install the Puppet agent.

    wget http://apt.puppetlabs.com/puppetlabs-release-precise.deb
    dpkg -i puppetlabs-release-precise.deb
    sudo apt-get update
    sudo apt-get install puppet


     If you are using Ubuntu 14, you will require the following Puppet repository to install the Puppet agent.

    wget http://apt.puppetlabs.com/puppetlabs-release-trusty.deb
    dpkg -i puppetlabs-release-trusty.deb
    sudo apt-get update
    sudo apt-get install puppet


    1. Enable dependencies and Puppet labs repository on Master.

      # rpm -ivh http://yum.puppetlabs.com/puppetlabs-release-el-7.noarch.rpm
      # rpm -ivh http://yum.puppetlabs.com/puppetlabs-release-el-6.noarch.rpm
      # rpm -ivh http://yum.puppetlabs.com/puppetlabs-release-el-5.noarch.rpm
    2. Install and upgrade Puppet on the agent node.

      # yum install puppet
      # puppet resource package puppet ensure=latest
      # /etc/init.d/puppet restart

    For more information on installing the Puppet agent on CentOS, see installing Puppet on CentOS.

  3. Open the puppet file, which is in the <PUPPET_AGENT>/etc/default directory and configure it as follows:

    START=yes
  4. Add the following to the puppet.conf file, which is in the <PUPPET_AGENT> /etc/puppet directory:

    [main]
    server=puppet.stratos.org

    If you are unsure of the server name, use a dummy hostname. Stratos will update the above with the respective server name, when it starts running.

  5. Stop the puppet instance or instances that are running.

    cd /etc/init.d/puppet
    stop
    • When the Puppet agent is installed as mentioned in step 1, there is a high tendency that a puppet instance will start running. Therefore before creating the base image you need to stop any puppet instances that are running.
    • Execute the following command to identify the running puppet instances:

      ps -ef | grep puppet

      The following output will be given, if any Puppet instances are running.

      Example:

      root      1321     1  0 Sep09 ?        00:00:17 /usr/bin/ruby /usr/bin/puppet agent
      root     12149 12138  0 05:44 pts/0    00:00:00 grep --color=auto puppet
  6. Copy the init.sh script into the <PUPPET_AGENT>/root/bin directory.

    You can find the init.sh script for the respective IaaS here.

    The init.sh file differs based on the IaaS. If you wish to find the init.sh script for a different IaaS, go to init-scripts. You can find the respective init.sh script by navigating to the init-script/<IAAS>/<OS> path.

  7. Update the /etc/rc.local file.

    /root/bin/init.sh > /tmp/puppet_log
    exit 0
  8. Execute the following commands:

    rm -rf /var/lib/puppet/ssl/*
    rm -rf /tmp/*

    By executing the above commands you will be cleaning up the base image, for Stratos to install the required certificates and payloads. This is done to avoid any errors that will be given, if Stratos starts installing a certificate or payload that already exists in the base image.

Step 3 - Create a snapshot of the instance

Follow the instructions below to create a snapshot of the instance on OpenStack:

  1. Log in to the OpenStack management console.
  2. Navigate to Instances on the menu on the left side. 
  3. Select the respective instance and click Create Snapshot.
  4. Enter a name for the image and click Create Snapshot.
  5. Navigate to Images on the menu that is on the left side and get the Image ID. You need to define the Image ID in the Sample Cartridge Definition JSON file. 


After you have finished creating the cartridge, make a note of the image ID you created for the cartridge, as you will need this when you use Stratos Manager to add a cartridge.

The following sub-sections describe the steps involved in creating a cartridge base image on the GCE IaaS:

Step 1 - Spawn an instance

  1. Navigate to the Google Developers Console.
  2. Launch an instance with your preferred OS and other related settings as follows:
    1. On the Compute menu, click Compute Engine and then click VM instances.
    2. Click Create instance

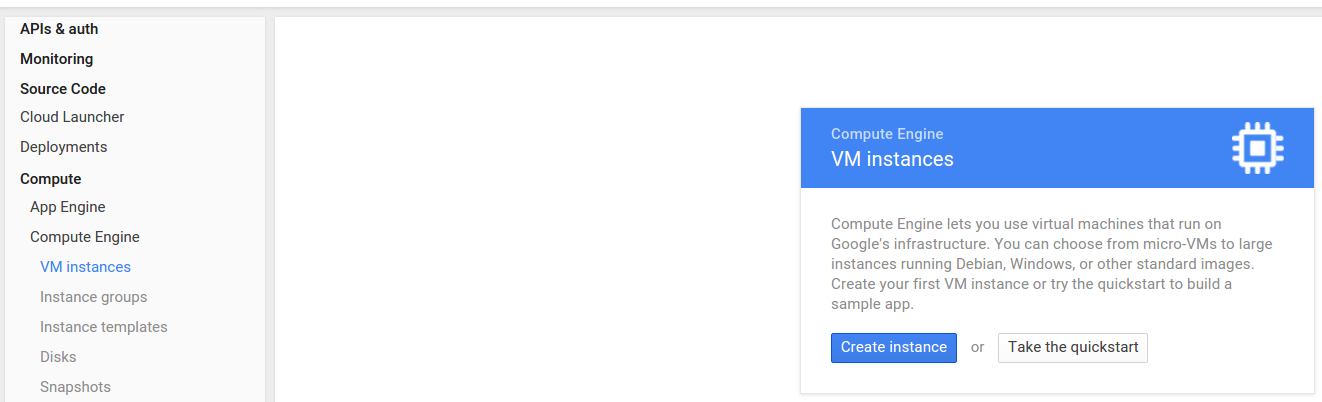
      The create a new instance interface appears.
    3. After entering the required instance details, click Save to create the instance.
  3. SSH to the spawned instance and make relevant changes to the base image (e.g., If you need a PHP cartridge, install PHP related libraries).

    1. On the Compute menu, click Compute Engine and then click VM Instances.
    2. Click the more option in the Connect column.
    3. Click Open in browser window.


Step 2 - Configure the cartridge base image

Follow the steps given below to configure a base Image:

  1. Start up a virtual machine (VM) instance using a preferred OS, on a preferred IaaS.

  2. Install the Puppet agent.

    If you are using Ubuntu 12, you will require the following Puppet repository to install the Puppet agent.

    wget http://apt.puppetlabs.com/puppetlabs-release-precise.deb
    dpkg -i puppetlabs-release-precise.deb
    sudo apt-get update
    sudo apt-get install puppet


     If you are using Ubuntu 14, you will require the following Puppet repository to install the Puppet agent.

    wget http://apt.puppetlabs.com/puppetlabs-release-trusty.deb
    dpkg -i puppetlabs-release-trusty.deb
    sudo apt-get update
    sudo apt-get install puppet


    1. Enable dependencies and Puppet labs repository on Master.

      # rpm -ivh http://yum.puppetlabs.com/puppetlabs-release-el-7.noarch.rpm
      # rpm -ivh http://yum.puppetlabs.com/puppetlabs-release-el-6.noarch.rpm
      # rpm -ivh http://yum.puppetlabs.com/puppetlabs-release-el-5.noarch.rpm
    2. Install and upgrade Puppet on the agent node.

      # yum install puppet
      # puppet resource package puppet ensure=latest
      # /etc/init.d/puppet restart

    For more information on installing the Puppet agent on CentOS, see installing Puppet on CentOS.

  3. Open the puppet file, which is in the <PUPPET_AGENT>/etc/default directory and configure it as follows:

    START=yes
  4. Add the following to the puppet.conf file, which is in the <PUPPET_AGENT> /etc/puppet directory:

    [main]
    server=puppet.stratos.org

    If you are unsure of the server name, use a dummy hostname. Stratos will update the above with the respective server name, when it starts running.

  5. Stop the puppet instance or instances that are running.

    cd /etc/init.d/puppet
    stop
    • When the Puppet agent is installed as mentioned in step 1, there is a high tendency that a puppet instance will start running. Therefore before creating the base image you need to stop any puppet instances that are running.
    • Execute the following command to identify the running puppet instances:

      ps -ef | grep puppet

      The following output will be given, if any Puppet instances are running.

      Example:

      root      1321     1  0 Sep09 ?        00:00:17 /usr/bin/ruby /usr/bin/puppet agent
      root     12149 12138  0 05:44 pts/0    00:00:00 grep --color=auto puppet
  6. Copy the init.sh script into the <PUPPET_AGENT>/root/bin directory.

    You can find the init.sh script for the respective IaaS here.

    The init.sh file differs based on the IaaS. If you wish to find the init.sh script for a different IaaS, go to init-scripts. You can find the respective init.sh script by navigating to the init-script/<IAAS>/<OS> path.

  7. Update the /etc/rc.local file.

    /root/bin/init.sh > /tmp/puppet_log
    exit 0
  8. Execute the following commands:

    rm -rf /var/lib/puppet/ssl/*
    rm -rf /tmp/*

    By executing the above commands you will be cleaning up the base image, for Stratos to install the required certificates and payloads. This is done to avoid any errors that will be given, if Stratos starts installing a certificate or payload that already exists in the base image.

Step 3 - Create a snapshot of the instance

  1. Set the auto-delete state of the root persistent disk to  false as follows:
    This is done to avoid the persistent disk from being automatically deleted when you terminate the instance.

    1. On the Compute menu, click Compute Engine and then click VM Instances.
    2. Click on the name of the instance.

    3. Edit the settings related to the instance. 

    4. Uncheck the Delete boot disk when instance is deleted option. This is done to ensure that  all the data is not deleted  when you terminate the instance.

    5. Click Save.
      If you wish to view details on the disk related to the instance, click Compute Engine and then click Disks.  

  2. Delete the instance.
    Initially, you need to terminate the spawned instance using the root persistent disk to be able to create an image. When you are terminating the instance make sure that the persistent disk is not attached to any other virtual machines.

    1. On the Compute menu, click Compute Engine and then click VM Instances.
    2. Check the instance that you need to delete.
    3. Click Delete to delete the instance.
  3. Create a new image as follows:

    1. On the Compute menu, click Compute Engine and then click Images.
    2. Click Create Image.
    3. Provide the Source type as Disk and select the relevant disk name from the dropdown menu. You need to do this to create the image based on the persistent disk.
    4. Click Create

      The newly created image is immediately available under the Images section.


Step 5 - Disable the mock IaaS

Mock IaaS is enabled by default. Therefore, if you are running Stratos on another IaaS, you need to disable the Mock IaaS.

Follow the instructions below to disable the Mock IaaS:

  1. Navigate to the <STRATOS_HOME>/repository/conf/mock-iaas.xml file and disable the Mock IaaS.

    <mock-iaas enabled="false">
  2. Navigate to the <STRATOS_HOME>/repository/deployment/server/webapps directory and delete the mock-iaas.war file. 

    When Private PaaS is run the mock-iaas.war is extracted and the mock-iaas folder is created. Therefore, if you have run Stratos previously, delete the  mock-iaas folder as well.


Step 6 - Carryout additional IaaS configurations (Optional)

This step is only applicable if you are using GCE.

When working on GCE carryout the following instructions:

  1. Create a service group.
  2. Add a firewall rule.

Step 7 - Configure the Cloud Controller (Optional)

This step is only mandatory if you are deploying Stratos on a Virtual Machine (e.g., EC2, OpenStack, GCE).

Follow the instructions given below to configure the Cloud Controller (CC):

  1. Configure the IaaS provider details based on the IaaS.
    You need to configure details in the  <STRATOS_HOME>/repository/conf/cloud-controller.xml file and comment out the IaaS provider details that are not being used.  

  2. Update the values of the MB_IP and MB_PORT in the jndi.properties file, which is in the <STRATOS_HOME>/repository/conf directory. 

    The default value of the message-broker-port= 61616.

    The values are as follows:

    • MB_IP: The IP address used by ActiveMQ.

    • MB_PORT: The port used by ActiveMQ.
    connectionfactoryName=TopicConnectionFactory
    java.naming.provider.url=tcp://[MB_IP]:[MB_Port]
    java.naming.factory.initial=org.apache.activemq.jndi.ActiveMQInitialContextFactory


Step 8 - Define the Message Broker IP (Optional)

This step is only mandatory if you have setup the Message Broker (MB), in this case ActiveMQ, in a separate host.

If you have setup ActiveMQ, which is the Stratos Message Broker, in a separate host you need to define the Message Broker IP, so that the MB can communicate with Stratos.

Update the value of the  MB_IP  in the  JMSOutputAdaptor  file, which is in the  <STRATOS_HOME>/repository/deployment/server/outputeventadaptors  directory.


[MB_IP]: The IP address used by ActiveMQ.
<property name="java.naming.provider.url">tcp://[MB_IP]:61616</property>


Step 6 - Start the Stratos server

The way in which you need to start the Stratos server varies based on your settings as follows:

We recommend to start the Stratos server in background mode, so that the instance will not

  • If you want to use the internal database (H2) and the embedded CEP, start the Stratos server as follows:

    sh <STRATOS_HOME>/bin/wso2server.sh start
  • If you want to use an external database, start the Stratos server with the -Dsetup option as follows: 
    This creates the database schemas in <STRATOS_HOME>/dbscripts directory.

    sh <STRATOS_HOME>/bin/wso2server.sh start -Dsetup
  • If you want to use an external CEP, disable the embedded CEP when starting the Stratos server as follows:

    sh <STRATOS_HOME>/bin/wso2server.sh start -Dprofile=cep-excluded
  • If you want to use an external database, together with an external CEP, start the Stratos server as follows:
    This creates the database schemas in <STRATOS_HOME>/dbscripts directory.

    sh <STRATOS_HOME>/bin/wso2server.sh start -Dsetup -Dprofile=cep-excluded

You can tail the log, to verify that the Stratos server starts without any issues.

tail -f <STRATOS_HOME>/repository/logs/wso2carbon.log
  • No labels